
Managing Chrome OS Devices: Workspace ONE Operational Tutorial
Overview
VMware provides this operational tutorial to help you with your Workspace ONE® environment. This exercise introduces you to Chrome OS management and walks through detailed steps to enroll and manage Chrome OS devices in Workspace ONE® UEM.
Audience
This tutorial is intended for IT administrators and product evaluators who are looking to manage Chrome OS devices in their new or existing Workspace ONE UEM tenants. Familiarity of Workspace ONE UEM and the Google Admin console along with access to these individual consoles is assumed. Knowledge of additional technologies such as network, VPN configuration, VMware Workspace ONE® Intelligence is also helpful.
Getting Started with Chrome OS Management
Prerequisites
Before you can perform this exercise, you must have the following installed and configured.
- Workspace ONE UEM tenant version 23.06 and later.
- Google Admin Console account with a verified domain and enabled with either a Chrome OS Enterprise upgrade or Chrome OS Education upgrade.
- In addition to the Chrome OS Enterprise or Education upgrade, you must also have available licenses in your Workspace ONE UEM account to manage Chrome OS devices.
- Supported Chrome OS device(s) factory reset in out of box mode.
Caution: Do not factory reset your personal device to complete these exercises.
Caution: If you have a pre-existing Chrome OS registration linked to a previous version of Workspace ONE UEM, then follow the steps to migrate from the older version of Chrome OS management to the newer version.
Migrate to Newer Version of Chrome OS Management
- Log in to your Workspace ONE UEM console.
- Navigate to Groups & Settings > All Settings.
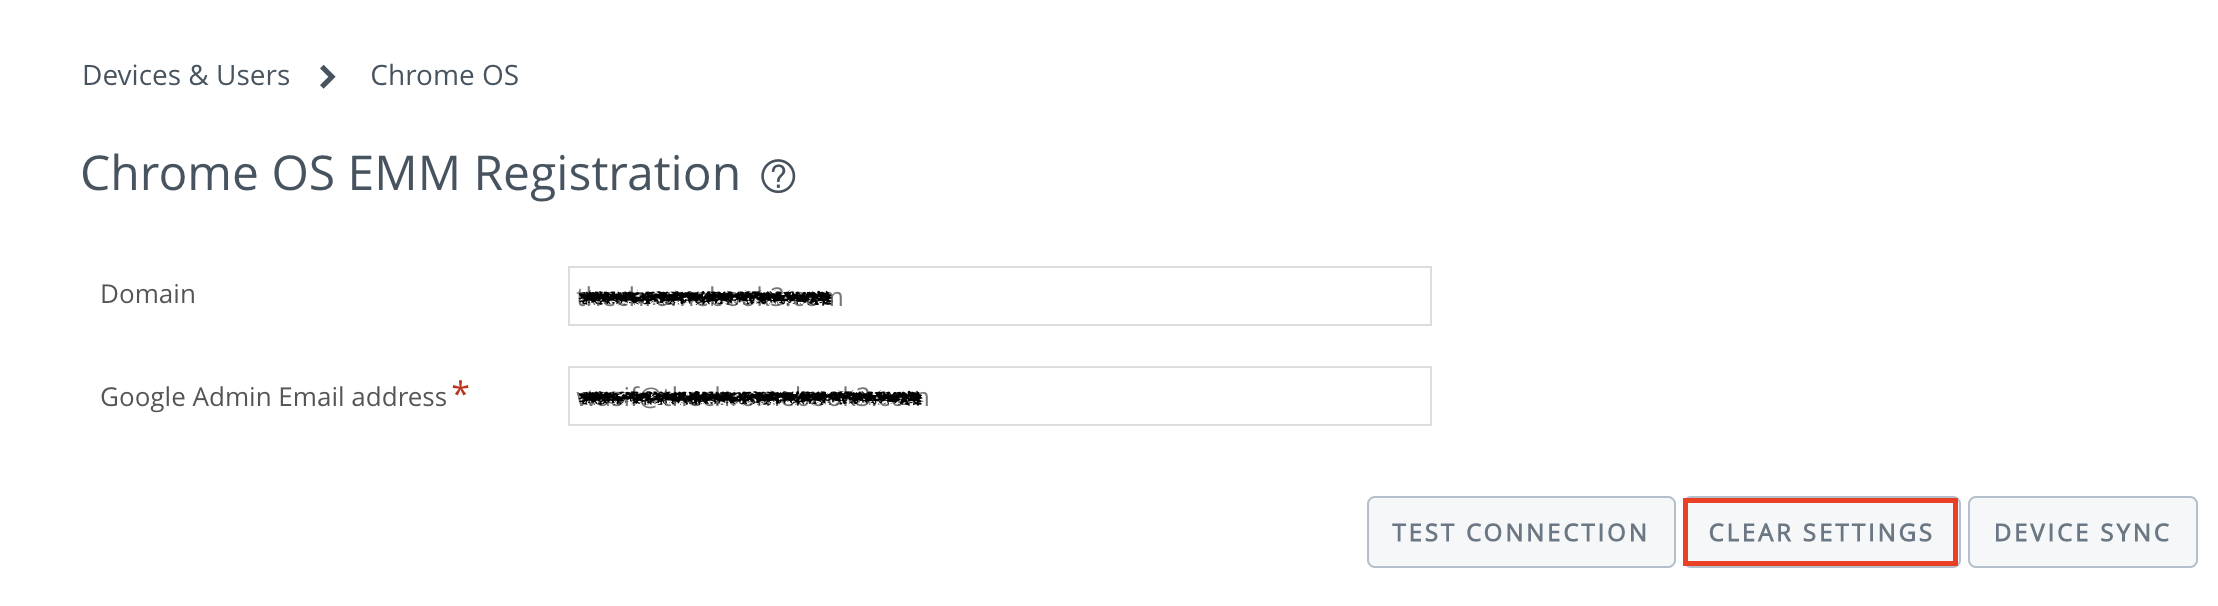
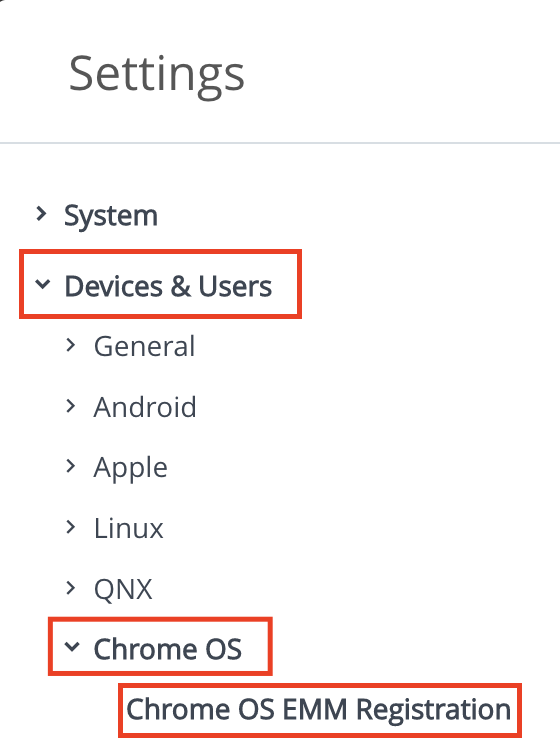
- From All Settings, navigate to Devices & Users > Chrome OS > Chrome OS EMM Registration.
- Select Clear Settings.
- Next, login into your Google Workspace Administrator console by navigating to
https:// admin.google.com. - Navigate to Directory > Users.
- Scroll to find the admin user account which was previously used for Workspace ONE EMM registration. Select the admin user account.
- Expand Security.
- Scroll to Connected Applications and select the edit icon.
- Remove Workspace ONE as connected application for this user.

- Click Done.
Note: Any past Chrome OS profiles must be recreated, as these cannot be migrated from prior versions of Workspace ONE UEM.
Enabling Google Chrome Device Management
In this exercise, you enable partner access to device management from the Google Workspace Admin Console.
Prerequisites
Before performing this exercise, ensure that you have your Google Admin Console credentials.
You also need a Chrome Enterprise upgrade or Chrome Education upgrade enabled for your account.
Enable Chrome Device Management
- Navigate to https://admin.google.com.
- Sign in using your Google Admin credentials.
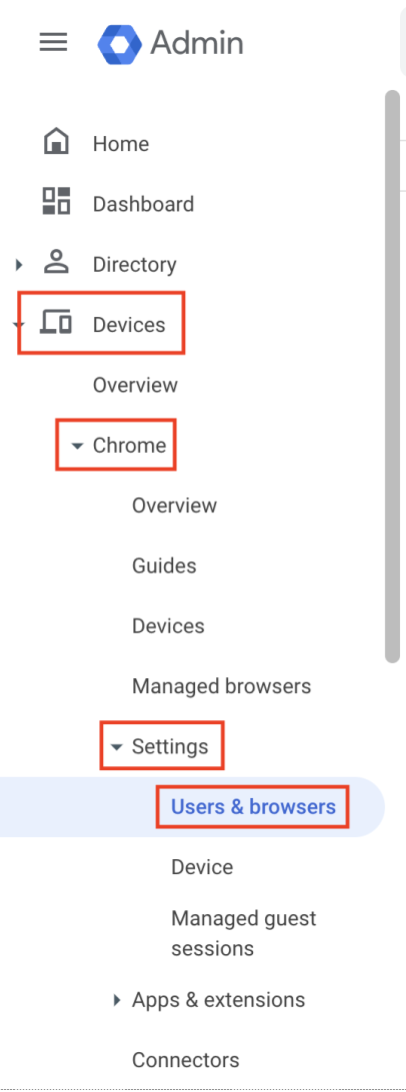
- From the Homepage, navigate to Devices > Chrome > Settings > Users & Browsers.
- Next, navigate to User & Browser Settings.
- Scroll to and select Allow EMM partners access to device management.
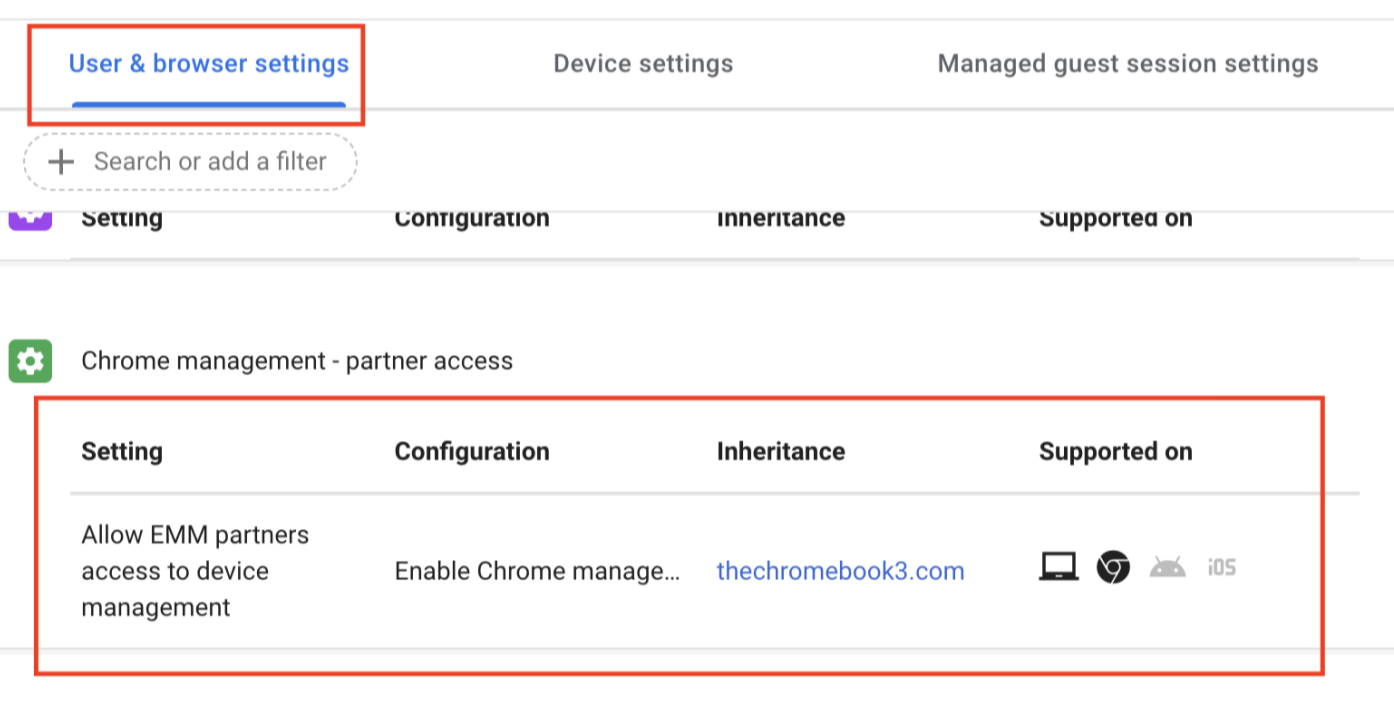
- Select Enable Chrome management – partner access from the drop-down next to Configuration.

Note: EMM Partner access in User & Browser settings must be enabled at the parent organizational unit (OU) level in the Google Admin console. This setting cannot be enabled at a child OU level, and a child OU will always inherit partner access properties from the parent OU.
- Click Save.
- Next, navigate to Device Settings tab and scroll to Chrome management – partner access.

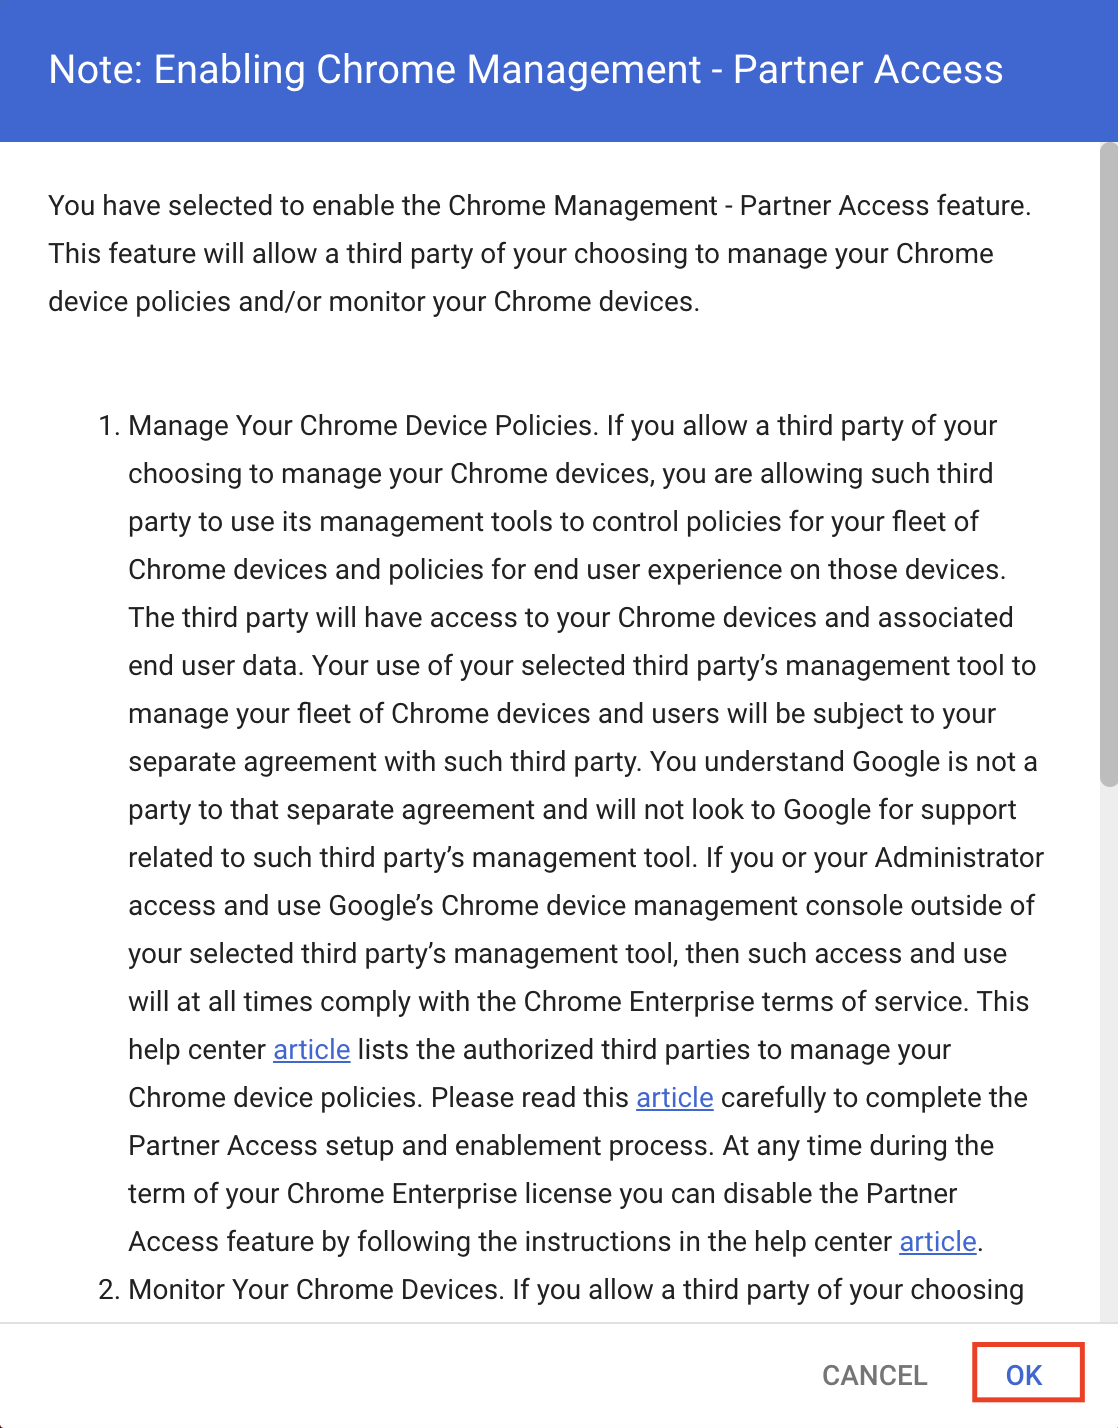
- Select Enable Chrome management – partner access from the drop-down.

- Click OK.
Note: EMM Partner access in Device settings can be enabled at the parent OU level as well as individual child OU levels in the Google Workspace Admin console.
Integrating Google Device Management with Workspace ONE UEM
In this exercise, you integrate Workspace ONE UEM with Google’s Chrome Policy API using a Service Account created in the Google Cloud Console. The procedures are sequential and build upon one another, so make sure that you complete each procedure in this section before going to the next procedure.
Begin by obtaining access to the Google Admin Console and the Google Cloud Console. This process involves creating a Server Account within a new project inside the Google Cloud Console and then adding the respective OAuth scopes in the Google Admin Console. Finally, complete the Chrome OS EMM Registration in your Workspace ONE UEM account.
Register Chrome OS EMM for Workspace ONE UEM
Perform the following steps to successfully register your Workspace ONE UEM account with the Google Workspace Admin console.
- In the Google Cloud Console, navigate to APIs & Services > Enabled APIs & services, then click Enable API and Services.
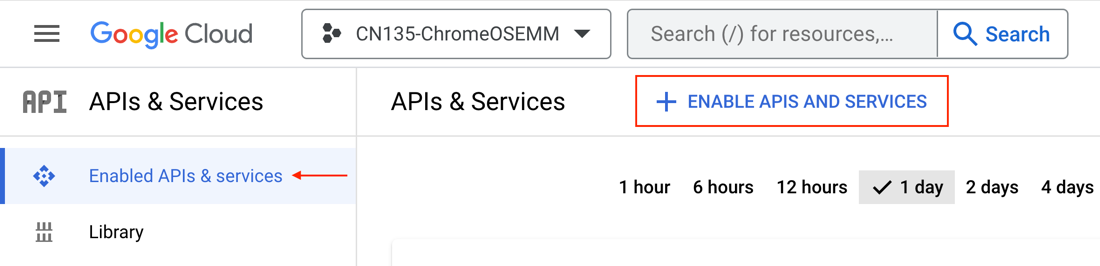
- Search for and enable the following APIs:

- Chrome Policy API
- Admin SDK API
- Navigate to APIs & Services > Credentials. Click Create Credentials, then select Service Account.

- Give the Service Account a name and skip or leave the remaining options blank. Click Create and Continue, then click Done. Copy the Service Account Email Address and Client ID.

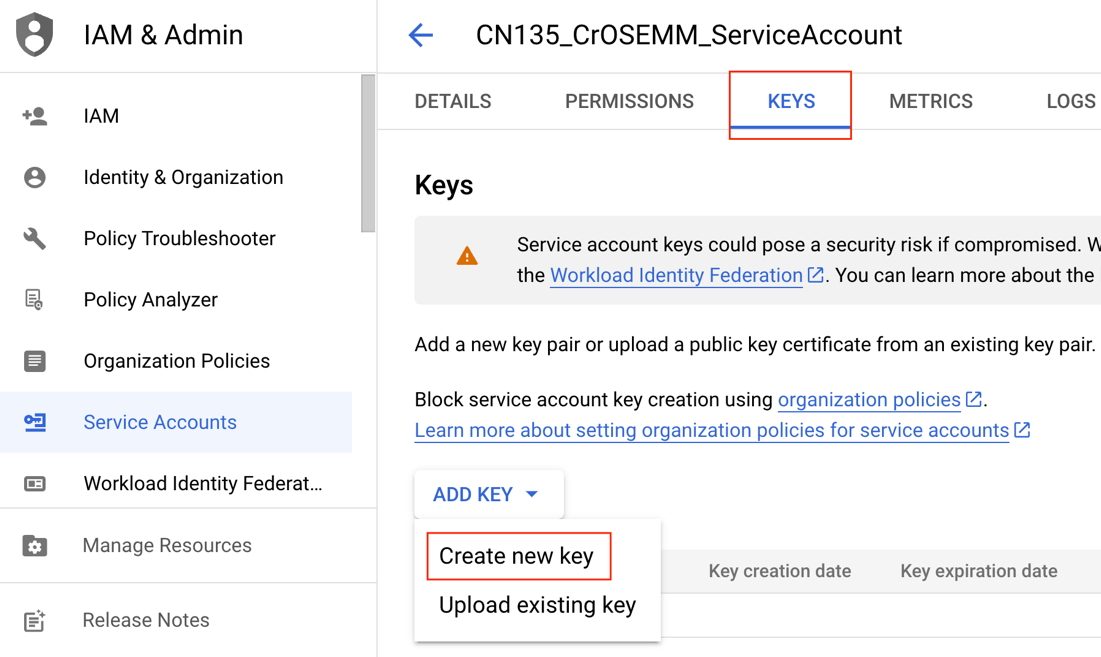
- In the Service Account Details page, select the Keys tab. Click Add Key > Create New Key.
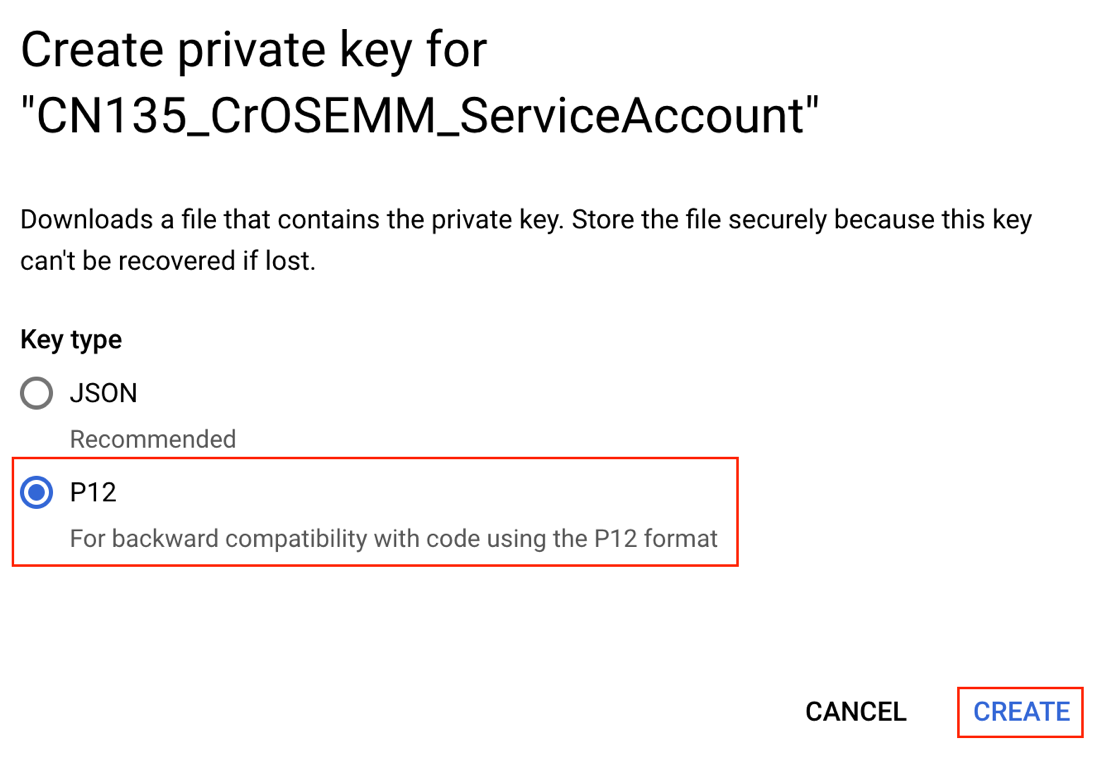
- Select P12 as the certificate type, then download the P12 certificate file and note down the auto-generated certificate password (typically "notasecret"). Optionally, you can also upload your own certificate for added security.
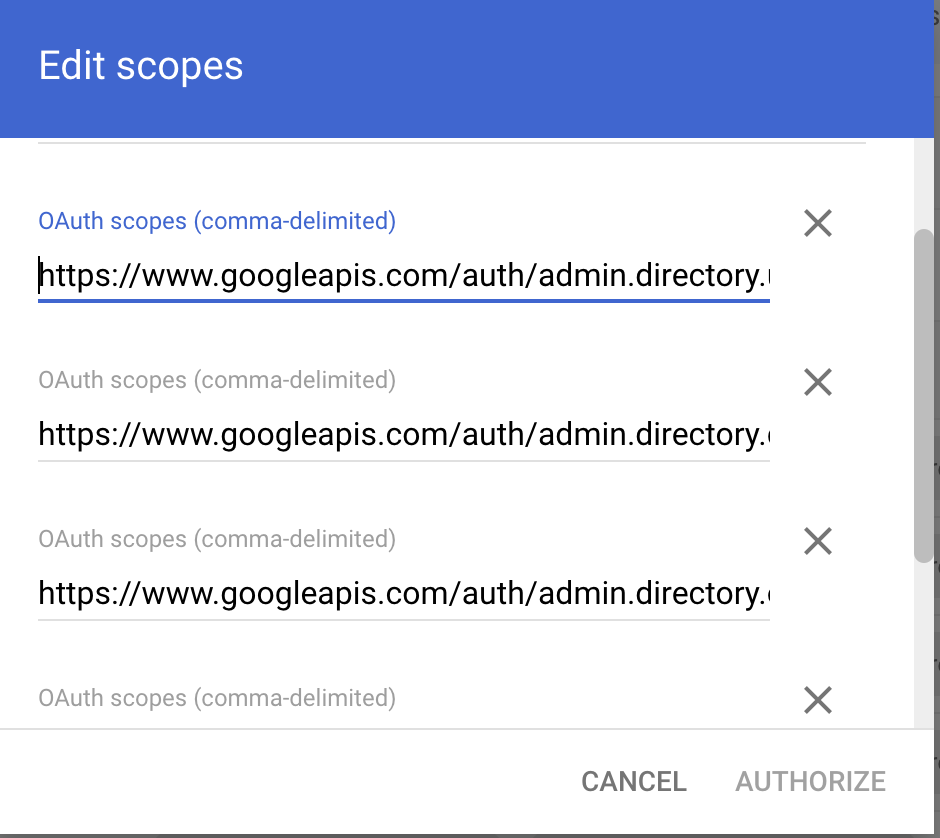
- In the Google Admin Console, navigate to Security > Access and data control > API Controls > Manage Domain Wide Delegation.

- Click Add New, then enter the Client ID of the service account created in step 4. Then add the following OAuth scopes:
- In the Workspace ONE UEM Console, navigate to Settings > Devices & Users > Chrome OS > Chrome OS EMM Registration.
- Enter the following details for Service Account and save the settings:
- Email address of the Google Admin account
- Email address of the Service Account
- Upload the certificate you downloaded from the Cloud console
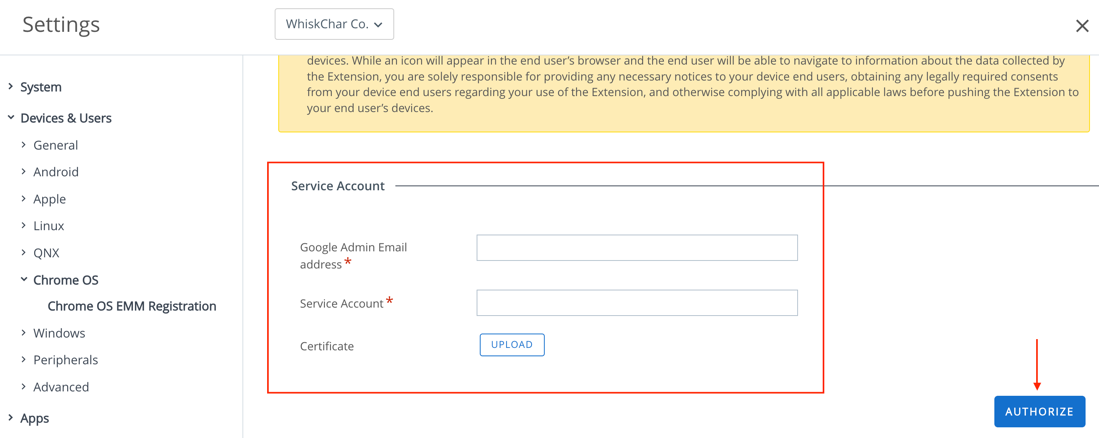
- After the settings are saved, click Test Connection and Device Sync to ensure the registration was successful.

Enrolling Chrome OS Devices into Workspace ONE UEM
Device enrollment establishes the device’s communication with the Workspace ONE UEM console and facilitates management. In this exercise, you enroll your Chrome OS device using the Google admin credentials. The procedures are sequential and build upon one another, so make sure that you complete each procedure in this section before going to the next procedure.
Enroll Chrome OS Devices
Enrollment is facilitated on a Chrome OS device by using the Google admin credentials. The steps to enroll a supported Chrome OS device into Workspace ONE UEM is as follows:
- Boot up a factory-reset Chrome OS device in out-of-box mode.
- Select Get Started.
- Next, connect your Chromebook to a Wi-Fi network.
- On the User setup page, click Enterprise Enrollment or press CTRL + ALT + E.
- Enter your Google Workspace administrator email account, then click Next.
- Enter your Google Workspace administrator account’s password. Then click Next.
- Upon successful enrollment, a success message marking the completion of Enterprise Enrollment is displayed.
- Click Done.
Your Chromebook is now successfully enrolled into Workspace ONE UEM.
Note: Workspace ONE UEM will sync with your Google Admin console to enroll newly registered devices. This sync is by default automatic and happens periodically once every hour. You can also navigate back to Workspace ONE UEM > Groups & Settings > All Settings > Devices & Users > Chrome OS > Chrome OS EMM Registration > Device Sync to sync device on-demand.
Configuring Chrome OS Profiles using Workspace ONE UEM
In this exercise, you explore how to set up and configure a restrictions profile in Workspace ONE UEM to see how enterprise profile settings apply on a Chrome OS device. The procedures are sequential and build upon one another, so make sure that you complete each procedure in this section before going to the next procedure.
Understanding Configuration Options for Chrome OS Profiles
Profiles are the mechanism by which Workspace ONE UEM manages settings on a device. All profiles are broken down into two basic sections: the General section and the Payload section.
- The General section defines the profile's name and description.
- The Payload sections define actions to be taken on the device.
In Workspace ONE UEM, Chrome OS profiles can apply at the device level or the enrollment-user level.
- Device Profiles - Apply to Chrome OS devices regardless of the user logged into the device.
- User Profiles - Apply to Chrome OS devices at the user level, and do not apply to users signed in as guest or with a Google Account outside of your organization (such as a personal Gmail account).
Profiles on Chrome OS devices are assigned based on the organizational unit (OU) of the Google Workspace Admin console. During the creation of a Chrome OS profile, you select the OU(s) that will receive the profile assignment.
- For User Profiles, all user accounts in the selected OU and below will receive the profile payload.
- For Device Profiles, all devices in the selected OU and below will receive the profile payload.
- There could be cases where the User and Device are in different OUs. In such cases, both the profiles will need to be assigned appropriately.
Tip: Refer to Add an organizational unit for help creating OU(s) in the Google Workspace Admin console.
Configure Chrome OS User Profile
In this procedure, you configure a Security & Privacy User Profile for Chrome OS to deactivate incognito mode.
- Login into your Workspace ONE UEM console.
- Select Resources > Profiles & Baselines > Profiles.
- Select Add > Add Profile.
- Select Chrome OS as Platform.
- Select User Profile in Profile Context.
- Define the General Settings such as Profile name and add an optional Description in the respective text boxes.
- Expand the Security & Privacy payload from the payload's menu.
- Click ADD.

- Configure the Security & Privacy settings payload as desired. For the purposes of this tutorial, select Disallow incognito mode to keep the users from browsing the web without storing local data.

- Click Next.
- Select the desired Google Workspace OU(s) to assign the profile.
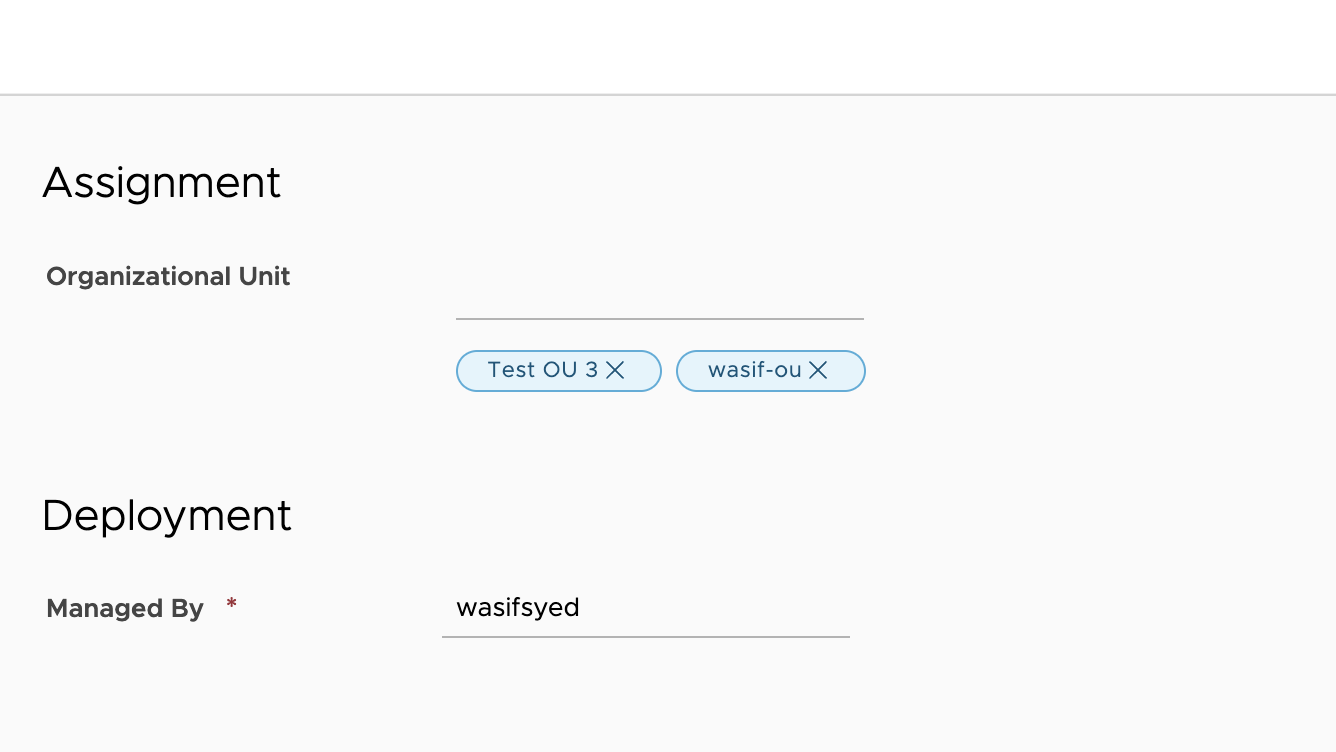
Note: You can select one or more OU(s) to receive the profile assignment.
- Select Save & Publish.
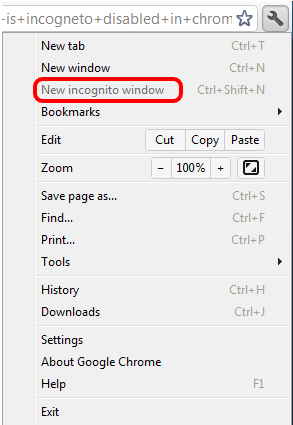
- Test to see if the profile was successfully assigned by launching a new tab in incognito mode for your user account on a Chrome browser. Notice how the option for New incognito window is disabled.
- Profile deployment can also be verified by navigating to
Chrome://Policyon a Chrome Browser. Policies listed inChrome://Policyshould match the configuration pushed using Profiles from Workspace ONE UEM for that user or device in their respective OU. - Another way to verify a successful profile deployment is by confirming the configuration in the Google Workspace Admin console. Start by navigating to Chrome > Settings > Users & browsers (for User profiles) and select the OU to which received the Profile assignment from Workspace ONE UEM. Policies listed in this section should match the configuration pushed from Workspace ONE UEM for that user or device OU.

Summary and Additional Resources
This operational tutorial provided steps to enroll and manage Chrome OS devices in Workspace ONE UEM.
Procedures included:
- Enabling Google’s Chrome Device Management.
- Integrating Google device management with Workspace ONE UEM.
- Enrolling Chrome OS devices into Workspace ONE UEM.
- Configuring Chrome OS profiles using Workspace ONE UEM.
For more tutorials on Workspace ONE UEM, see Operational Tutorials on Workspace ONE UEM.
Additional Resources
For more information about Workspace ONE, explore the VMware Workspace ONE Activity Path. The activity path provides step-by-step guidance to help you level up your Workspace ONE knowledge. You will find everything from beginner to advanced curated assets in the form of articles, videos, and labs.
Changelog
The following updates were made to this guide:
|
Date |
Description of Changes |
|
2023/09/20 |
|
|
2023/04/14 |
|
About the Author and Contributors
Wasif Syed is one of our passionate and innovative Solutions Engineers on the VMware End User Computing (EUC) Subject Matter Experts (SME) team. With a strong background in Android, iOS, and Chrome OS technologies, Wasif seeks to solve mobility challenges that face today’s Anywhere Workforce.
- Eric Stillman - Product Manager for Android and Chrome OS at VMware End-User Computing.
Feedback
Your feedback is valuable.
To comment on this paper, contact VMware End-User-Computing Technical Marketing at euc_tech_content_feedback@vmware.com.