
Manually Creating Optimized Windows Images for VMware Horizon VMs
VMware HorizonVMware Horizon Cloud Service
Introduction
Overview
Considerations you must take into account when creating a Windows system image are different if you plan to deploy virtual desktops rather than physical desktops:
- Physical desktops – Resource usage on a physical machine impacts only the user who is using that machine. The operating system on a physical machine determines whether or not resources are available. One-time actions impact the user only the first time they are performed because the machine is never refreshed. For example, a user typically gets a new user profile the first time they log on, and they continue to use that same profile with all subsequent logons.
- Virtual desktops – In contrast, in a virtual environment, the guest operating system behaves as if it has exclusive access to the CPU cores, but in reality, the cores are shared between 2 to 8 virtual machines. When using nonpersistent VMware Horizon® VMs or user profiles, the actions that are intended to run only once could run every time a user logs on.
Therefore, with virtual desktops, one-time system actions must be configured in the base image, and one-time user actions must be configured in the default user profile. In addition, to reach a higher consolidation ratio, increasing the number of VMs hosted on a single VMware vSphere® host, VMware recommends turning off features that are not needed.
Purpose of This Guide
Manually Creating Optimized Windows Images for VMware Horizon VMs provides step-by-step procedures for creating optimized images. These procedures include creating a VM, installing and configuring a Windows operating system, optimizing the OS, and installing the various VMware agents required for desktop deployment.
This guide also includes a chapter on day-2 operations, such as updating VMware Tools, in vSphere-based VMs, and updating Windows.
Important: The procedures in this guide are sequential and build on one another, so make sure to complete each procedure in each chapter before moving on to the next.
A recommended alternative to manually creating the VM image is to use automation, which is provided by Microsoft Deployment Toolkit (MDT). For step-by-step instructions, see the companion guide Using Automation to Create Optimized Windows Images for VMware Horizon VMs.
Intended Audience
This guide is intended for IT administrators and product evaluators who are familiar with VMware vSphere and VMware vCenter Server®. Familiarity with networking and storage in a virtual environment, Active Directory, identity management, and directory services is assumed. Knowledge of other technologies, such as Horizon is also helpful.
Advantages of an Optimized Image
Optimizing the golden image is well worth the time and effort involved. Savings are returned on a variety of fronts.
Initial Deployment Time Savings
By trimming the image, you can reduce the amount of required disk space by up to 80 percent, which translates to a significant reduction in the time it takes to create desktop pools (up to 3 times faster).
By default, Windows generates native images and performs disk cleanup actions after being idle for 10 minutes, which can use a full core for up to an hour. When deploying a large pool, this means that the cluster might not be usable for up to an hour after deployment. With image optimization, however, this process could be reduced to 30 seconds.
User Logon Time Savings
When a user logs on, the portion of logon time devoted to creating a standard user profile can take up to 30 seconds, but when optimized, this portion of logon time could be reduced to 3.5–10.5 seconds.
Host Memory Savings
A default deployment can use up to 2 GB of active memory, but with optimization, memory requirements can be reduced significantly (up to 50 percent).
Host CPU Savings
An optimized deployment can reduce CPU usage by up to 40 percent, allowing for up to a 40-percent increase in VM density on the physical vSphere host.
Storage and IOPS Savings
Because of the earlier-mentioned disk-space savings, you realize cache-usage improvements as well. Deactivating unneeded features and compressing the OS files means a larger portion can fit in the cache, which can reduce the amount of IOPS required by up to 250 percent.
Tested Operating Systems
The following operating systems have been tested using the procedures included in this guide. The table shows the example sizing and login duration that we achieved in our testing.
Only versions and editions that have a year of active Microsoft support remaining have been extensively tested, older versions should work as well. VMware Horizon only supports those that have active (or Extended with a Microsoft support contract) Microsoft support, check the following pages if your intended version/edition is still supported:
And see the VMware knowledgebase article Supported versions of Windows 10 on Horizon Agent Including All VDI Clones (Full Clones, Instant Clones, and Linked Clones on Horizon 7) (2149393), for the minimal Horizon version of that operating system version/edition.
Note: Most screenshots in this guide are from Windows 11 22H2. If you have a different OS version, some screens might look slightly different, but in general they are quite similar.
Important: Use an OS version that has a Microsoft Windows volume license key using the Key Management Service (KMS). KMS treats each activated clone as a computer with a newly issued license. In a production environment, you must activate Windows. In an evaluation environment, you can create the VM and log in without activating Windows.
| Operating System | Version | Build | Edition |
| Windows 11 | 22H2 | 22621.900 (2022-11-29) | Education/Enterprise/Professional |
| Windows 11 | 21H2 | 22000.1281 (2022-11-15) | Education/Enterprise/Professional |
| Windows 10 | 22H2 | 19045.2251 (2022-11-08) | Education/Enterprise/Professional |
| Windows 10 | 21H2 | 19044.2251 (2022-11-08) | Education/Enterprise/Professional/LTSC |
| Windows Server 2022 | 21H2 | 20348.1311 (2022-11-22) | Datacenter/Standard |
Infrastructure Prerequisites
Before you can perform the procedures in this guide, you must have certain infrastructure components installed and configured.
If you are using a VMware vSphere infrastructure, which can reside either on-premises or on one or more cloud platforms, verify that you have the following components installed and configured:
- VMware vSphere and vCenter Server. We used vSphere 8.0 and Horizon 2209 in our testing. For information and installation instructions, see the VMware vSphere documentation.
- VMware ESXi™ host or hosts configured in the vCenter Server instance.
- An authentication infrastructure that includes Active Directory, DNS, and DHCP.
- If you intend to use VMware App Volumes™, you must have the host name or IP address of the server on which App Volumes Manager is installed or the load balancer fronting the server on which App Volumes Manager is installed. You will enter this information when you install the App Volumes Agent on the primary VM image.
If you plan to create Horizon desktop pools or RDSH server farms, ideally at this point you would also have Horizon Connection Server installed and configured. For installation instructions, see the Quick-Start Tutorial for VMware Horizon 8.
If you are using VMware Horizon® Cloud Service™ on Microsoft Azure, rather than a vSphere infrastructure, you must provide your own Microsoft Azure IaaS capacity, and configure the Microsoft Azure prerequisites for a Horizon Cloud Service deployment. The Horizon Cloud Service is a VMware-managed virtual desktop and application solution that provides desktops as a service using a Microsoft Azure public cloud infrastructure. For more information, see the VMware Horizon Cloud Service Documentation.
Using Automation
This guide you are currently reading describes how to manually create a VM image. However, it is recommended to automate the process of image creation. For step-by-step instructions for using the Microsoft Deployment Toolkit (MDT) to automate the process of image creation, see the companion to this guide, titled Using Automation to Create Optimized Windows Images for VMware Horizon VMs. It also explains how to use the VMware OS Optimization Tool MDT plugin and how to add VMware Agents and VMware Tools using MDT.
Creating a vSphere-Based VM
Each desktop pool or RDSH server farm uses a golden virtual machine (VM) image, which serves as the model for the deployed virtual desktops. For a vSphere-based infrastructure, you use VMware vSphere® Web Client to create the golden VM.
For a VMware Horizon Cloud on Microsoft Azure infrastructure, see the chapter Creating a VM in Horizon Cloud and Installing Agents.
Prerequisites
Before you complete this procedure, you will need the following:
- Windows ISO file – You must have uploaded an ISO file to a vSphere datastore. The ISO file must contain a supported version of the Windows operating system. You will point to this file when completing the New Virtual Machine wizard. For a list of the operating systems we tested, see Tested Operating Systems. For a complete list of supported Windows 10 operating systems, see the VMware knowledgebase article Supported versions of Windows 10 on Horizon Agent Including All VDI Clones (Full Clones, Instant Clones, and Linked Clones on Horizon 7) (2149393).
- Important: Use an OS version that has a Microsoft Windows volume license key using the Key Management Service (KMS). KMS treats each activated clone as a computer with a newly issued license. In a production environment, you must activate Windows. In an evaluation environment, you can create the VM and log in without activating Windows.
- User account – When you log in to vSphere Web Client, the account you use must have the privileges required to create a VM. See the "Prerequisites" section of the product documentation topic Create a Virtual Machine with the New Virtual Machine Wizard.
Create Virtual Machine
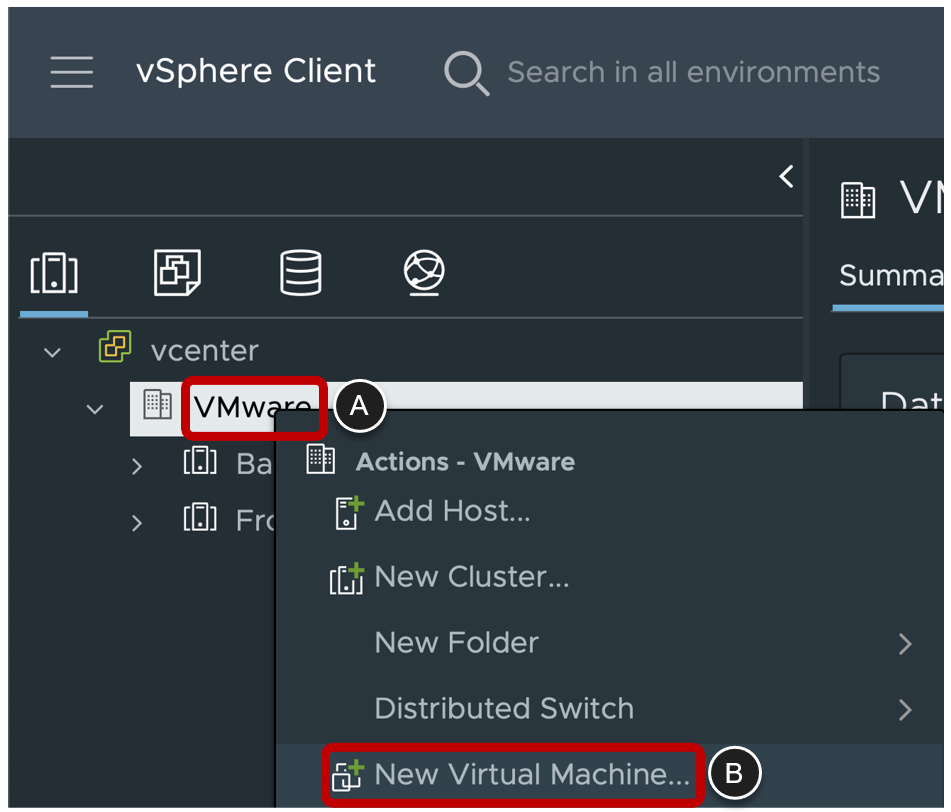
- Start the New Virtual Machine Wizard in the vSphere Web Client
- In vSphere Web Client, right-click a data center, cluster, host, or VM folder.
- Select New Virtual Machine.
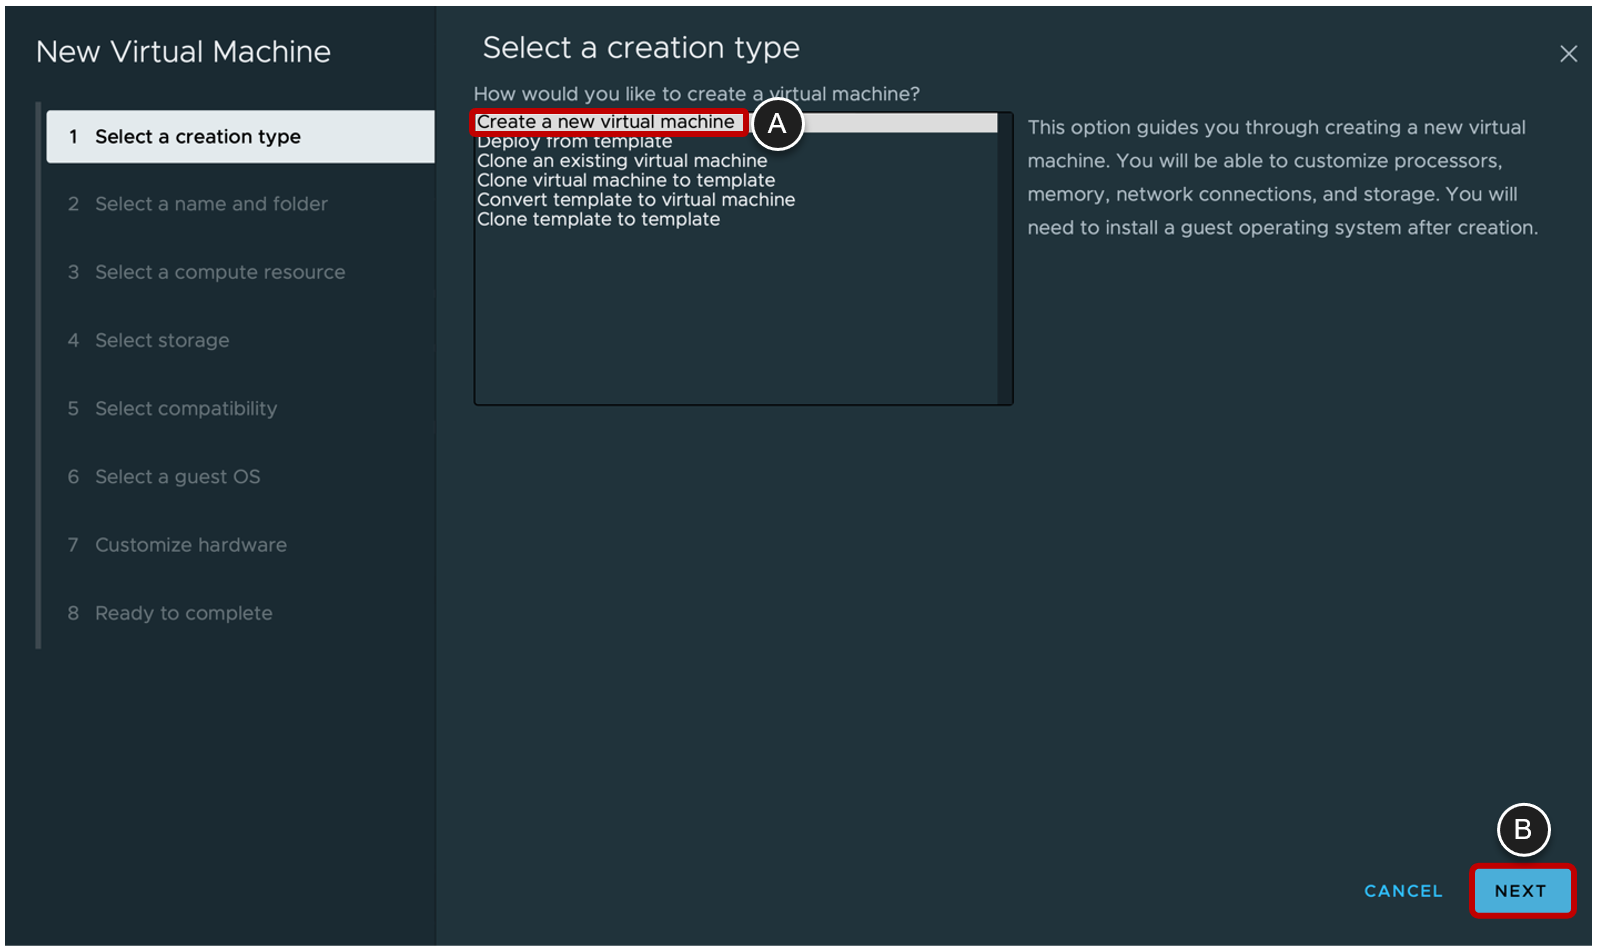
- Select the New Virtual Machine Creation Type
- Select Create a new virtual machine.
- Click NEXT.
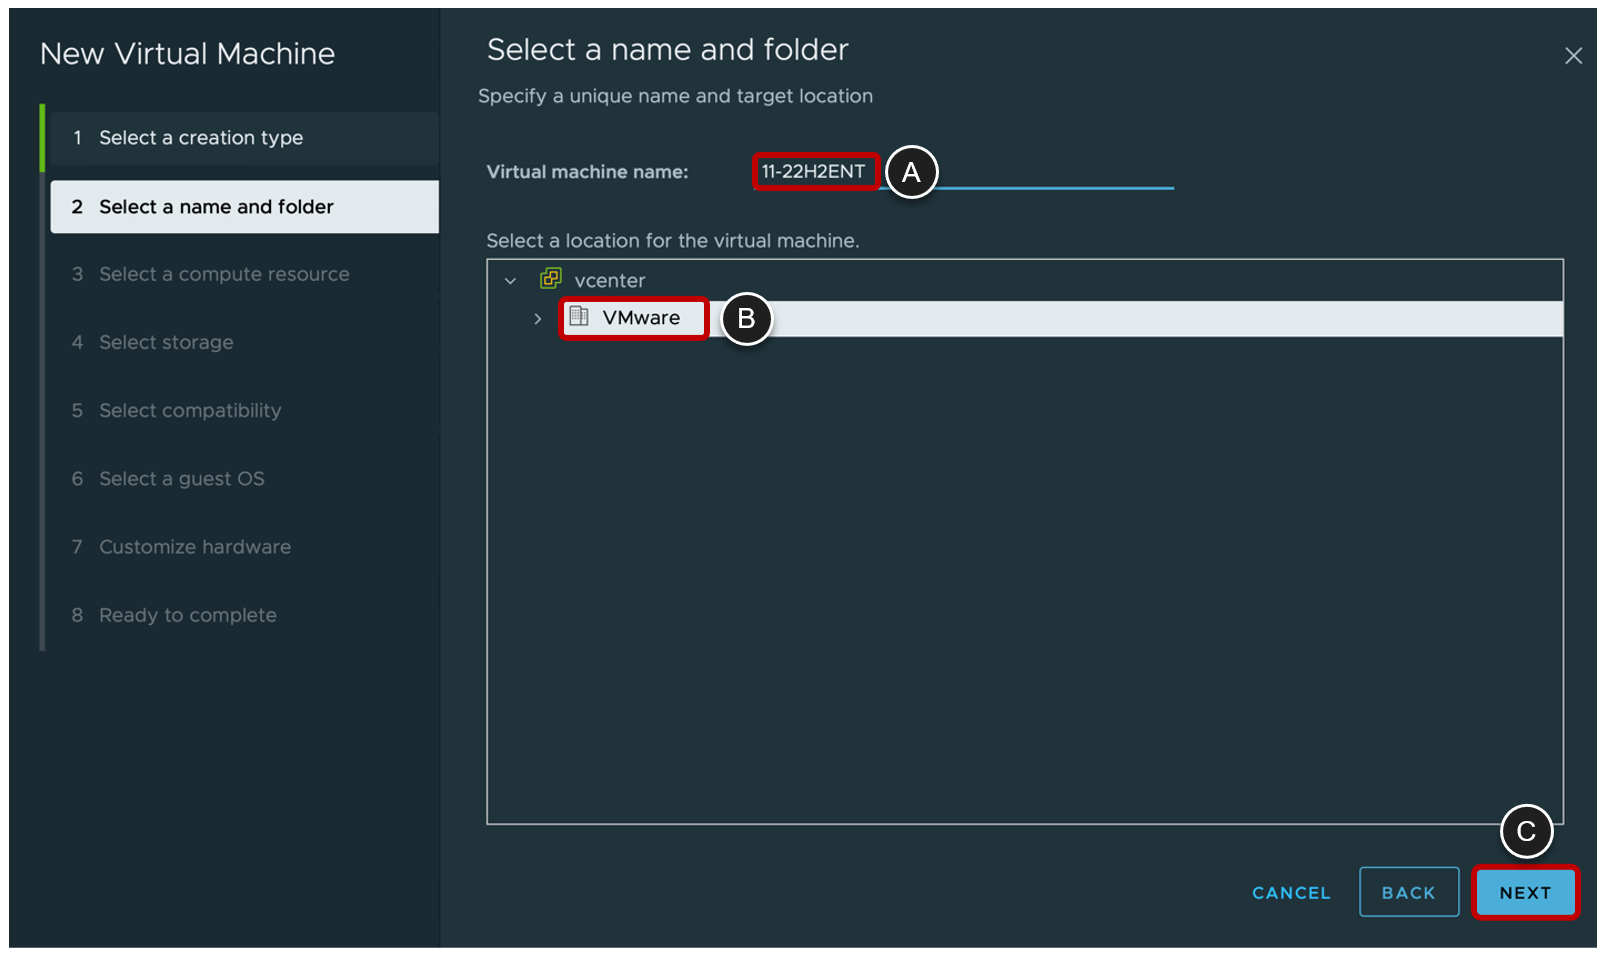
- Select a VM Name and Folder
- Provide a name in the Virtual machine name field.
- Select a location.
- Click NEXT.
- Select a Cluster or Host
- Select a cluster or host as the compute resource.
- Click NEXT.

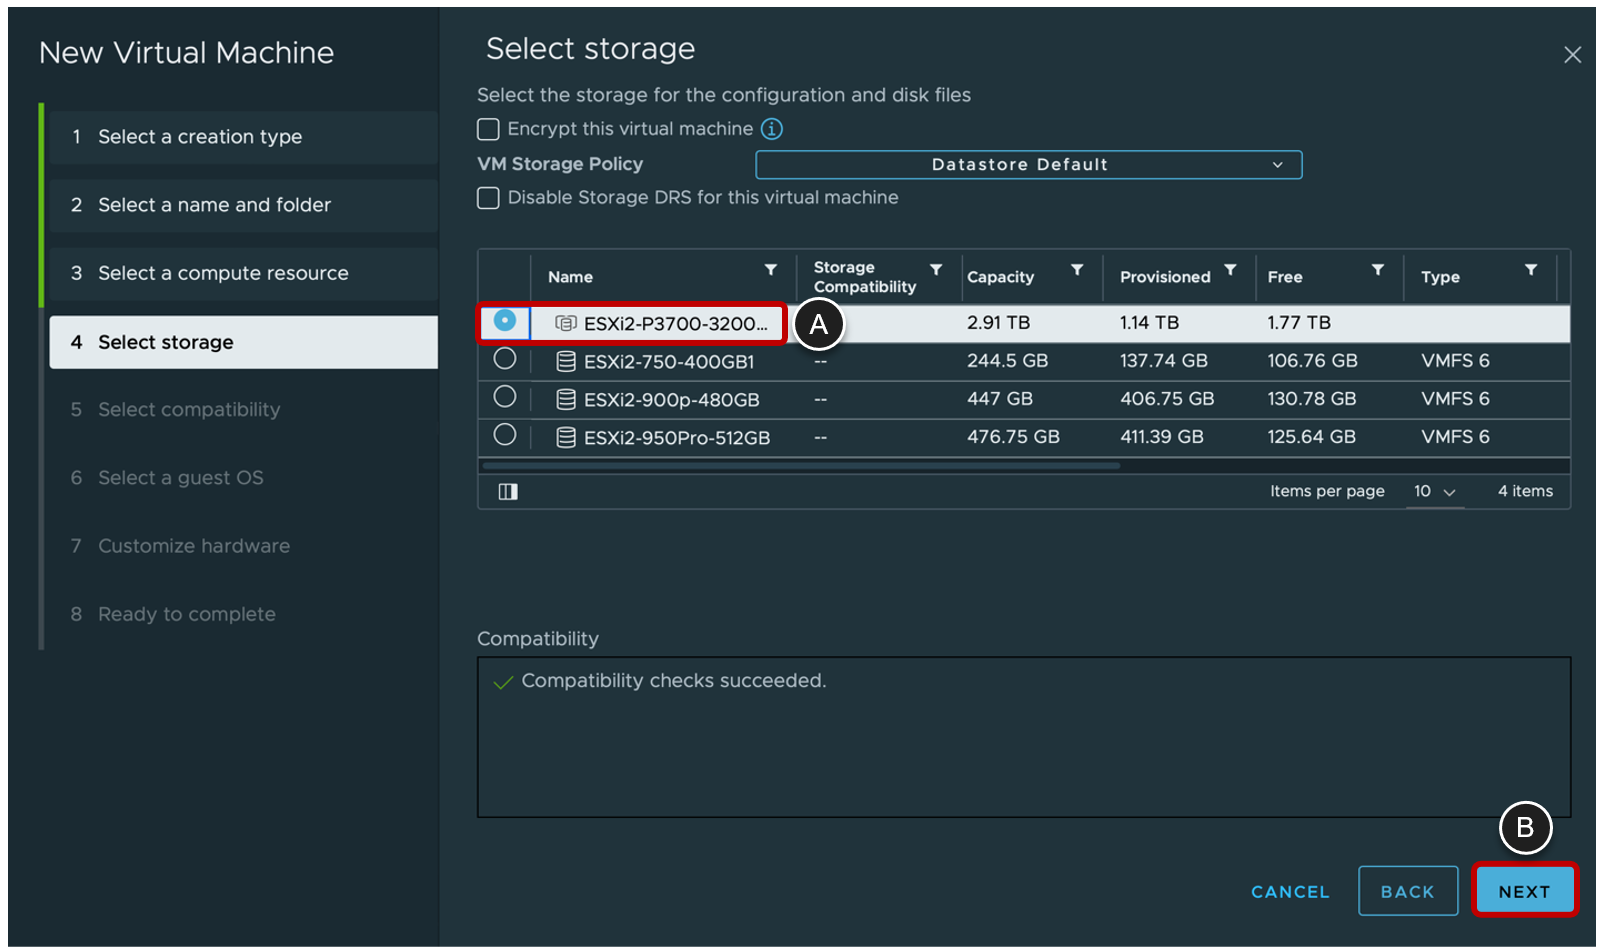
- Select a Datastore for the VM
- Select a datastore or datastore cluster where you would like to store the VM.
- Click NEXT.
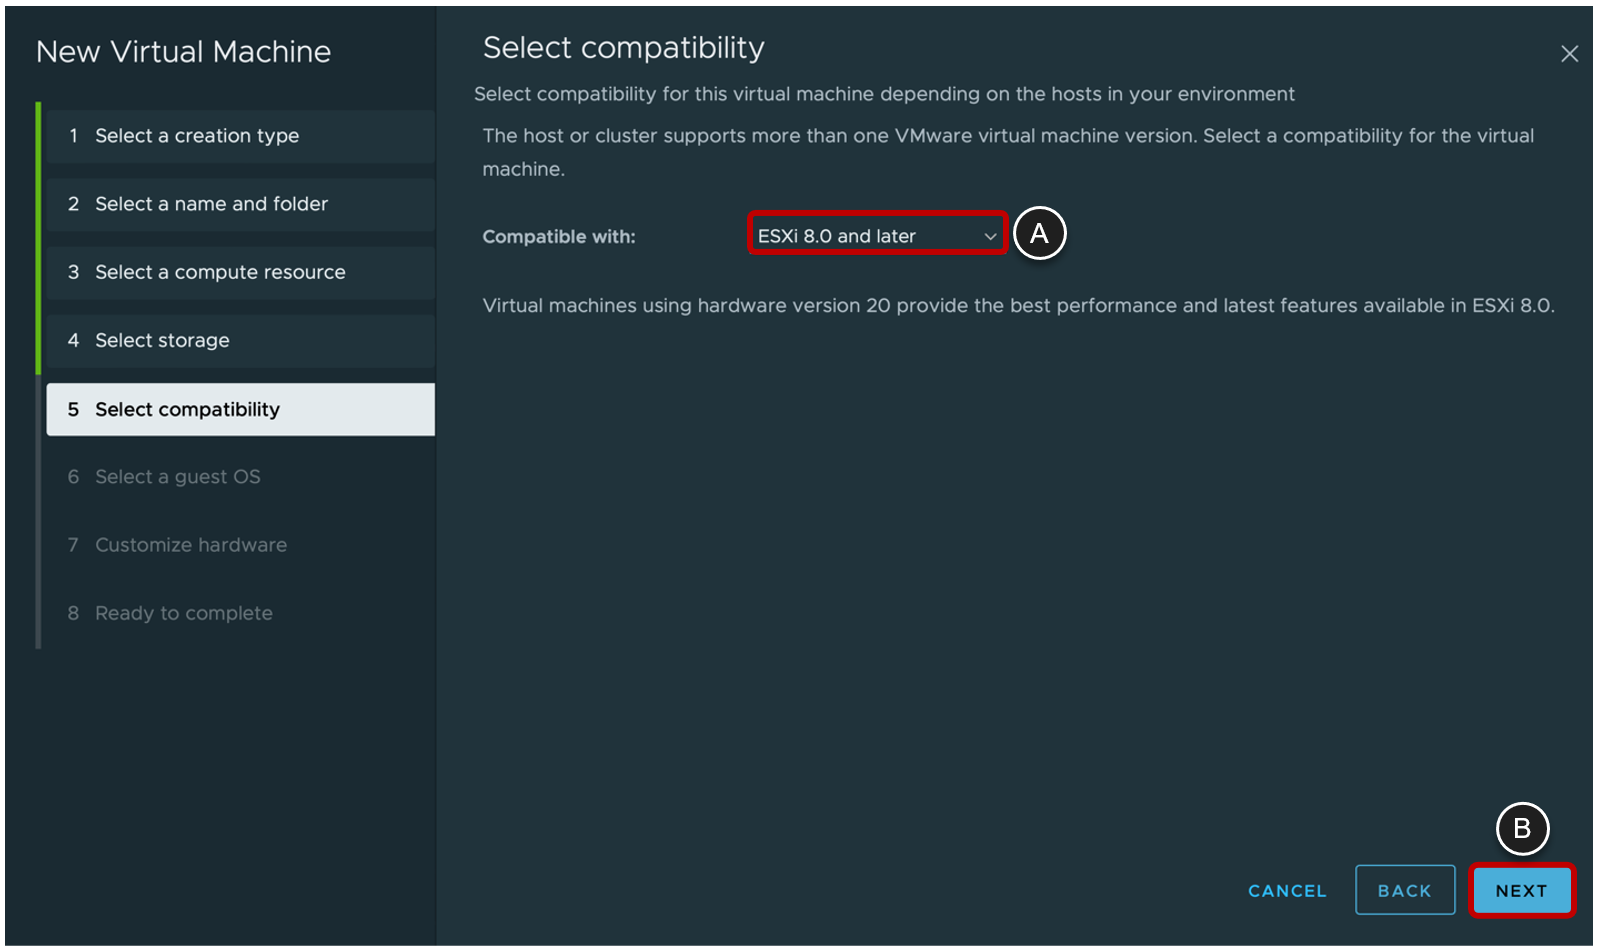
- Select the vSphere Compatibility Level
- Select the lowest version of ESXi that this VM would be deployed to. Tip: See Hardware Features Available with Virtual Machine Compatibility Settings.
- Click NEXT.
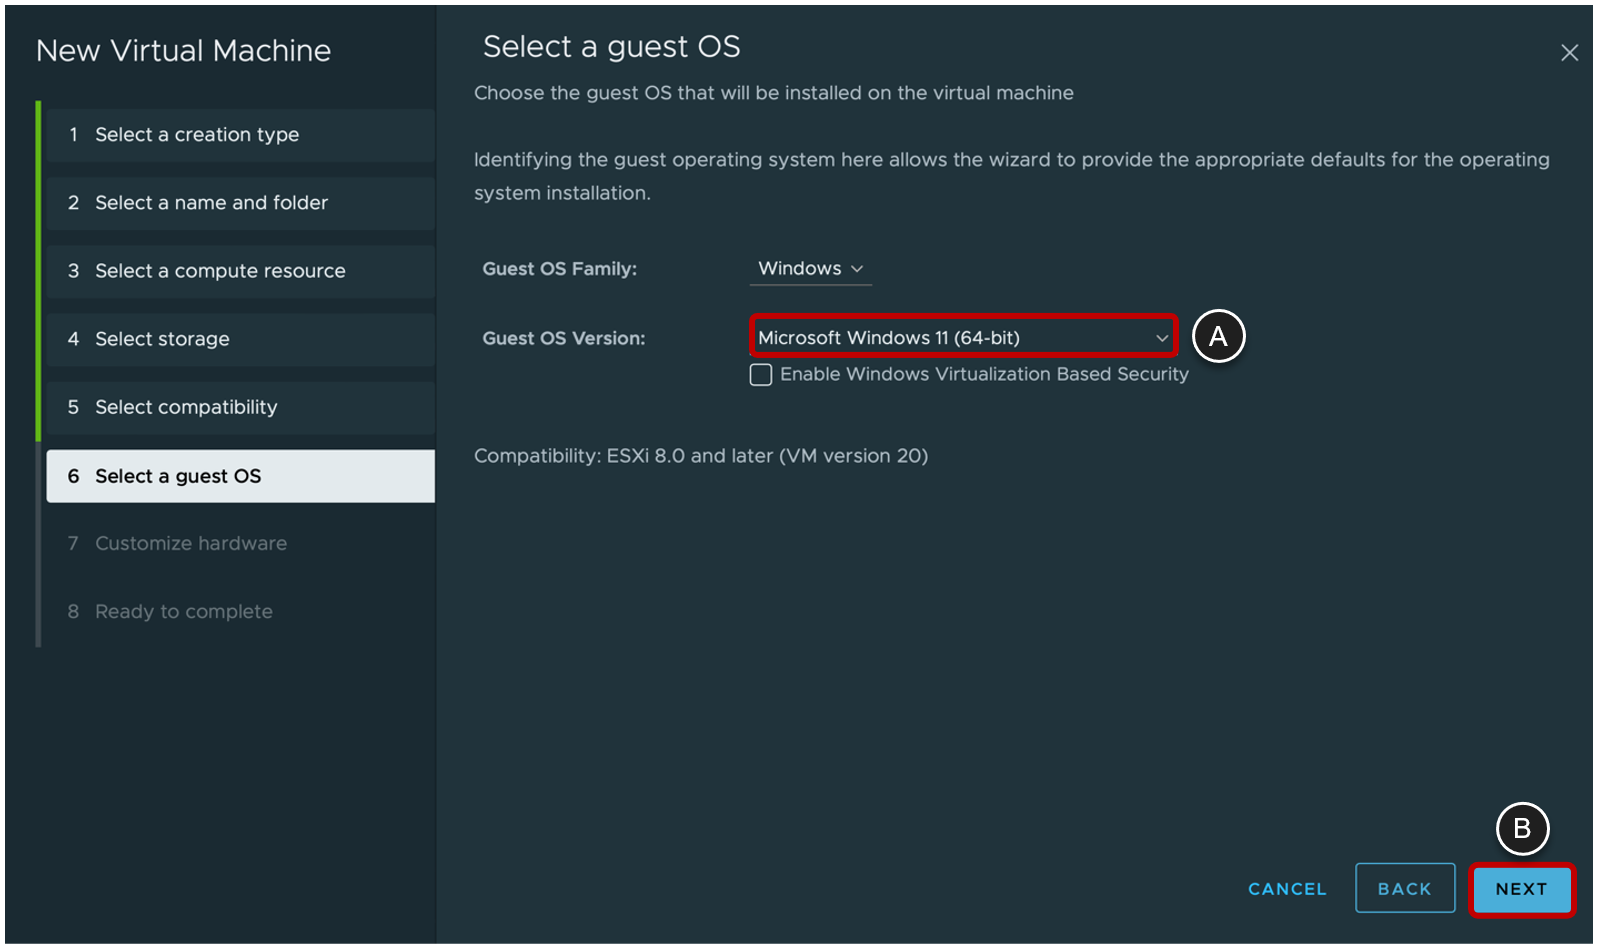
- Select the Windows Version and Architecture
- Select the Guest OS Version with the correct architecture (32- or 64-bit), choose Microsoft Windows 10 when deploying Windows 11 to hardware version 19. When required, enable VBS. (Note that VBS cannot be used together with vGPU or any kind of passthrough.)
- Click NEXT.
- Specify Virtual Hardware Settings
- Expand the Memory section.
- Select Reserve all guest memory (All locked).
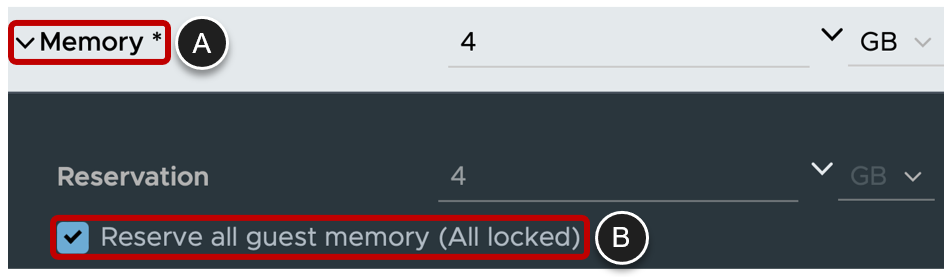
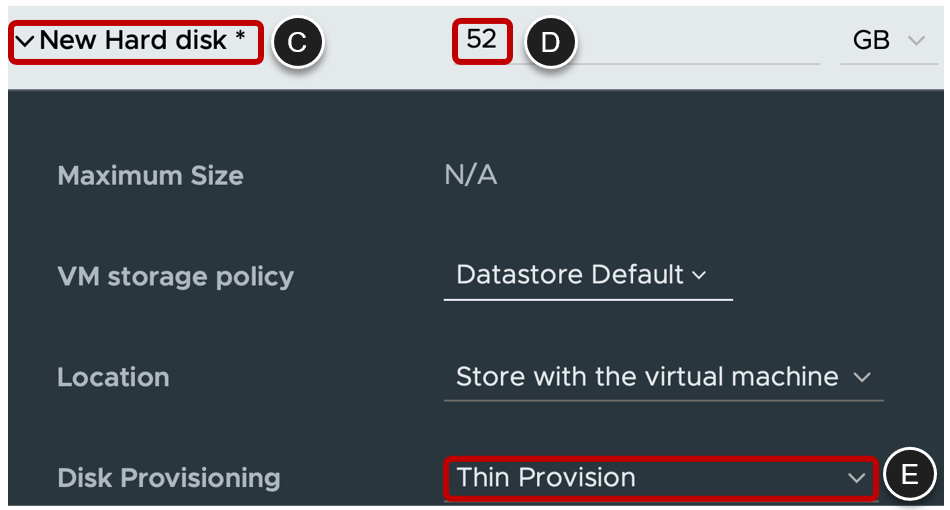
- Expand the New Hard disk section.
- Choose an appropriate hard disk size, a minimum of 52GB is recommended
- Choose Thin Provisioning.
- Expand the New SCSI controller section.
- Select VMware Paravirtual.

- Expand New Network.
- From the VM Network list, select the appropriate network.
- Select VMXNET3.
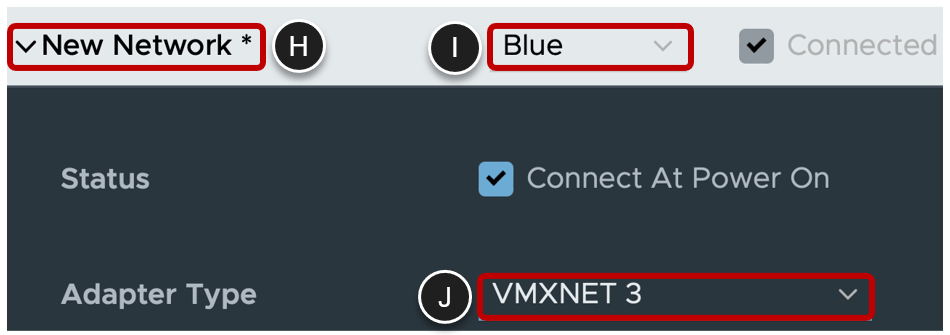
- Expand New CD/DVD Drive.
- Select Datastore ISO File and browse to the Windows ISO file.
- Select Connect At Power On.

- Delete the New USB Controller, by clicking on the three dots or x on the end of the line.

- Expand the Video card section.
- Select the maximum Number of Displays that will be used.
- Use the table below to determine which number to enter in the Total amount of video memory field.
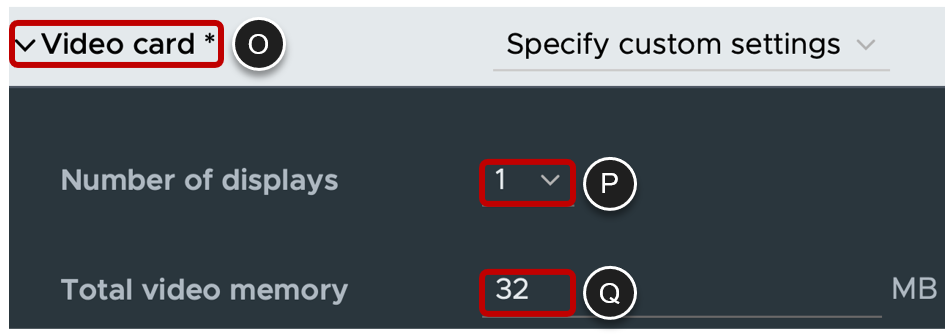
Note: The table that follows describes the small amount of RAM on the ESXi host that is required for video overhead in addition to system memory. This VRAM size requirement depends in on the display resolution and number of monitors configured for end users.
| Display Resolution Standard | Width, in Pixels | Height, in Pixels | 1-Monitor Overhead | 2-Monitor Overhead | 3-Monitor Overhead | 4-Monitor Overhead |
| VGA | 640 | 480 | 1.20 MB | 3.20 MB | 4.80 MB | 5.60 MB |
| WXGA | 1280 | 800 | 4.00 MB | 12.50 MB | 18.75 MB | 25.00 MB |
| 1080p | 1920 | 1080 | 8.00 MB | 25.40 MB | 38.00 MB | 50.60 MB |
| WQXGA | 2560 | 1600 | 16.00 MB | 60.00 MB | 84.80 MB | 109.60 MB |
| UHD (4K) | 3840 | 2160 | 32.00 MB | 78.00 MB | 124.00 MB | Not supported |
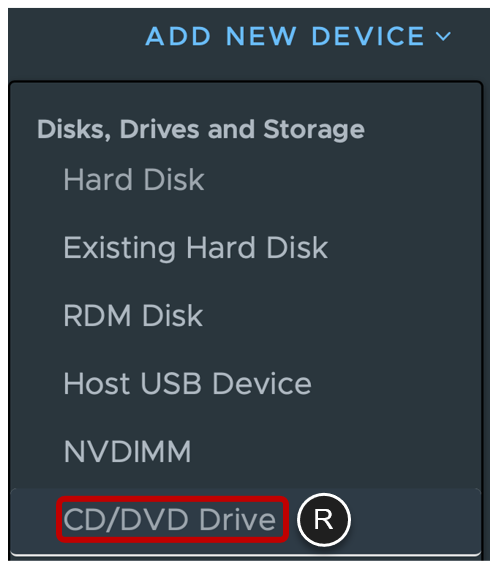
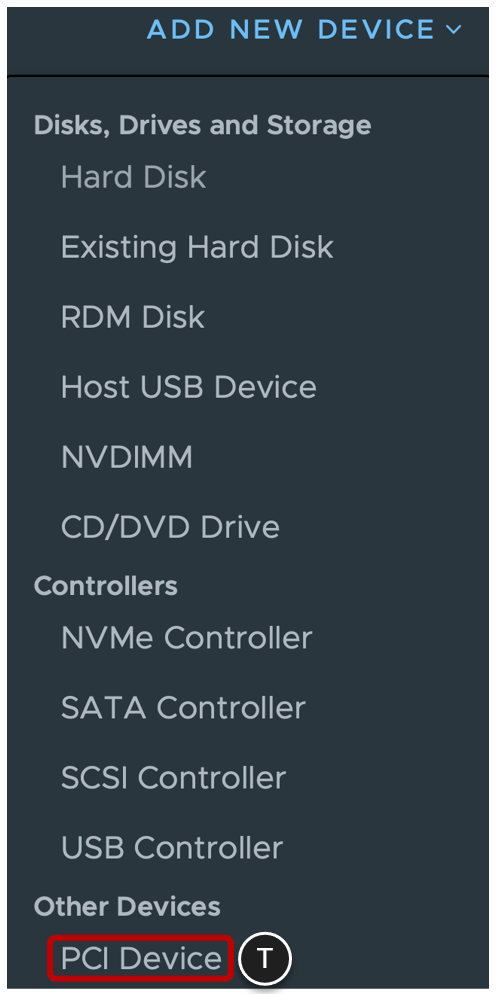
- When installing something older than Windows 11 22H2 or Windows Server 2022, at the top of the page click on ADD NEW DEVICE and select CD/DVD Drive.
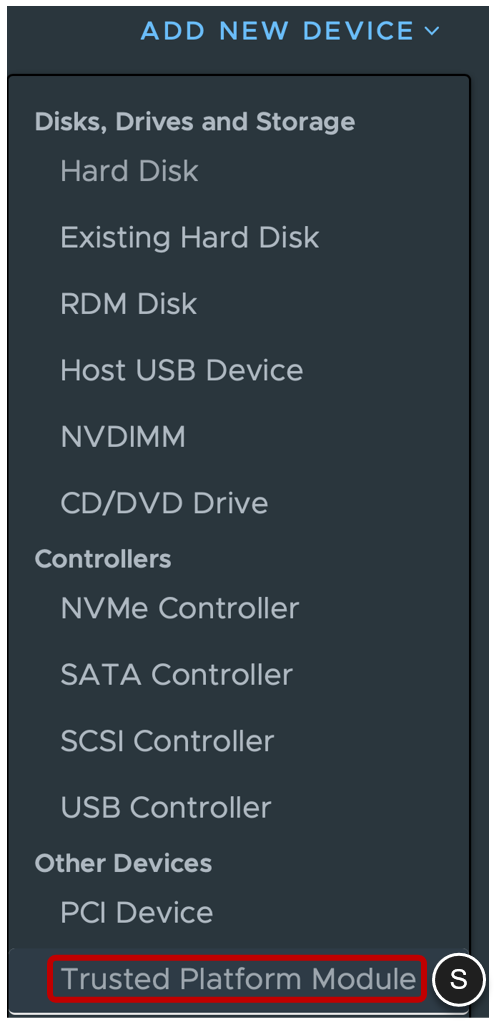
- When you are installing Windows 11 and using VM Hardware Level 19 (ESXi 7 U2) or earlier, at the top of the page click on ADD NEW DEVICE and select Trusted Platform Module.
- When you want to use vGPU, at the top of the page click on ADD NEW DEVICE and select PCI Device.
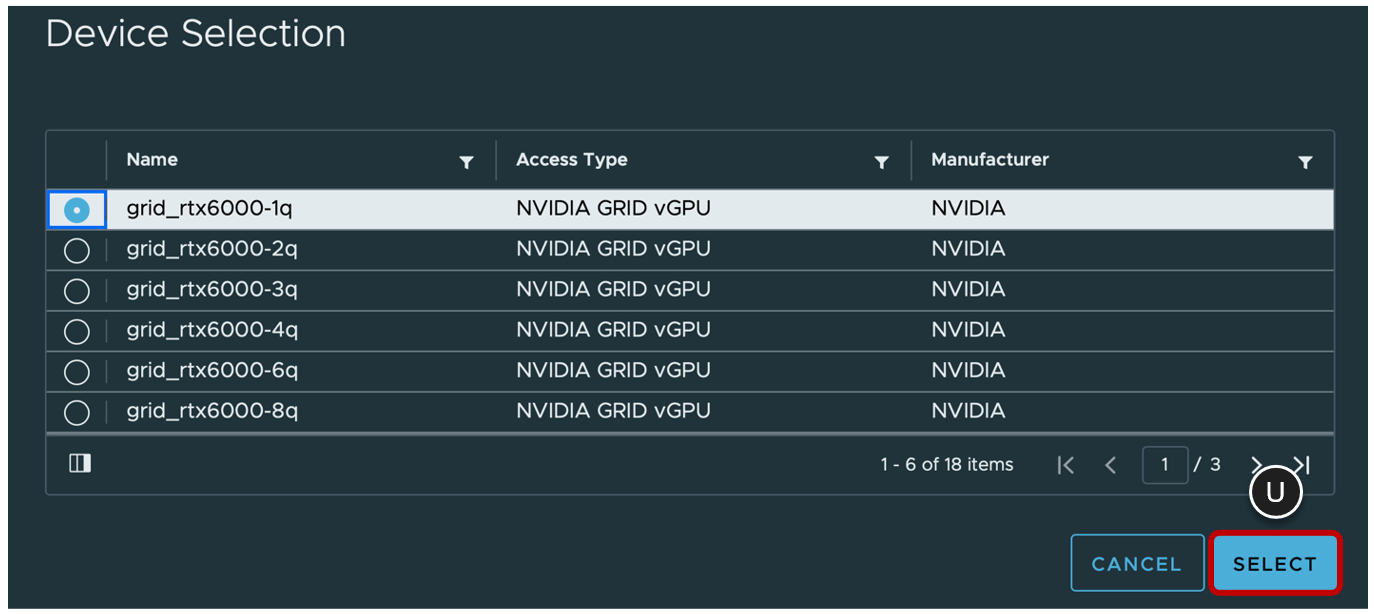
- If you’ve added vGPU select the desired profile and click on SELECT.
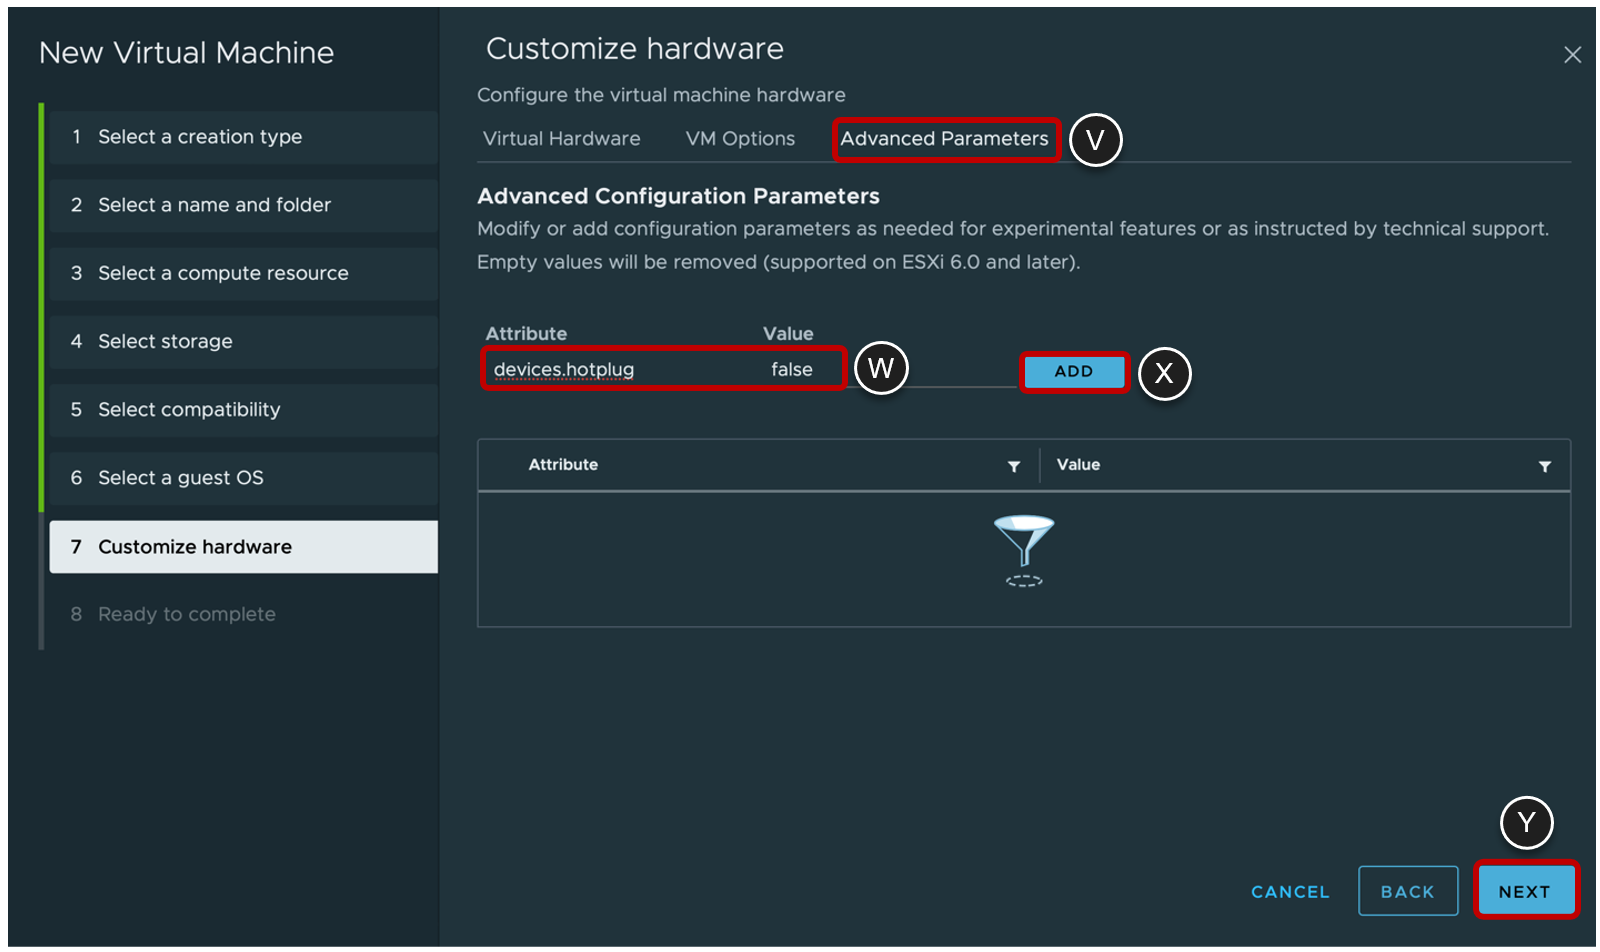
- At the top of the page select Advanced Parameters. (In vCenter 7 you can find this under VM Options->Advanced->Configuration Parameters->Edit Configuration)
- Use devices.hotplug as the Attribute and false as the Value
- Click on ADD.
- Click on NEXT.
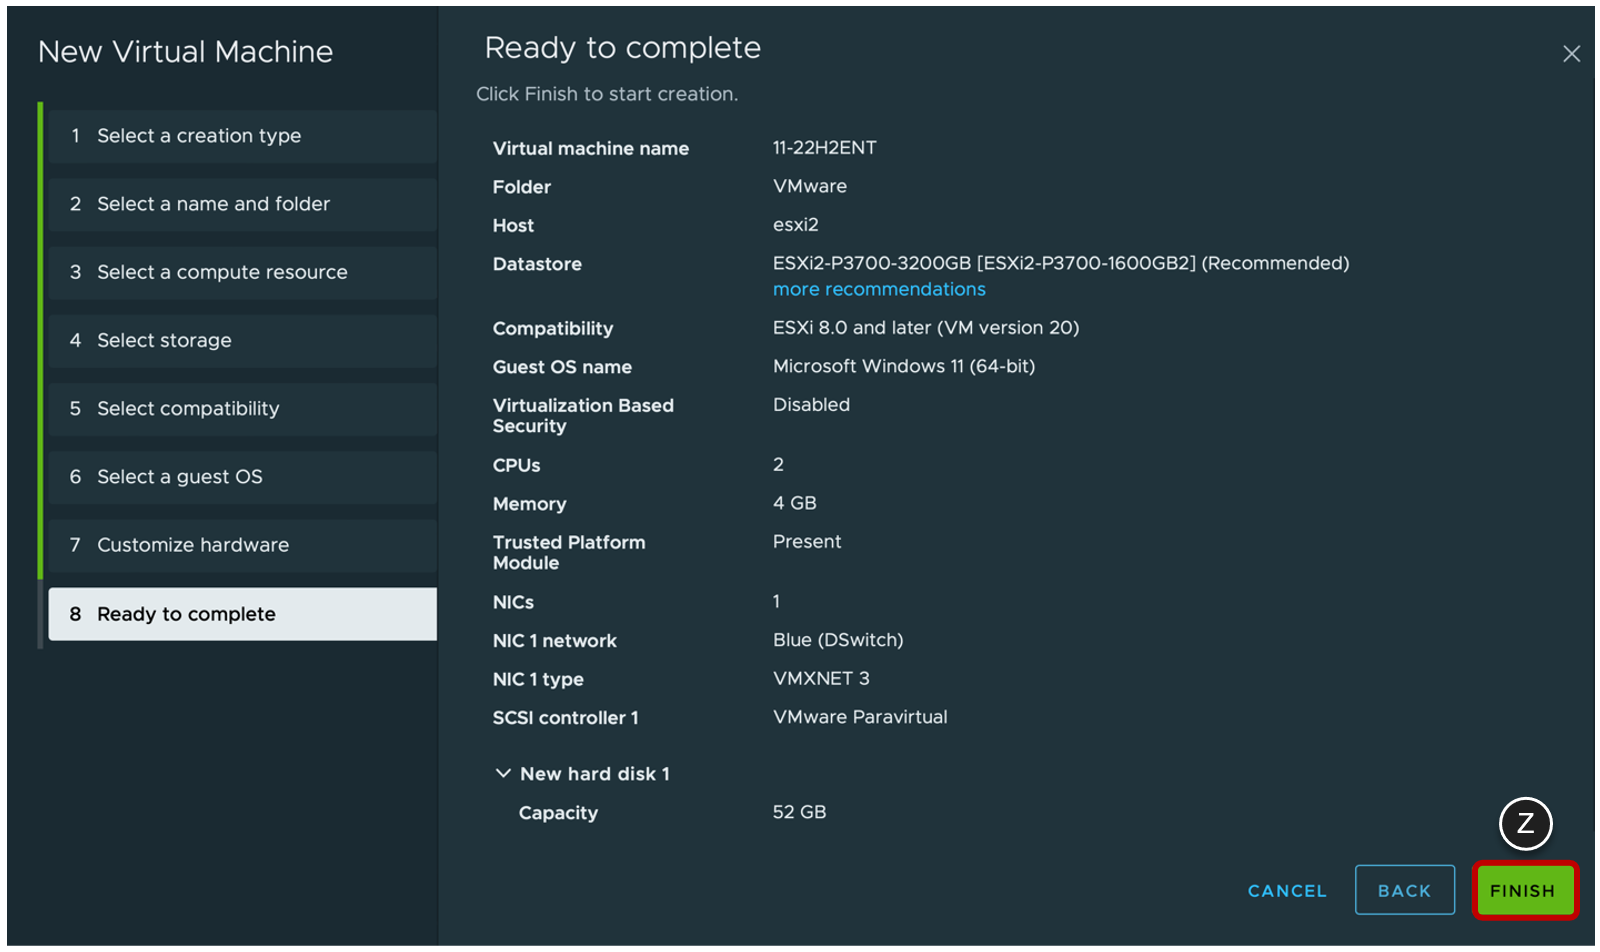
- Click on FINISH.
Install Windows
After you boot the VM, installation of the Windows OS begins automatically. You will accept most of the default settings and specify that you are doing a new installation rather than an update.
- Open a Remote Console for the Virtual Machine (VM)
- Using the vSphere Web Client, from the inventory list, select the newly created Windows VM.
- Launch a console for the VM by clicking either Launch Web Console or Launch Remote Console.
Note: To launch a remote console, you must have downloaded and installed the VMware Remote Console. If necessary, you can click the "i" button to download and install it.
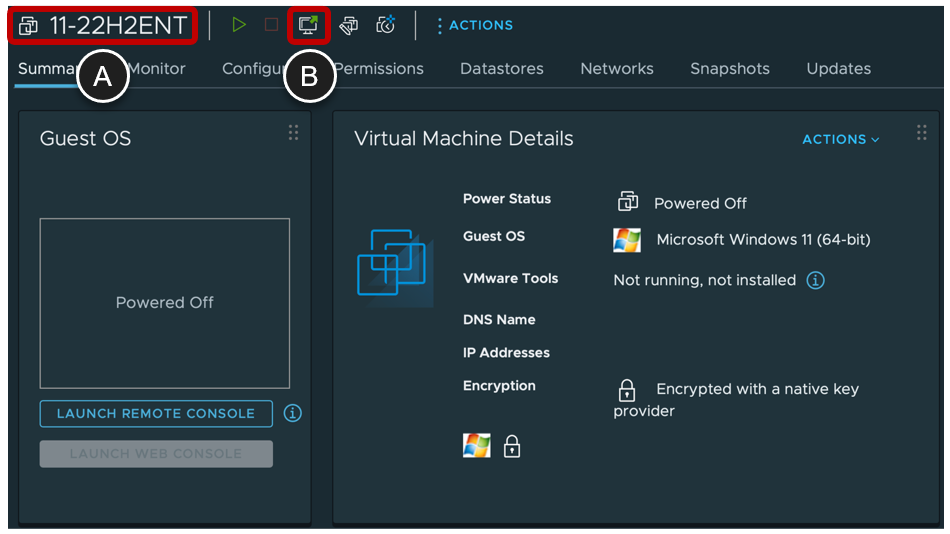
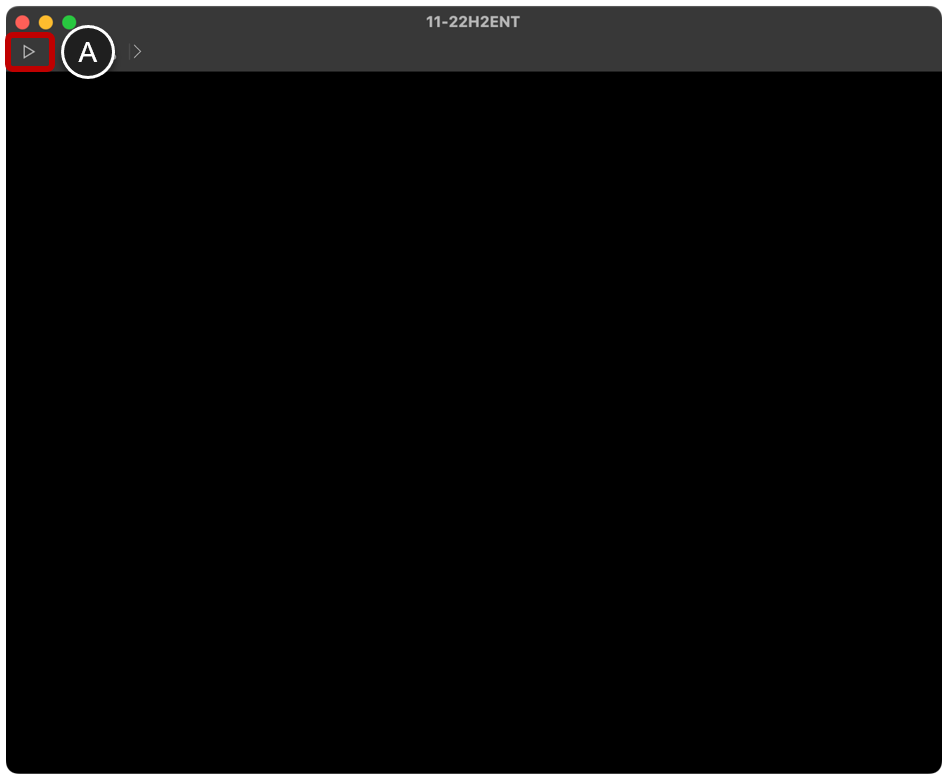
- Power on the VM
- Click the play icon, which is a small triangle-shaped button at the top of the window.
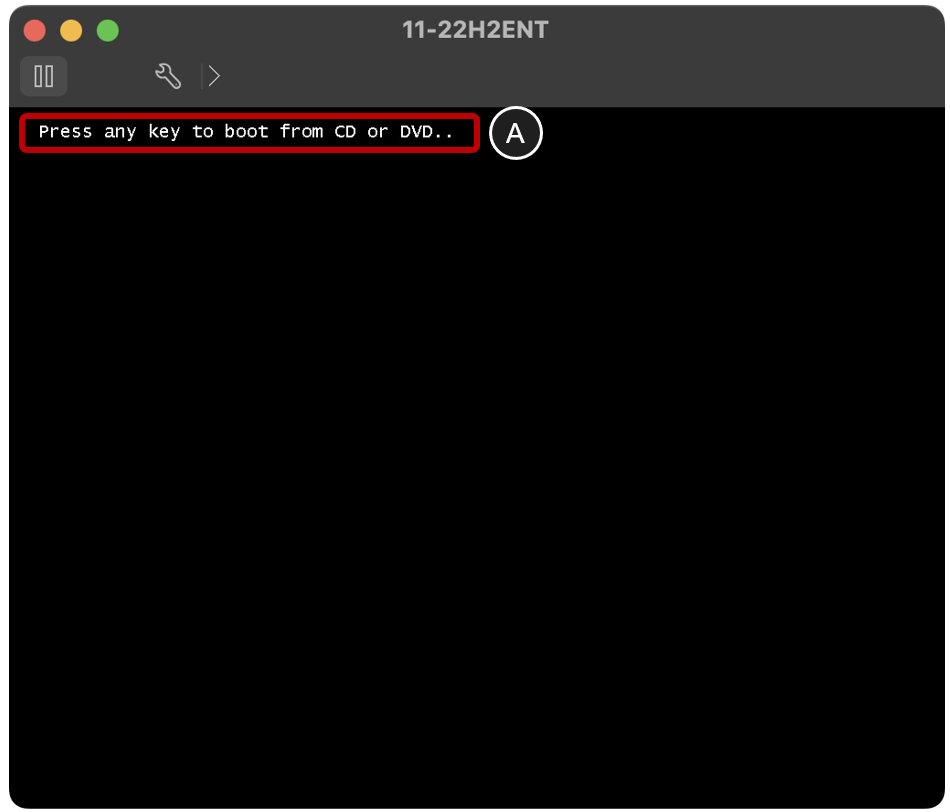
- Boot the VM from the Virtual CD
- Press a key on your keyboard.
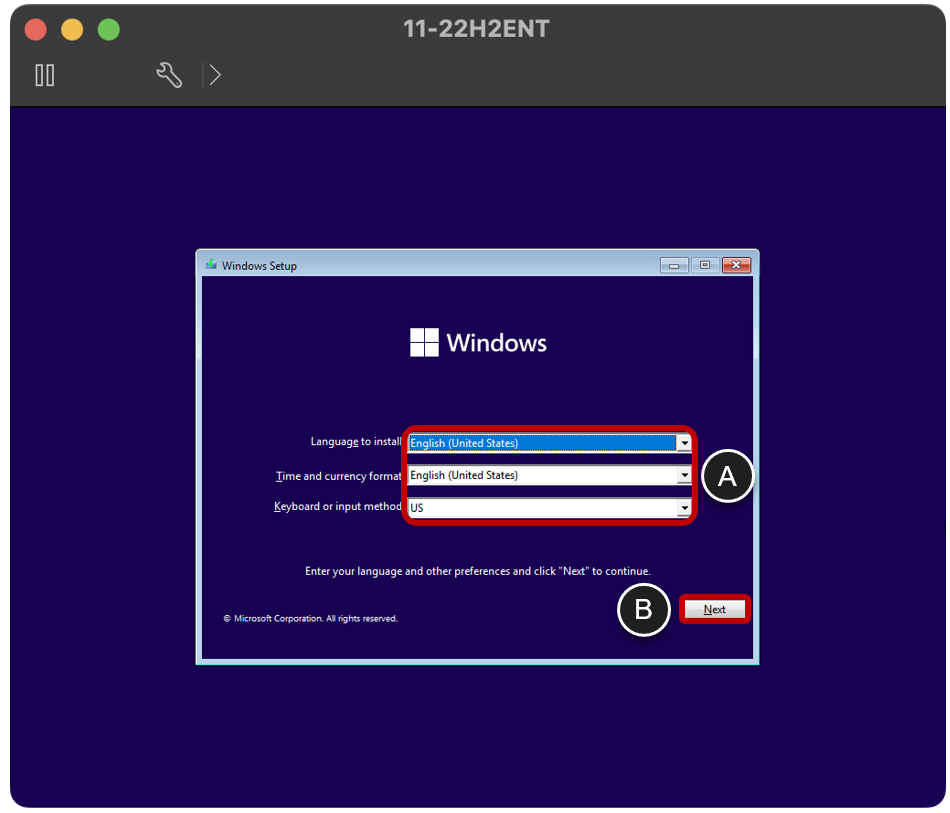
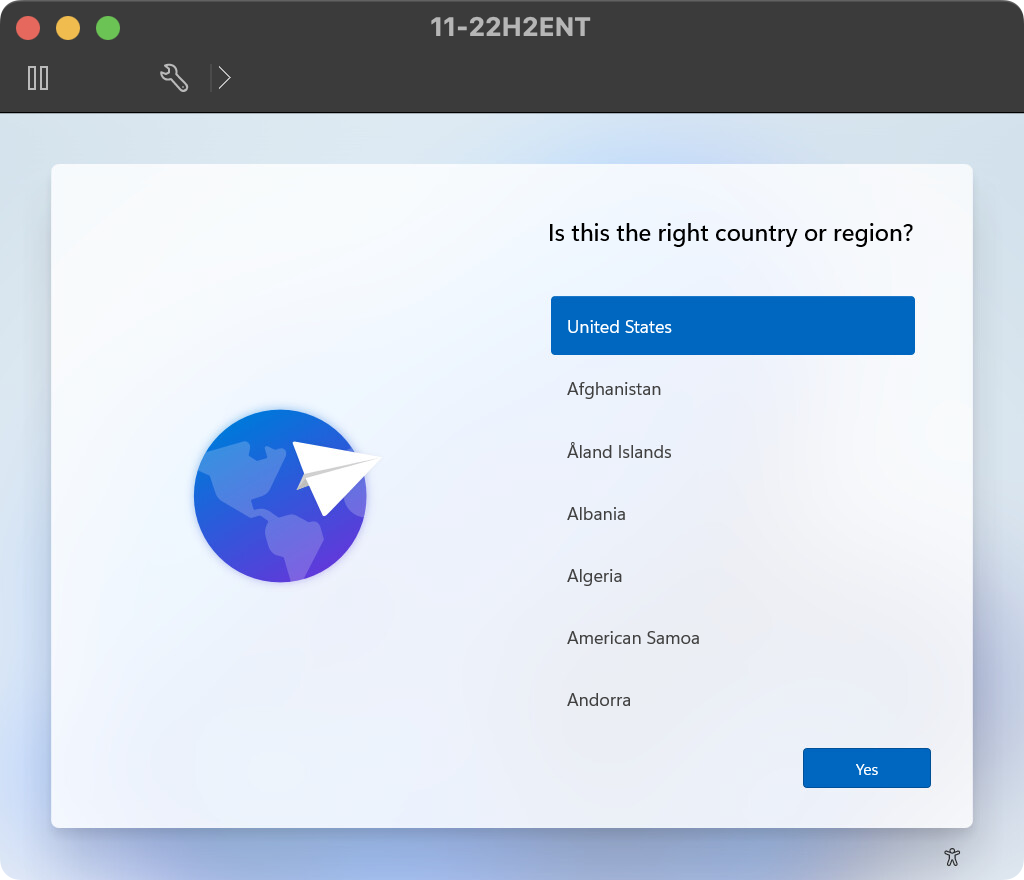
- Select Settings for Your Region
- Select the correct regional options.
- Click Next.
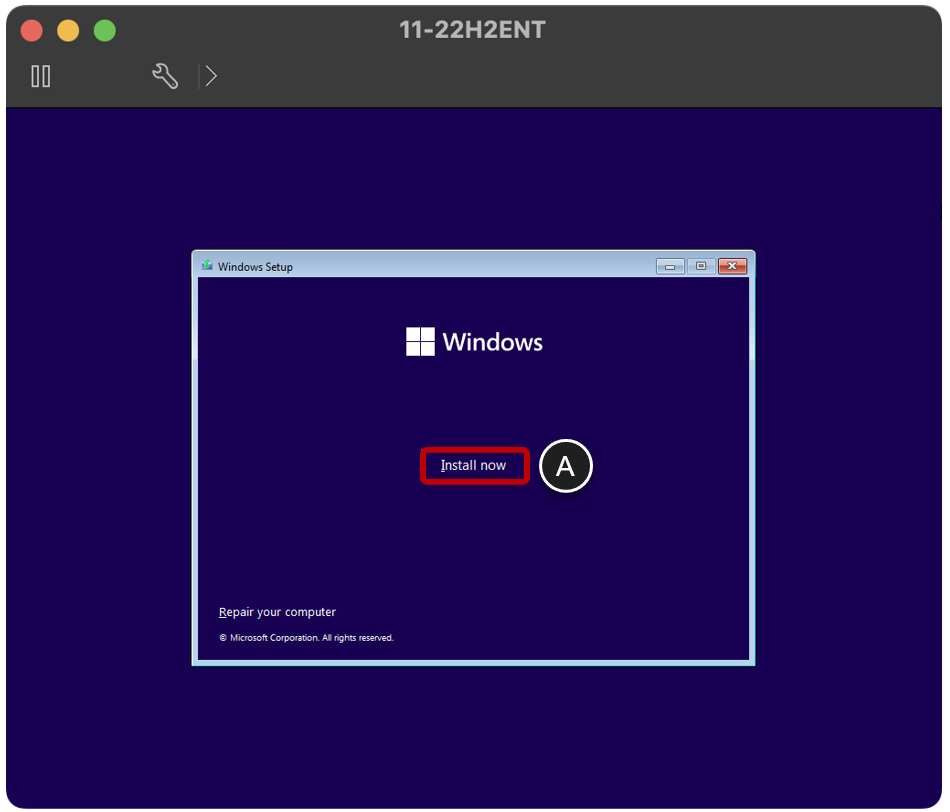
- Begin Installing Windows
- Click Install now.
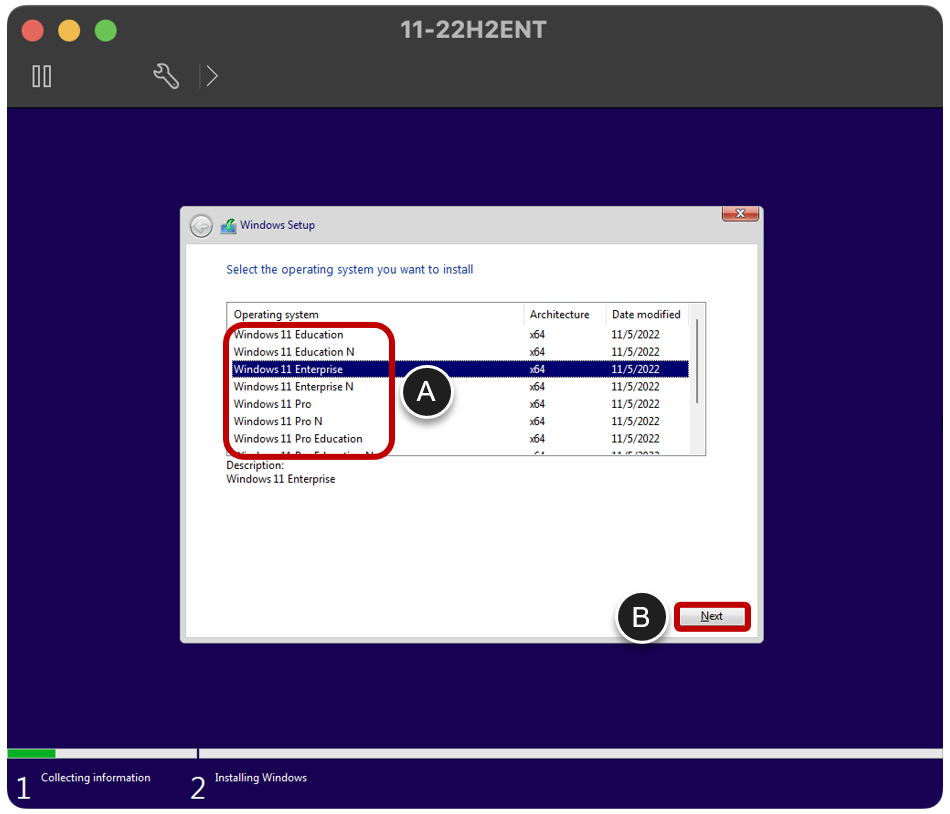
- Select the Edition (This screen is only shown for an ISO that contains multiple editions).
- Select the Windows edition.
- Important: For Windows Server 2016/2019/2022, select and edition with "Desktop Experience".
- Click Next.
- Select the Windows edition.
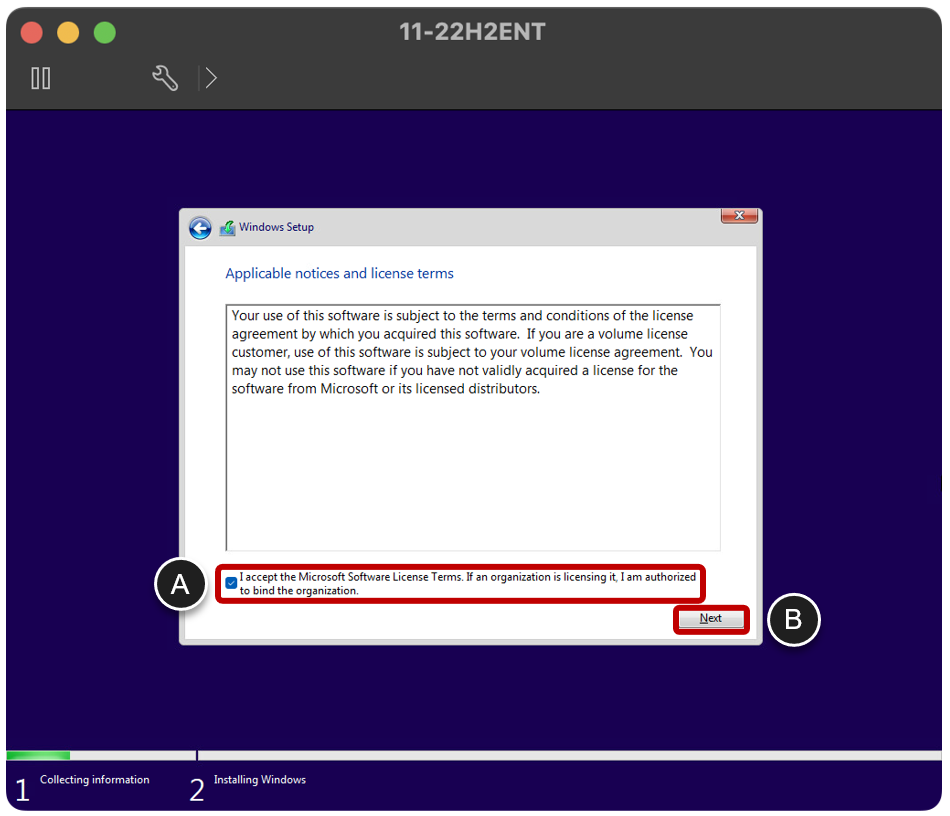
- Accept the License Agreement
- Select the I accept the Microsoft Software License Terms check box.
- Click Next.
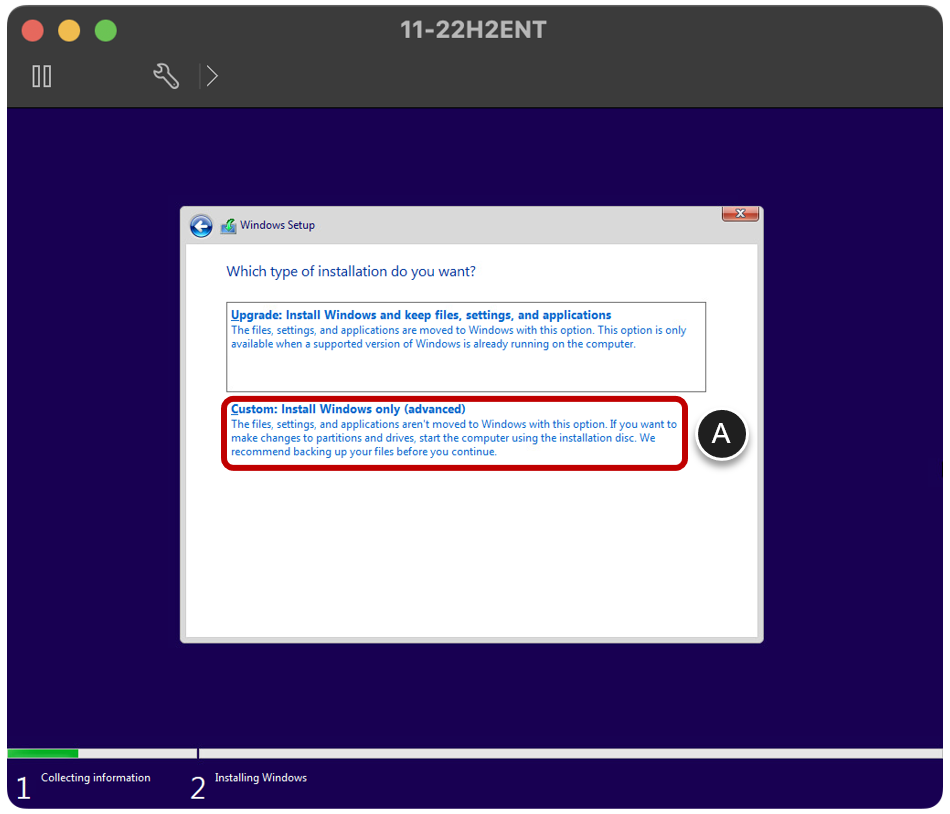
- Select the Custom Installation
- Select Custom: Install Windows only (advanced).
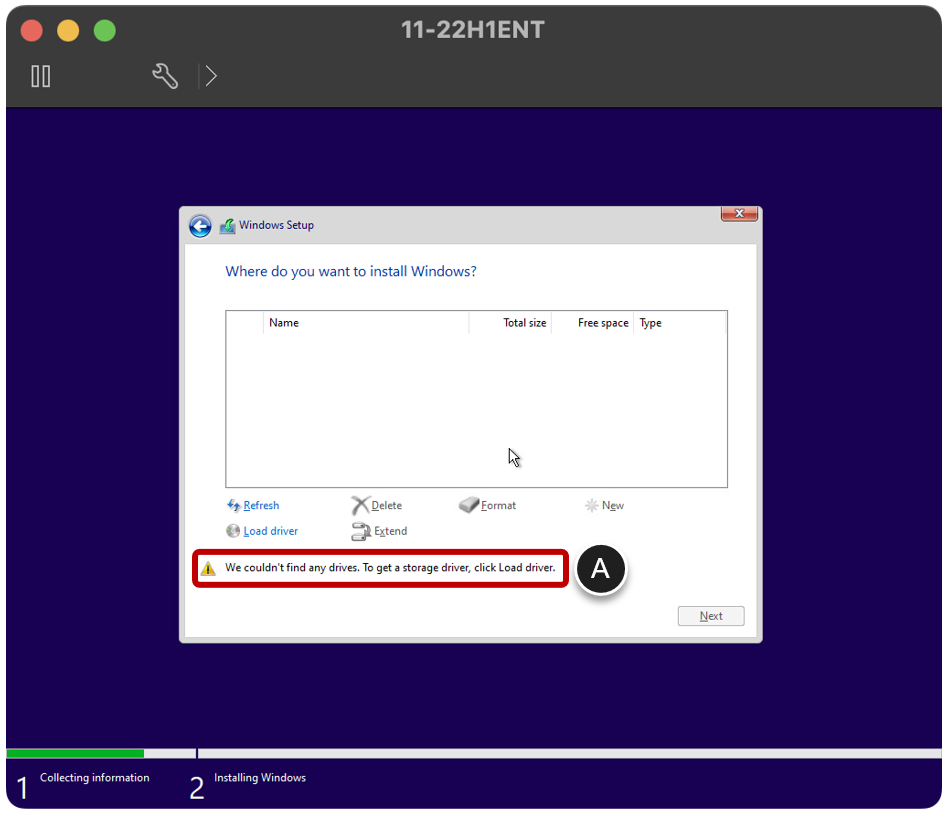
- If no drives are listed, load the PVSCSI Driver from the VMware Tools Disk Image
Note: Windows 11 22H2 and Windows Server 2022 both come with the PVSCSI driver so you should not need to mount the VMware Tools and select it. For those OS versions, move onto step 10.
- When this page is displayed without drives, go back to the vSphere Client.
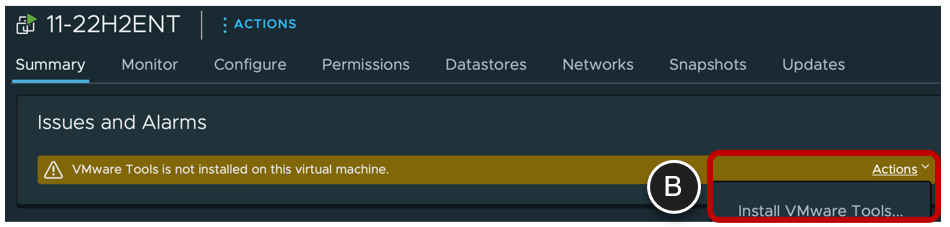
- Access the VMware Tools Disk Image from vSphere Web Client
- Click on Actions > Guest OS and click on Install VMware Tools.
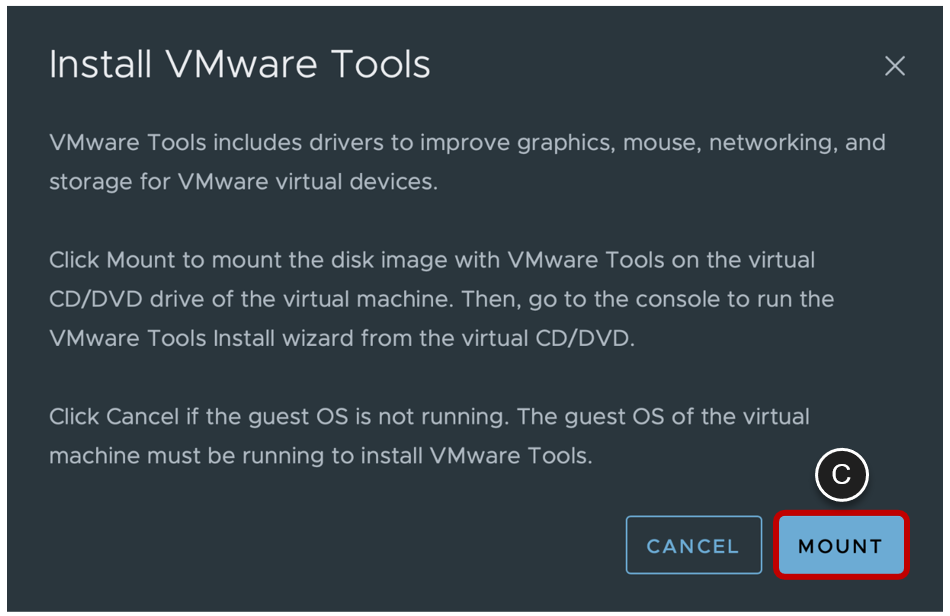
- Mount the VMware Tools Disk Image on a Virtual Drive of the VM
- Click on MOUNT and go back to the remote console.
- Switch back to the VM Remote Console and Open the Load Driver Dialog Box
- Click Load driver.
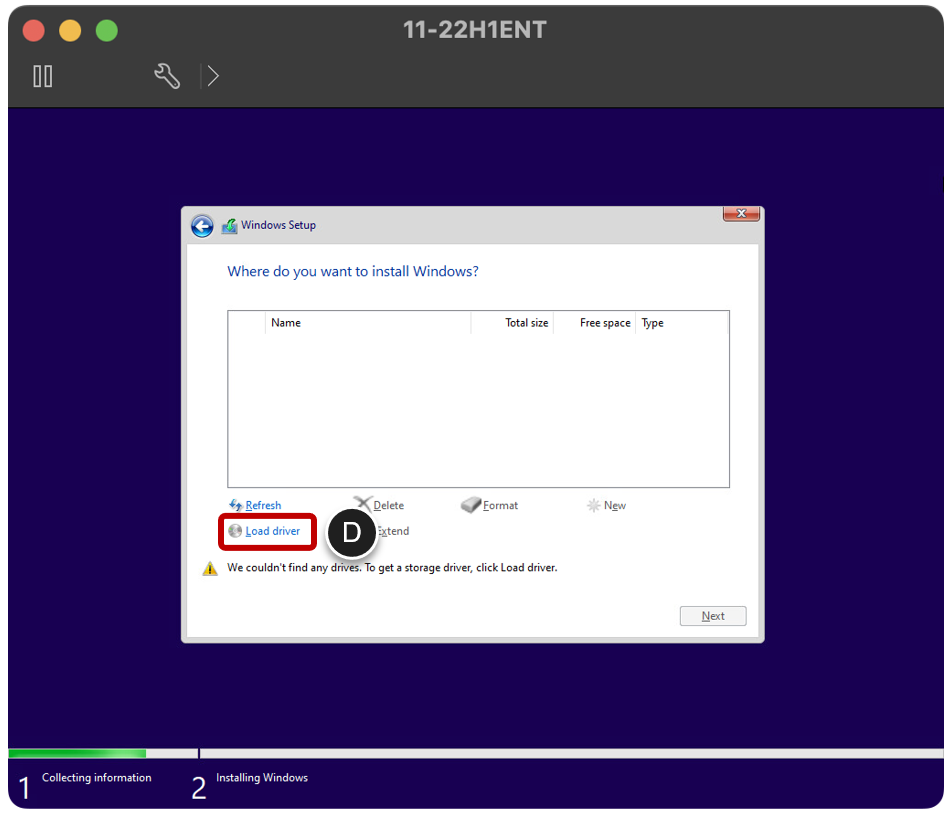
- Open the File Browser
- Click Browse.

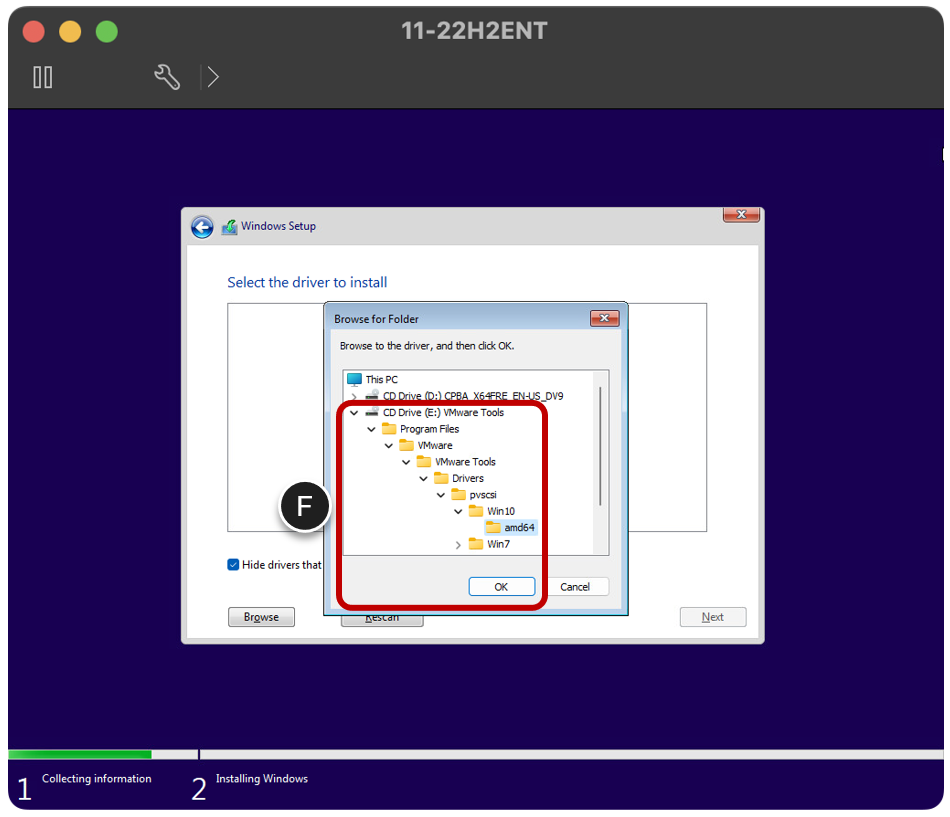
- Browse to the Correct PVSCSI Driver
- Browse to E:\Program Files\VMware\VMware Tools\Drivers\pvscsi\
- Then navigate to and select the sub-directory that corresponds to the version of Windows you are installing, as indicated in the table below.
- Click OK when you have selected the correct driver.
| Operating System | Version | PVSCSI Driver Location |
| Windows Server 2022 | 21H2 20348 | Built in |
| Windows 11 | 22H2 22621 | Built in |
| Windows 11 | 21H2 22000 | Win10\amd64 |
| Windows 10 | 22H2 19045 | Win8\amd64 |
| Windows 10 | 21H2 19044 | Win8\amd64 |
| Windows 10 | 21H2 19044 | Win8\amd64 |
| Windows 10 | 20H2 19042 | Win8\amd64 |
| Windows Server 2019 | 1809 17763 | Win8\amd64 |
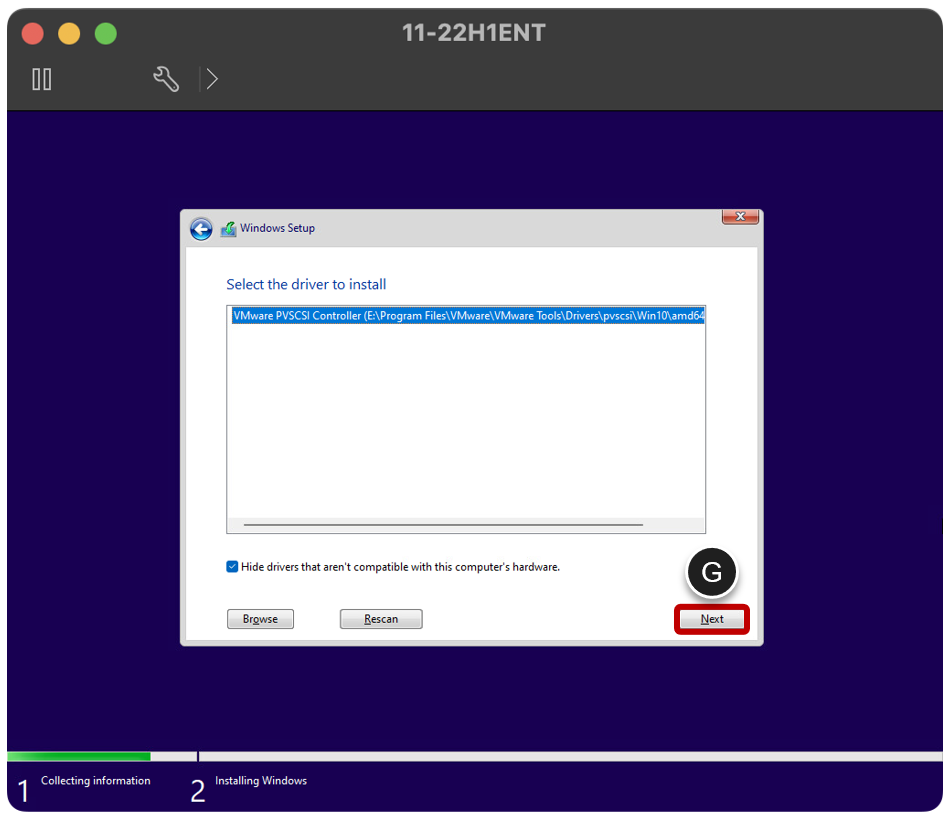
- Select the Driver
- With the VMware PVSCSI driver selected, click Next.
- Use the Default Installation Location
- Click Next.
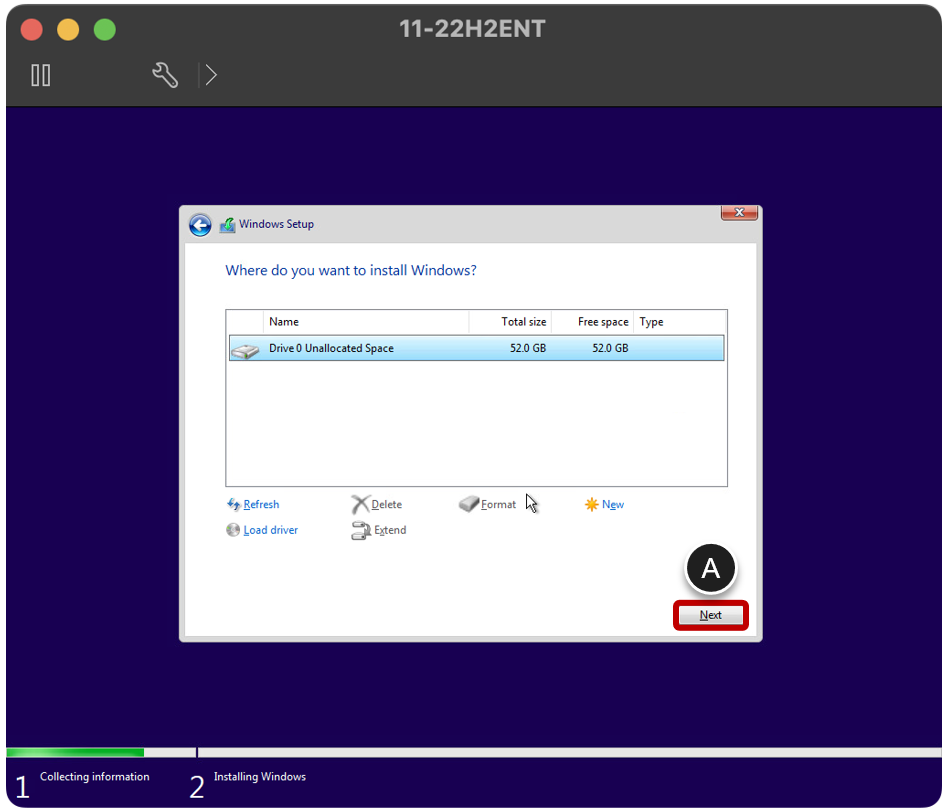
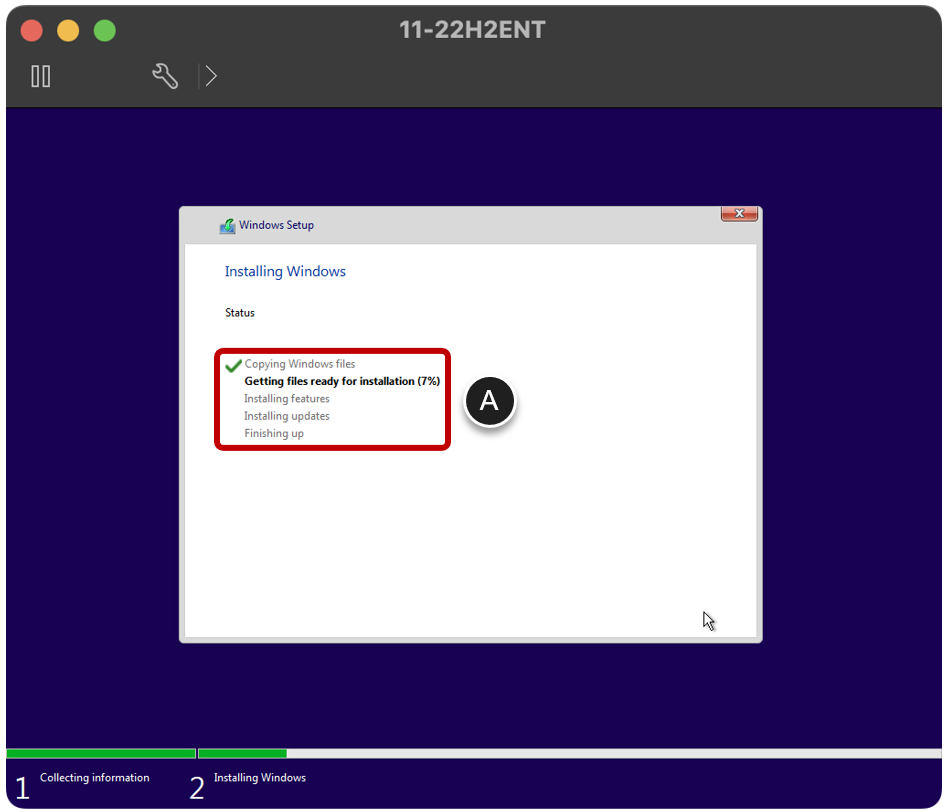
- Monitor Installation Progress
- Wait for Windows to be installed.
- Enter Audit Mode by Pressing CTRL+SHIFT+F3
After the Windows operating system is installed, you need to enter audit mode.
The screen at which you enter audit mode depends on which Windows operating system you are using. For example, some operating systems will automatically log in to Windows after a restart operation, while others will prompt for user credentials. If prompted, use Administrator for the username and leave the password field blank.
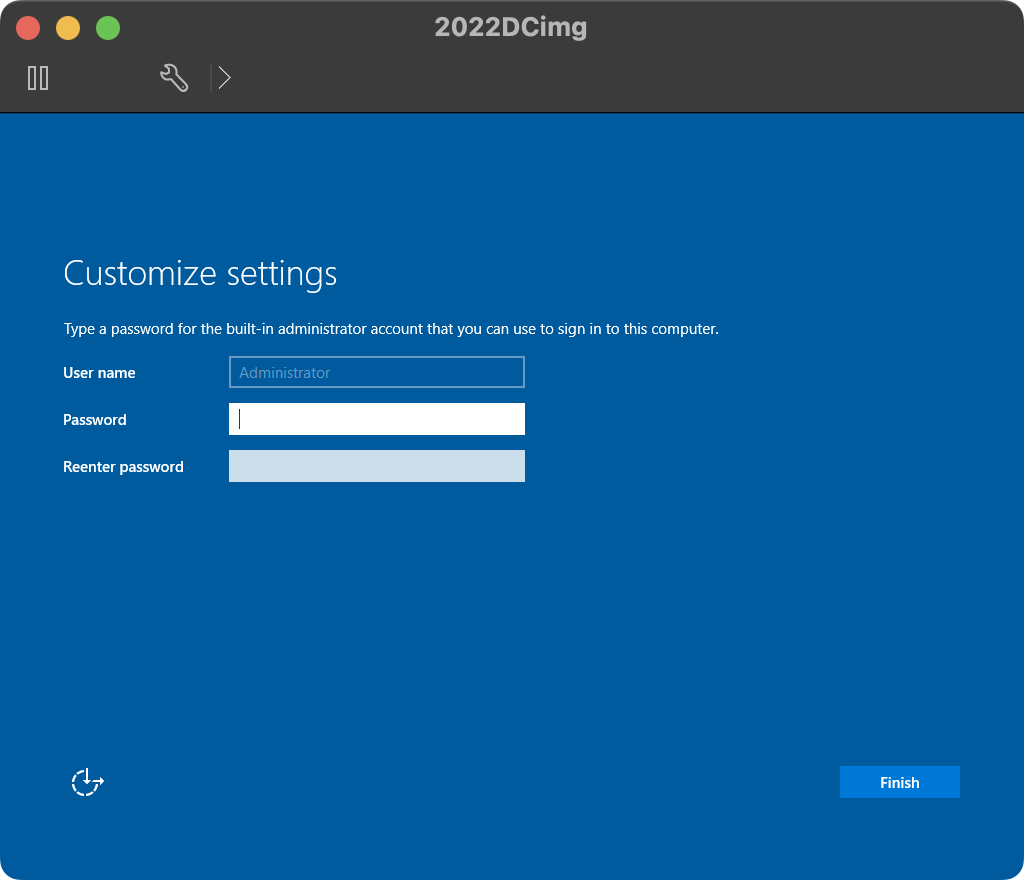
When you are prompted with Let's start with a region or Get going fast, or Personalize, or Customize Settings, or Setup Windows, press CTRL+SHIFT+F3 to switch to audit mode.
Note: Different Windows operating systems provide different prompts after the initial installation. The following screenshot shows the prompt after you install Windows 10 21H1. You would press CTRL+SHIFT+F3 to switch to audit mode in Windows 11 22H2 when you see this prompt.
The following screenshot shows the prompt after you install Windows Server. You would press CTRL+SHIFT+F3 to switch to audit mode in Windows Server when you see this prompt.
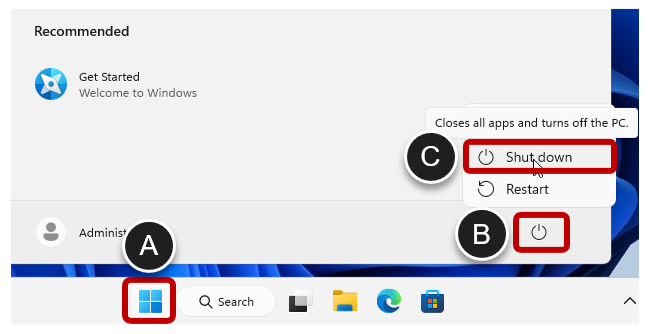
- Power Off
- Click the Start icon.
- Click the Power icon.
- Select Shut down.
Install VMware Tools
VMware Tools is a set of services and modules that enable several features in VMware products for better management of, and seamless user interactions with, guests operating systems.
For example, VMware Tools can run scripts that automate OS operations and can synchronize the time in the guest operating system with the time on the vSphere host. You must install VMware Tools in vSphere based VMs used for desktop and application pools.
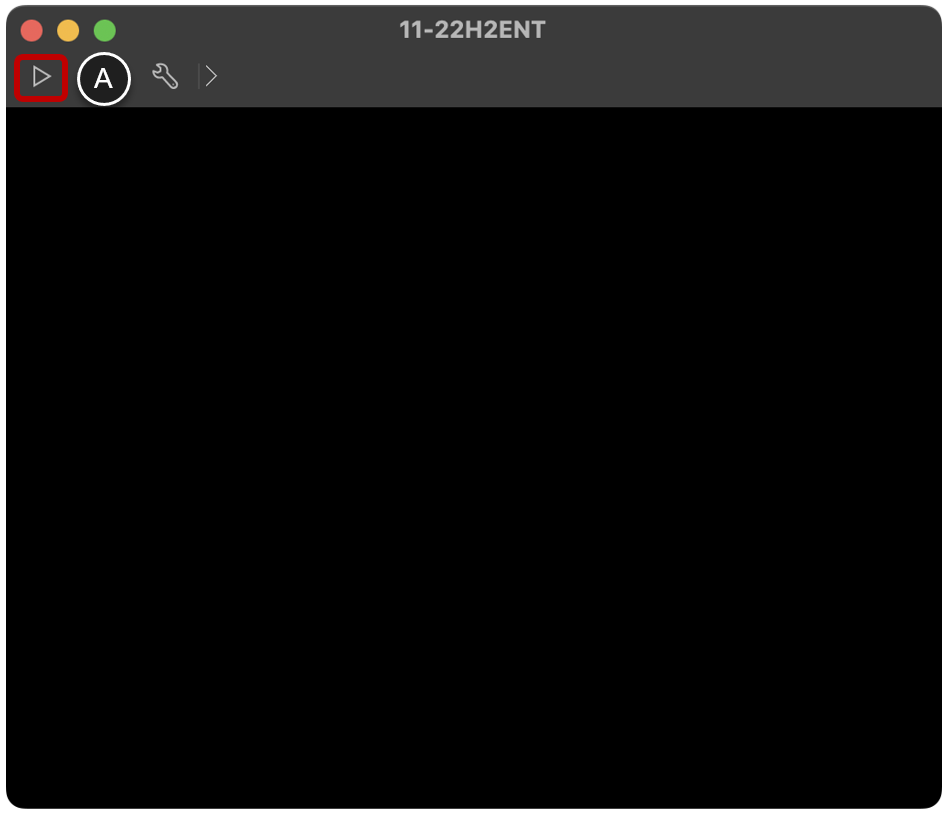
At the end of the previous exercise, Install Windows, you powered off the VM, which left the remote VM console dark, as shown in the following screenshot. If you closed that console, you need to open it again before you can begin this exercise. If you did not power off the VM, you must do so, or the Install VMware Tools link will not be available in the second screenshot.
- From the Remote VM Console, Start the VM
- Click on the play icon, which is a triangle-shaped icon at the top of the VM console.
- Access the VMware Tools Disk Image
- From the Summary tab for the VM in vSphere Web Client, click on Actions and click on Install VMware Tools.
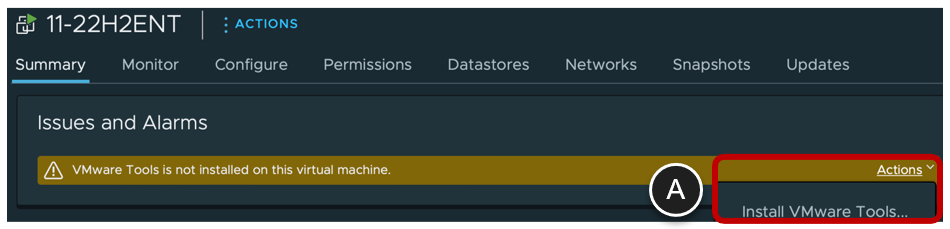
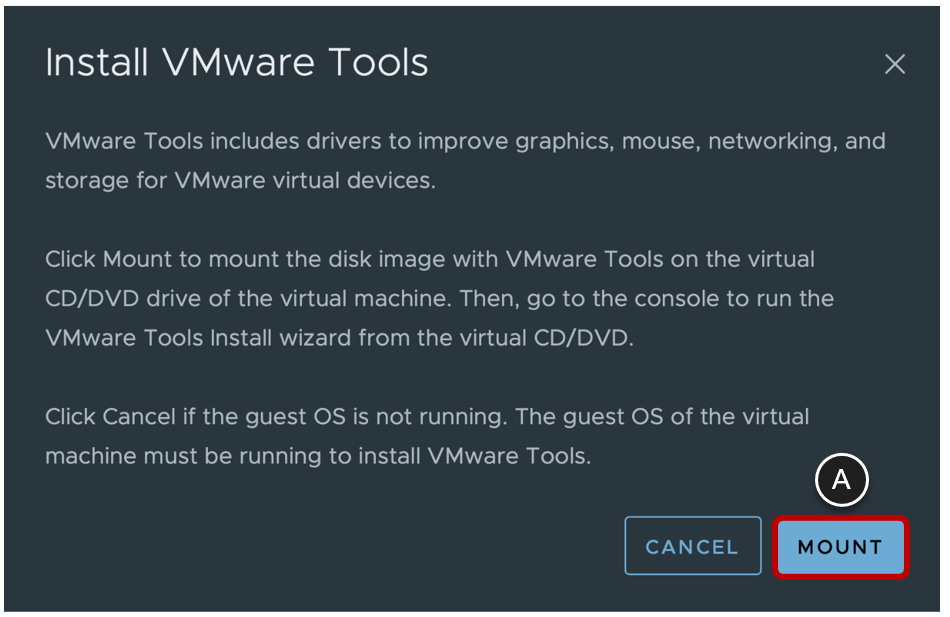
- Mount the VMware Tools Disk Image
- Click MOUNT.
- Go back to the vSphere remote console for the VM.
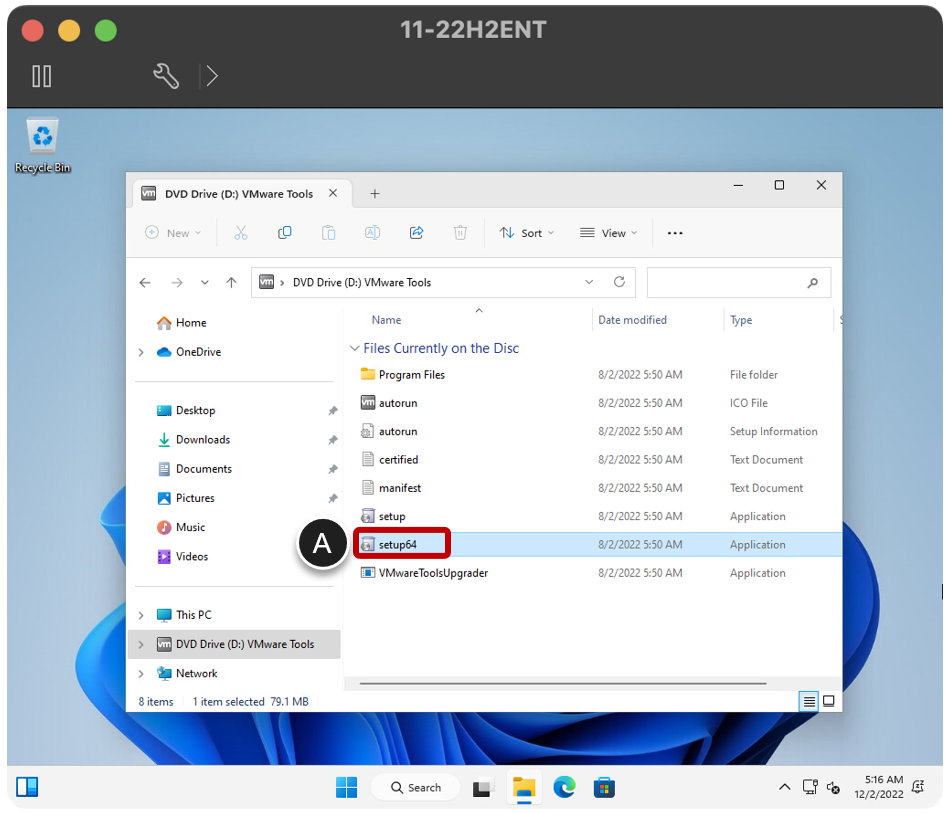
- Select the VMware Tools Virtual Drive
- Run Setup64.exe.
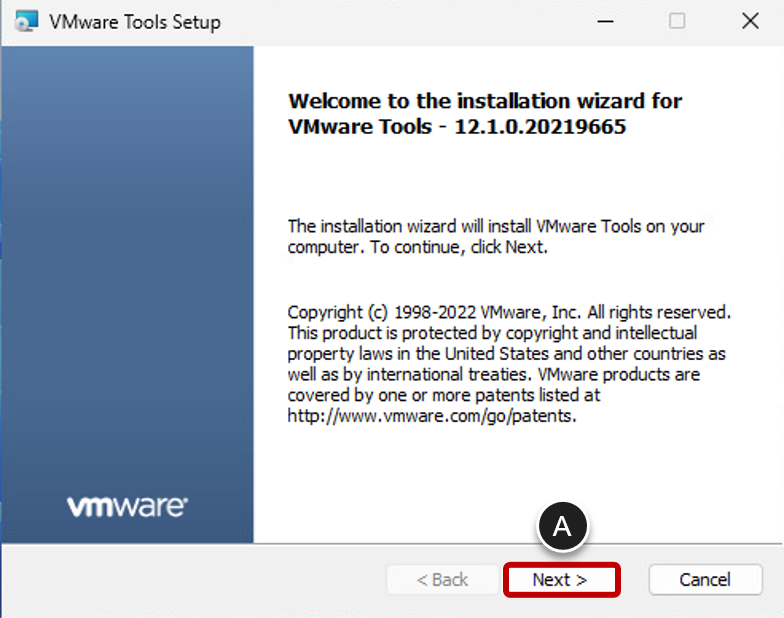
- Click Next on the Welcome Page
- Click Next.
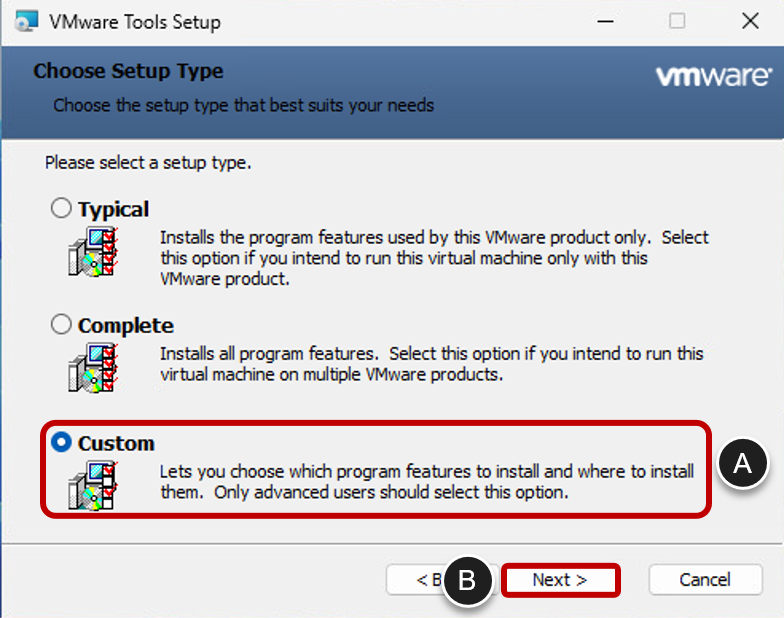
- Select the Custom Setup Type
- Select Custom.
- Click Next.
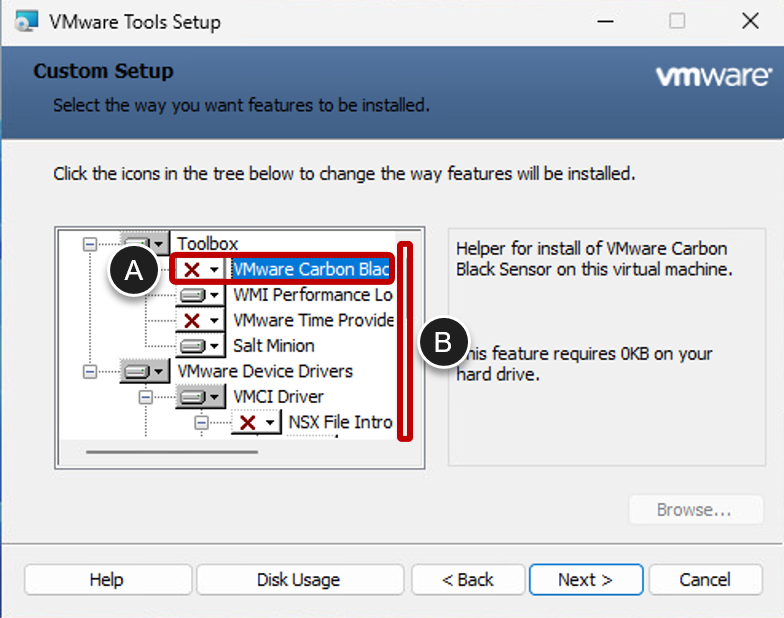
- Deactivate the Carbon Black Helper Component If Not Required
- Deselect VMware Carbon Black Helper, unless you use Carbon Black.
- Scroll down.
Note: If you leverage NSX, enable the NSX File and Network Introspection drivers.
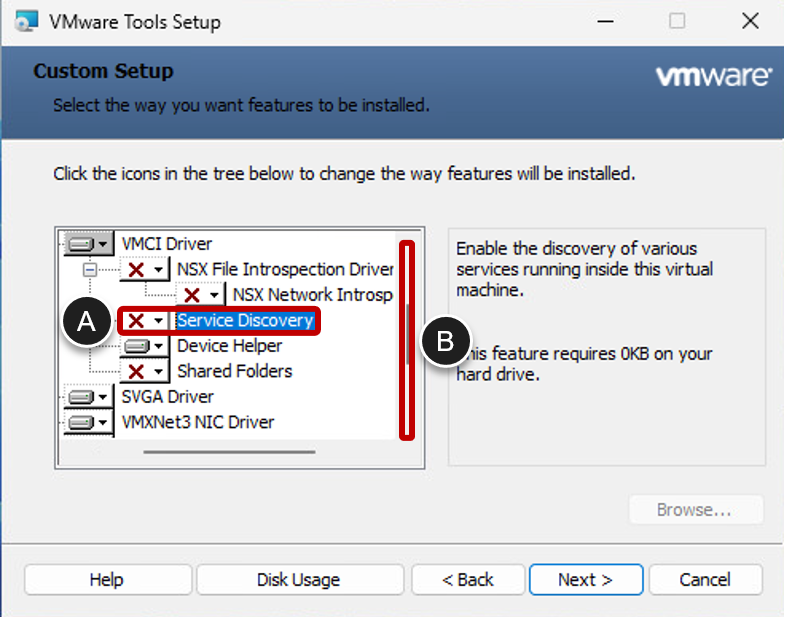
- Exclude the Service Discovery Component
- Deselect Service Discovery, which enables the discovery of various services running inside a virtual machine. This component is not necessary.
- Scroll down.
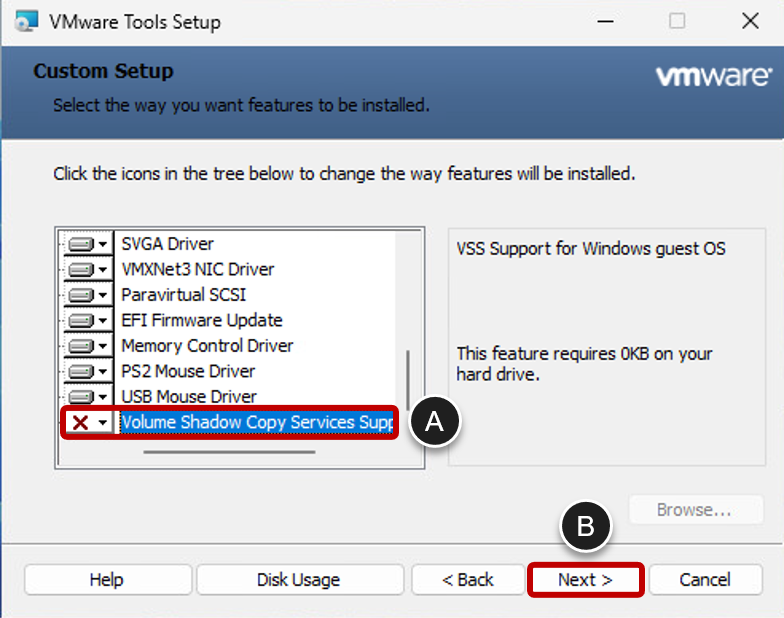
- Exclude the Volume Shadow Copy Component
- Deselect Volume Shadow Copy Services Support. This component is not required.
- Click Next.
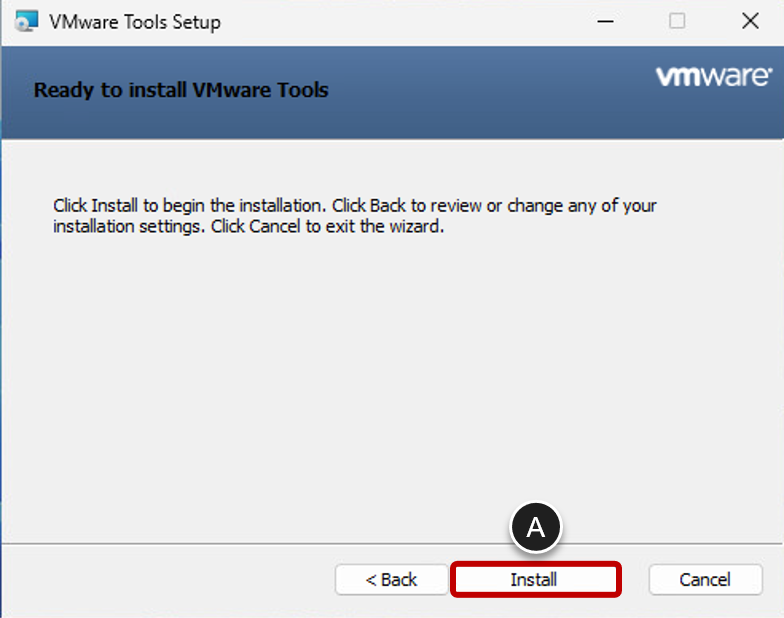
- Begin Installation of VMware Tools
- Click Install.
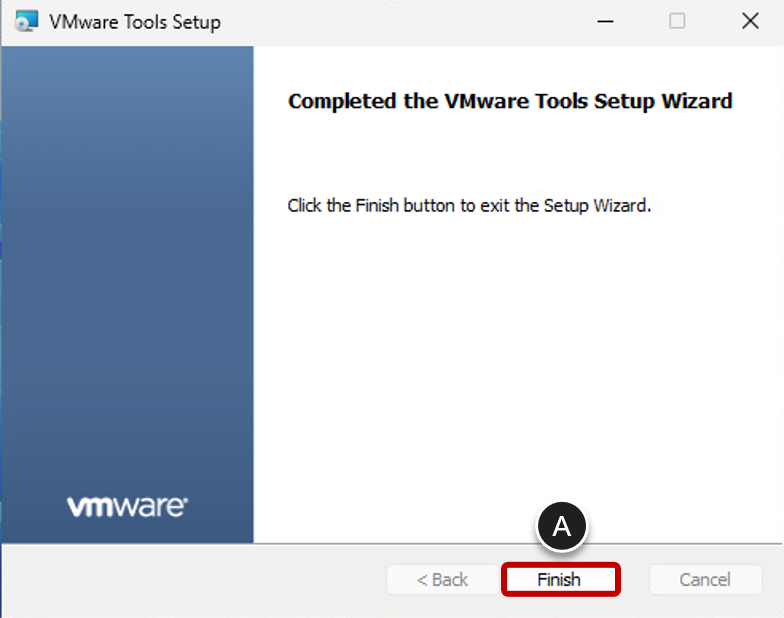
- Exit the Installation Wizard
- Click Finish.
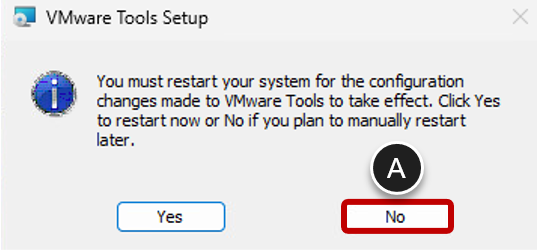
- Do Not Restart the VM
- Click No.
Install .Net Framework 3.5
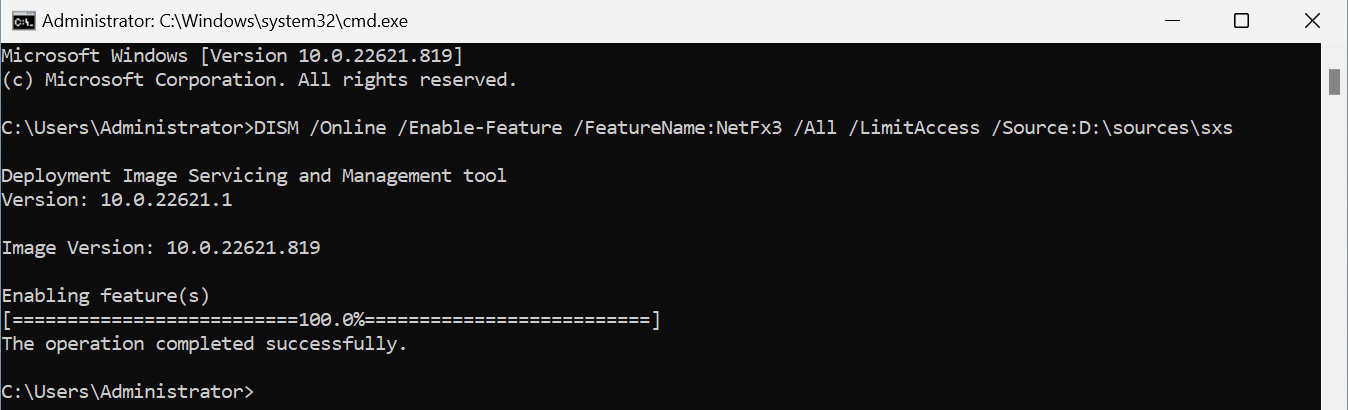
Open a command prompt and run the following command:
DISM /Online /Enable-Feature /FeatureName:NetFx3 /All /LimitAccess
/Source:D:\sources\sxs
Install any required component that leverages Windows Update, such as C++ runtimes, Office, and so on. The following screenshot shows an example of successfully running this command.
Update Windows
Install the latest Windows OS updates.
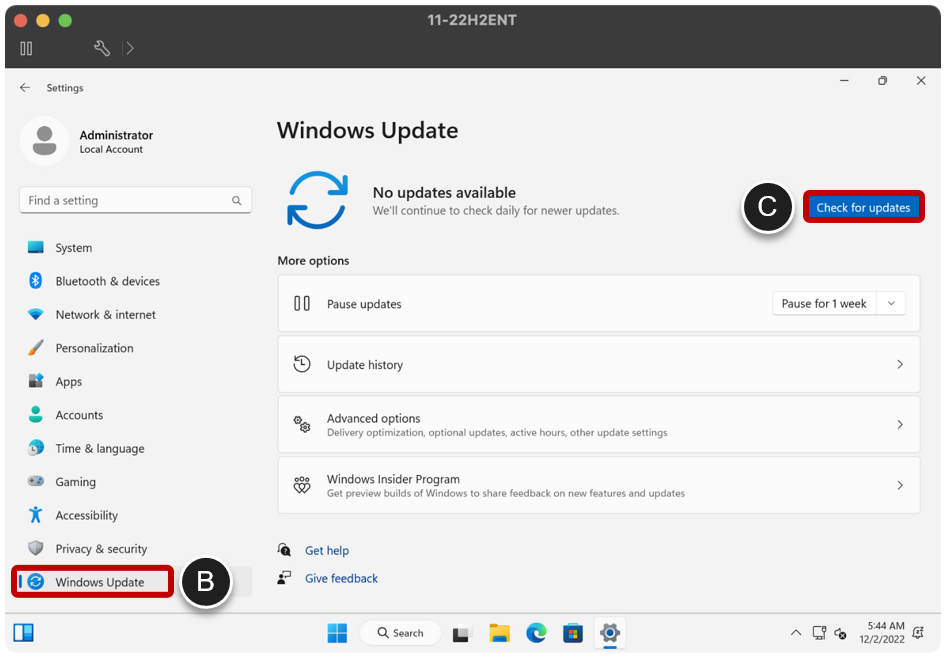
- Select the Update & Security Settings in Windows Settings
- Press Windows Key+I, to open Windows Settings.
- Click Windows Update or Update & Security.
- Click Check for updates and wait for the updates to be installed.
Note: For earlier non-LTSC Windows 10 versions, click Advanced options first and select Defer feature upgrades so that new features are not downloaded and installed. Deferring feature upgrades does not affect security updates.
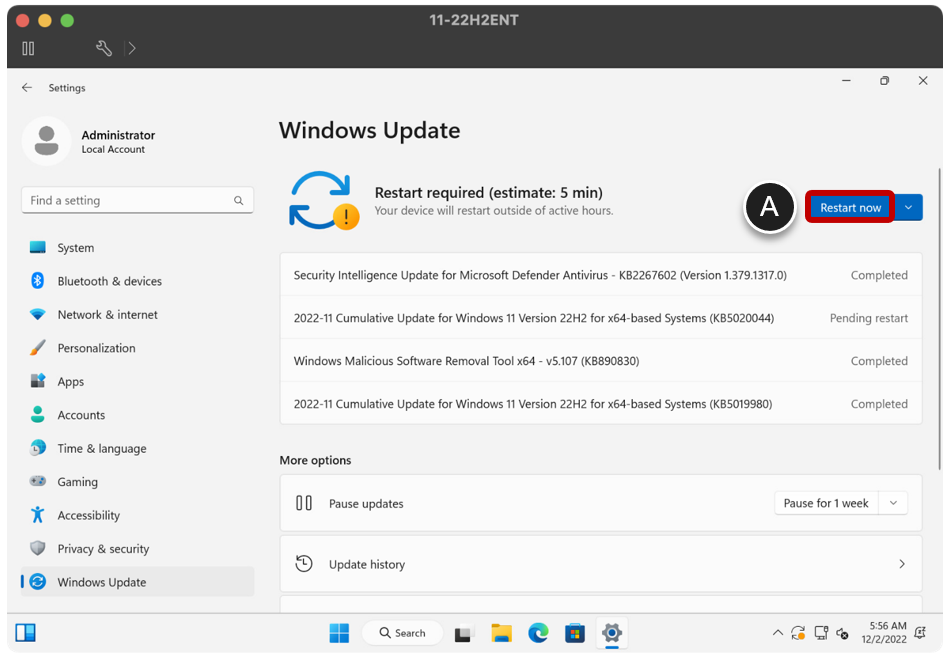
- Restart the VM
- Click Restart now.
- Run Windows Update again until no more updates are available, and no restarts are required.
Installing Virtual Desktop Agents and Applications in a vSphere-Based VM
Next, install the required Horizon Agents into the Windows image.
Install Horizon Agent
If you plan to create VMware Horizon desktop or application pools or server farms, you must install Horizon Agent on the golden VM image so that VMware Horizon servers can communicate with and manage the VMs that you deploy. The Horizon Agent also communicates with VMware Horizon® Client™ on end users' computers to provide features such as connection monitoring, virtual printing, access to the local file system, and access to locally connected USB devices.
Note: This procedure describes running the Horizon Agent installer in the guest operating system of a vSphere based VM. If instead you are using Horizon Cloud on Microsoft Azure, installing the Horizon Agent is included in the process of importing a VM from the Azure Marketplace, as described in the exercise Import a VM in Horizon Cloud on Microsoft Azure.
Prerequisites for Installing Horizon Agent
To perform this procedure, you need the following:
- User account – When you log in to the OS of the golden image to run the installer, the account you use must have local administrative privileges.
- Installer – Horizon Agent installer (
.exe) files are available from the Download VMware Horizon page. You must download the file and copy it to the system where it will run or to a location accessible to the system. - VM with supported Windows OS – The virtual machine must be running a Windows operating system that Horizon Agent supports. For a list of the systems we tested, see Tested Operating Systems. For a complete list of supported Windows 10 operating systems, see the VMware knowledgebase article Supported versions of Windows 10 on Horizon Agent Including All VDI Clones (Full Clones, Instant Clones, and Linked Clones on Horizon 7) (2149393).
Important: If you install Horizon Agent on a Windows Server machine on which the Remote Desktop Services (RDS) role is not installed, the wizard will prompt you to Install VMware Horizon Agent in 'desktop mode'.
Selecting this option configures the Windows Server machine as a single-user virtual desktop rather than as an RDS host. If you intend the machine to function as an RDS host, cancel the Horizon Agent installation, install the RDS role on the machine, and restart the Horizon Agent installation.
Installing the Horizon Agent
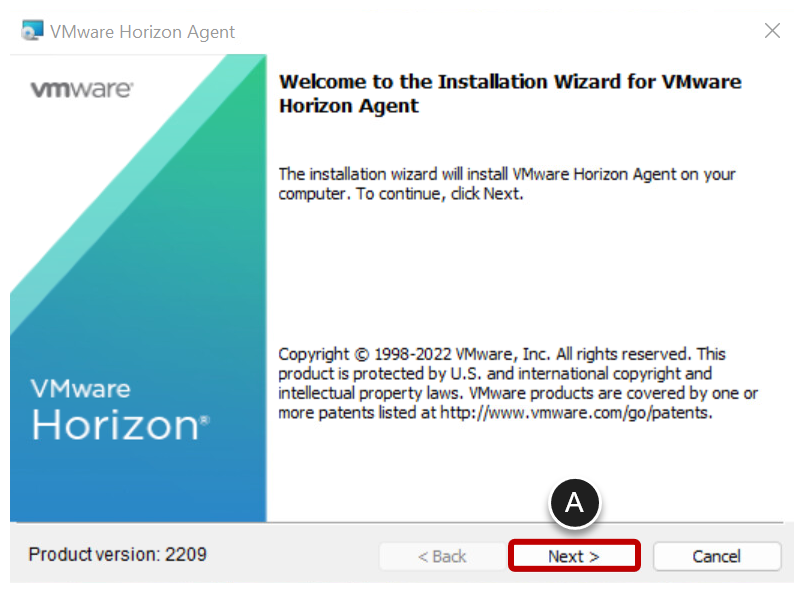
- Start the Horizon Agent Wizard
- Log in to the OS of the VM as an Administrator.
- Double-click the installer file to start the wizard and click Next on the Welcome page.
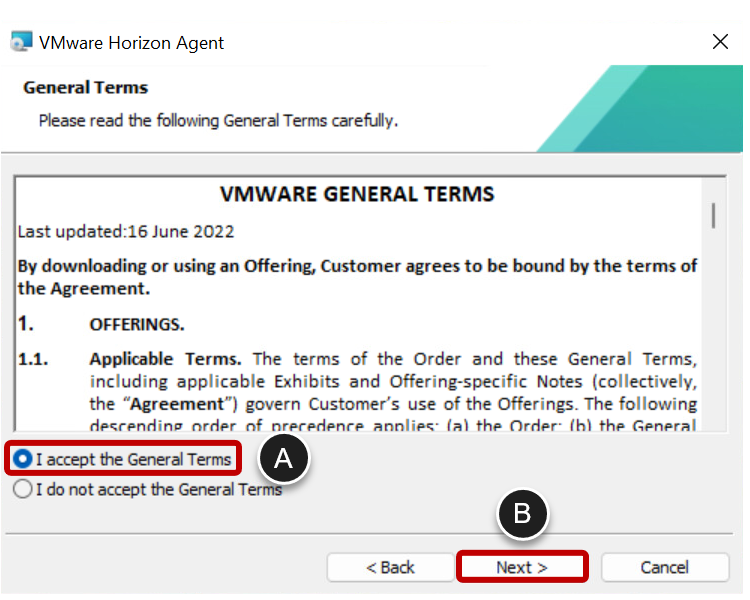
- Accept the License Agreement
- Select I accept the terms in the license agreement.
- Click Next.
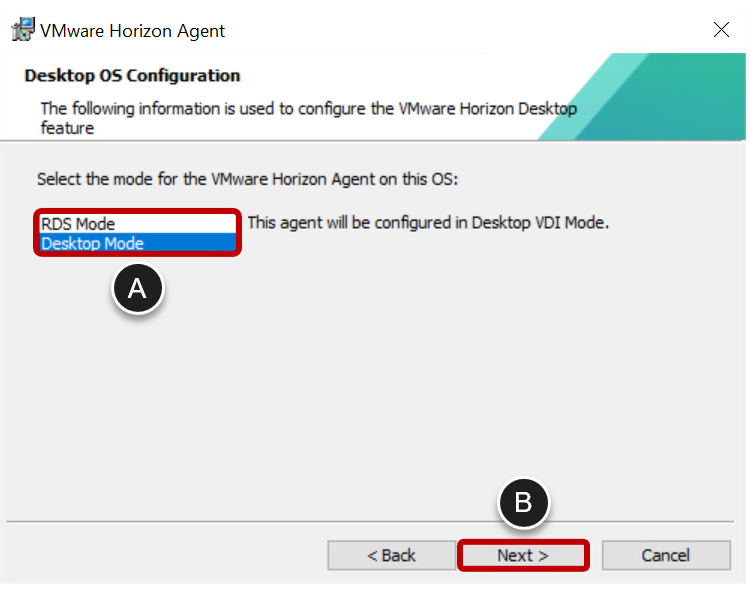
- Select the Mode
- When you install Horizon Agent on Windows Server 2016 or 2019, you must select either RDS Mode, for shared multi-user sessions, or Desktop Mode, for single-user (VDI) desktops. If you select RDS Mode the RDS role is installed and you are prompted to restart, after which you can launch the agent installer again.
- Click Next.
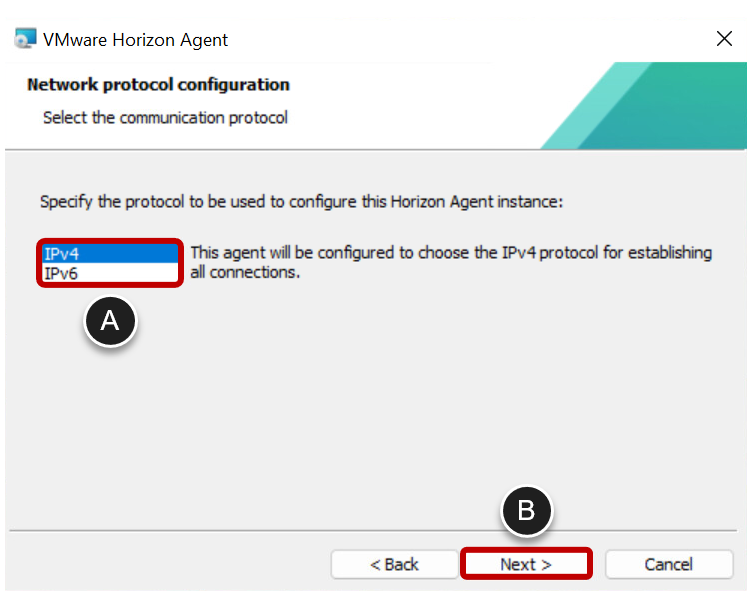
- Select Whether to Use IPv4 or IPv6
- Select IPv4 or IPv6.
- Click Next.
The environment must be either IPv6 only or IPv4 only. Horizon does not support a mixed IPv6 and IPv4 environment.
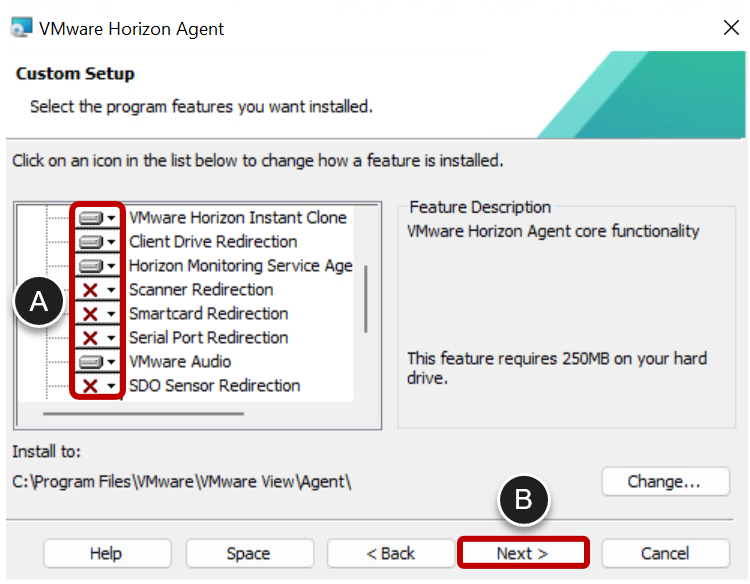
- Select Required Features
- Select only the features that will be used. For most environments these are Core, VMware Horizon Instant Clone Agent, VMware Audio, and VMware Integrated Printing.
- Click Next.
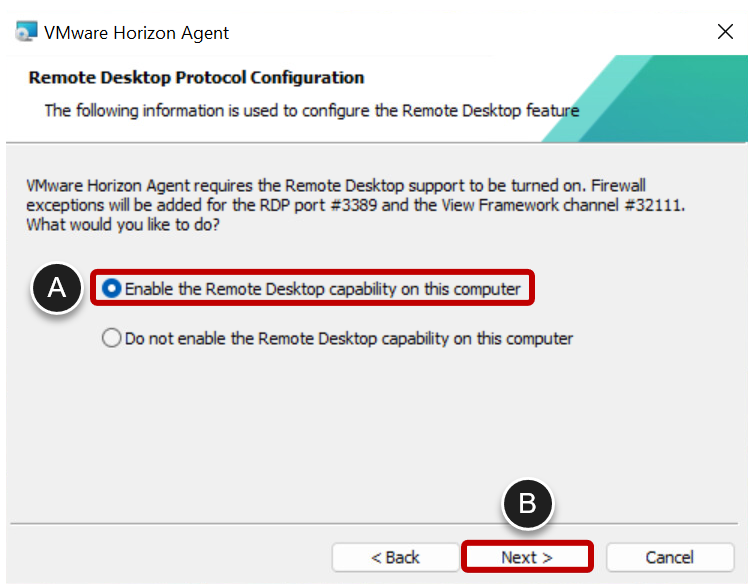
- Enable Remote Desktop support
- Click Next
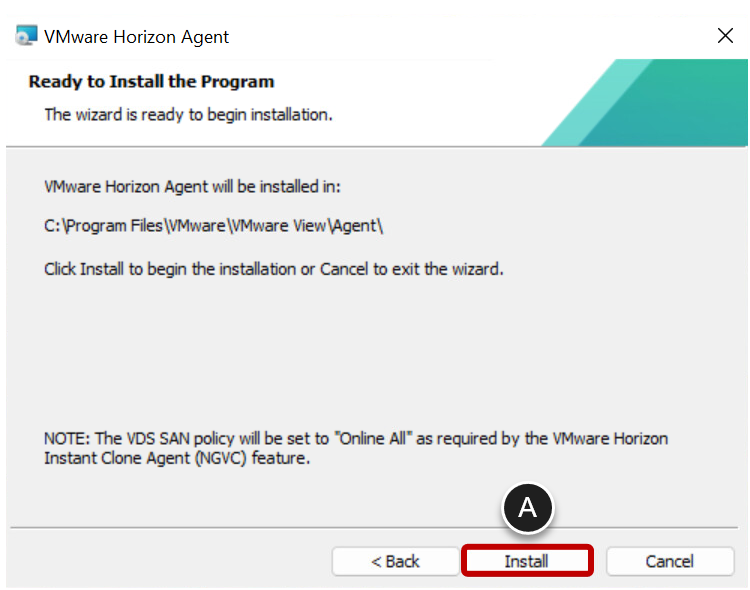
- Click Install
- Now that all the correct components are configured to be installed, click Install.
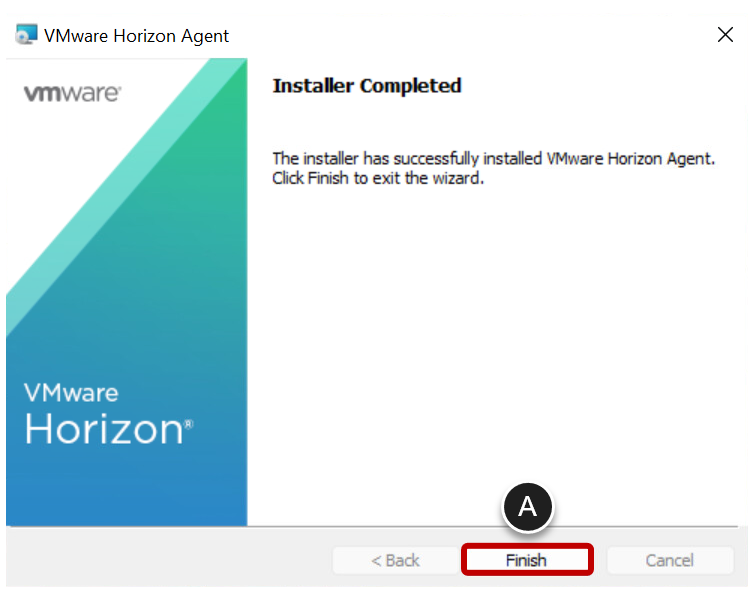
- Click Finish When Installation Is Complete
- Click Finish to close the installer.
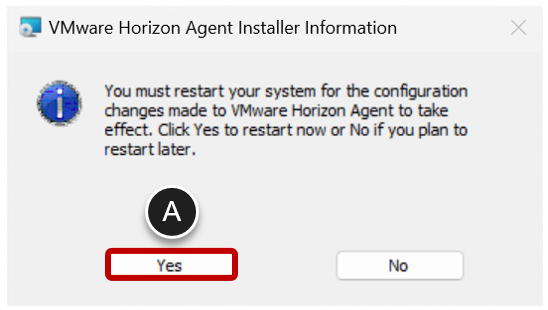
- Restart the VM
- When prompted to restart, click Yes.
Install the Dynamic Environment Manager Agent
VMware Dynamic Environment Manager™ (formerly called User Environment Manager) provides profile management by capturing user settings for the operating system and applications. Unlike traditional application profile management solutions, Dynamic Environment Manager captures only the settings that the administrator specifies. This reduces login and logout time because less data needs to be loaded. User data is managed through folder redirection.
FlexEngine, the Dynamic Environment Manager Agent component, applies the policies that the IT administrator creates with the Dynamic Environment Manager Management Console. To install this component, you run the same VMware Dynamic Environment Manager Setup wizard that you run to install the management console.
Notes: Installing the Dynamic Environment Manager Agent is an optional step. Install this agent only if you plan to use this functionality.
This procedure describes running the FlexEngine installer in the guest operating system of a vSphere based VM. If instead you are using Horizon Cloud on Microsoft Azure, installing the agent is included in the process of importing a VM from the Azure Marketplace, as described in the exercise Import a VM in Horizon Cloud on Microsoft Azure.
Prerequisites for FlexEngine Installation
To perform this exercise, you need the following:
- User account – When you log in to the OS to run the installer, the account you use must have administrative privileges.
- Installer – If necessary, you can download the installer from the VMware Downloads page. The installer is included in a ZIP file. You must download the file, extract the Dynamic Environment Manager MSI file, and copy it to the system where it will run or to a location accessible to the system.
- Internet access – The installation process includes a certificate revocation check to verify the digital signature of the MSI file. This check requires Internet access.
Note: When you install the Dynamic Environment Manager Agent on a VM where Horizon Agent is already installed, you are not required to specify a Dynamic Environment Manager license file. However, you are required to have purchased Dynamic Environment Manager. Dynamic Environment Manager Enterprise is included with Horizon Enterprise, and Dynamic Environment Manager Standard is included with Horizon Standard.
Installing Dynamic Environment Manager FlexEngine
- Start the Installer
- Log in to the OS of the VM as an Administrator.
- Double-click the installer file to start the wizard.
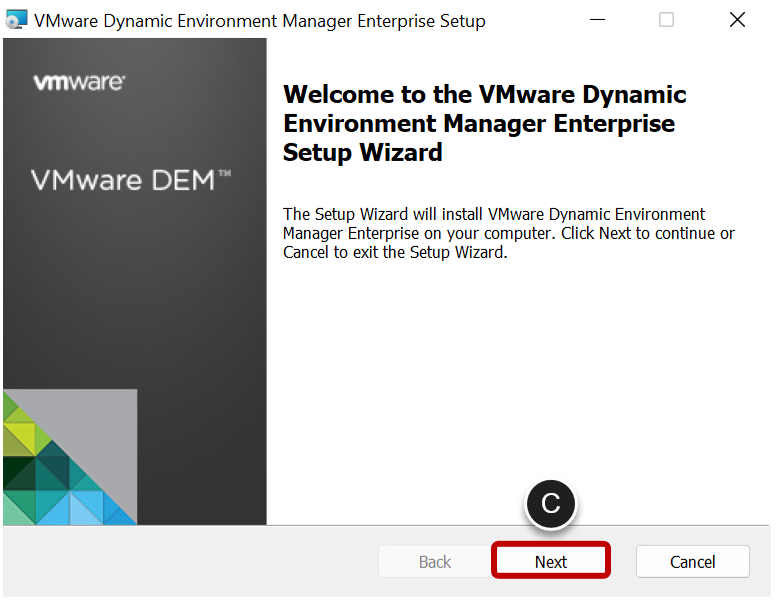
- Click Next on the Welcome page.
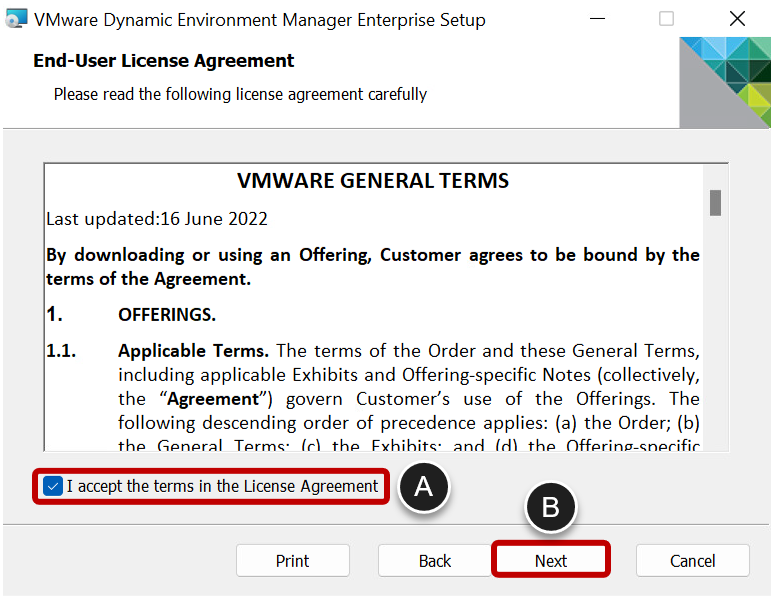
- Accept the License Agreement
- Select I accept the terms in the License Agreement.
- Click Next.
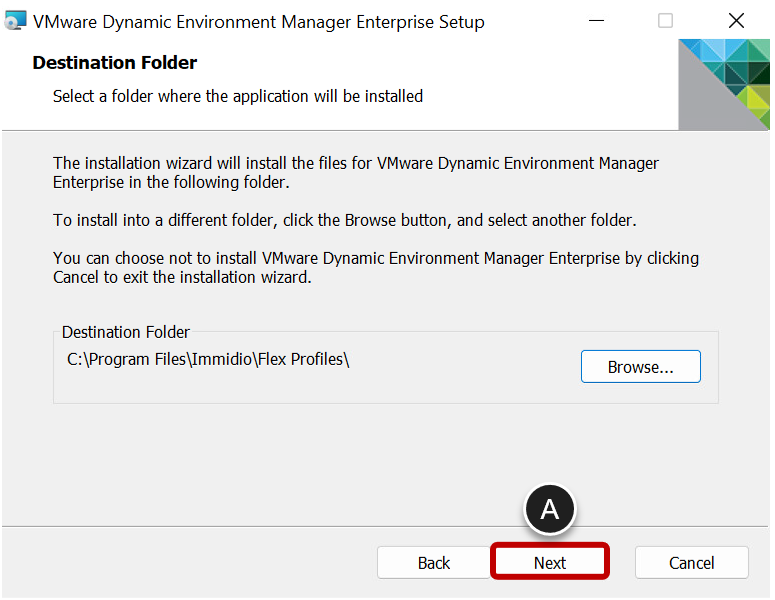
- Choose Destination Folder.
- Click Next.
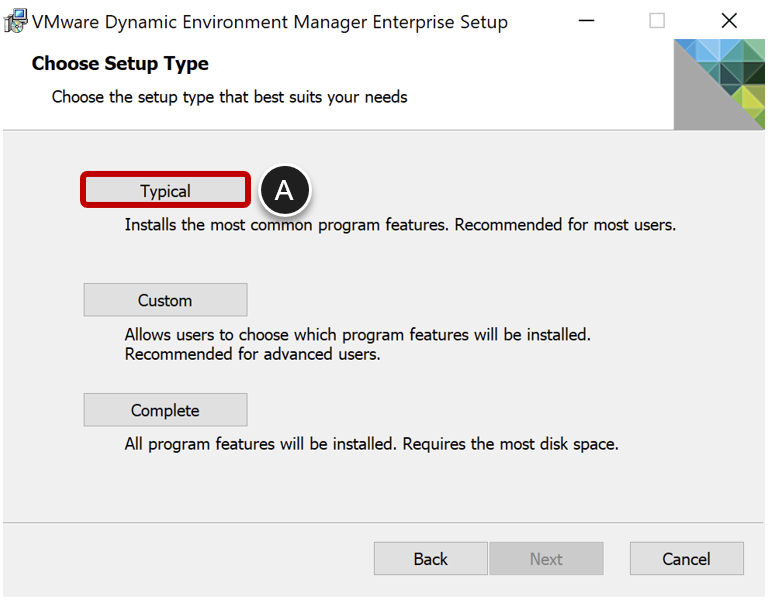
- Choose the Typical Setup Type
- Click Typical.
The typical setup installs the VMware DEM FlexEngine agent component, along with the optional components: Application Migration and Self-Support.
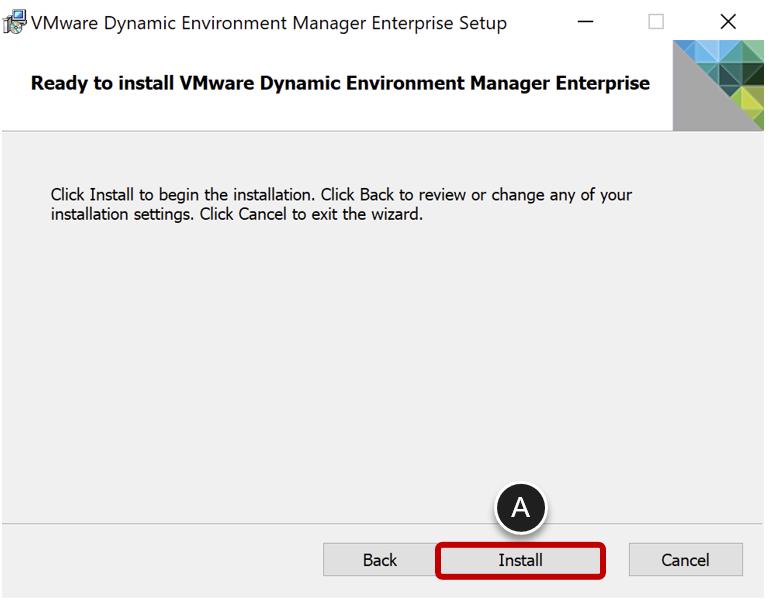
- Begin Installation
- Click Install
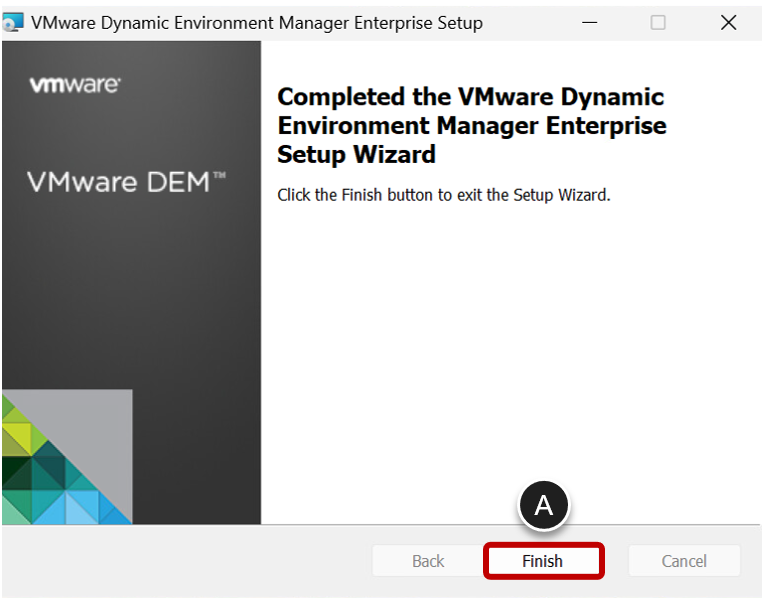
- Complete Installation
- Click Finish.
Install Applications in the Base Image
Although our primary application-delivery mechanism is App Volumes, it might be desirable to install select applications in the primary VM so that all clones get those applications in their base disk.
Many applications have integrated auto-update functionality. Install these applications and update them to the latest version, and then turn off or deactivate the auto-update functionality to prevent the clones from updating individually.
After you install any applications and drivers that you want to have in the base image, proceed to Running the OS Optimization Tool to Optimize, Generalize, and Finalize the OS.
Creating a VM in Horizon Cloud and Installing Agents
Horizon Cloud delivers feature-rich virtual desktops and applications using a purpose-built cloud platform that is scalable across multiple deployment options, including fully managed infrastructure from VMware and public cloud infrastructure from Microsoft Azure. The service supports a cloud-scale architecture that makes it easy to deliver virtualized Windows desktops and applications to any device, anytime. And, with a flexible subscription model, organizations can easily get up and running quickly.
Import a VM in Horizon Cloud on Microsoft Azure
If you are using Horizon Cloud on Microsoft Azure rather than Horizon 8, instead of creating a VM (as described in Creating a vSphere-Based VM) and then manually running various agent installers on that VM (as described in Installing Virtual Desktop Agents and Applications in a vSphere-Based VM), you import the VM from the Azure Marketplace. When completing the import wizard, you select various check boxes in order to automatically install Horizon Agent and the App Volumes Agent. The Dynamic Environment Manager Agent and vRealize Operations Desktop Agent are not listed as the options but will also be installed. The following procedure describes the process.
See VMware Horizon Cloud Service - next-gen Deployment and Onboarding on how to log in.
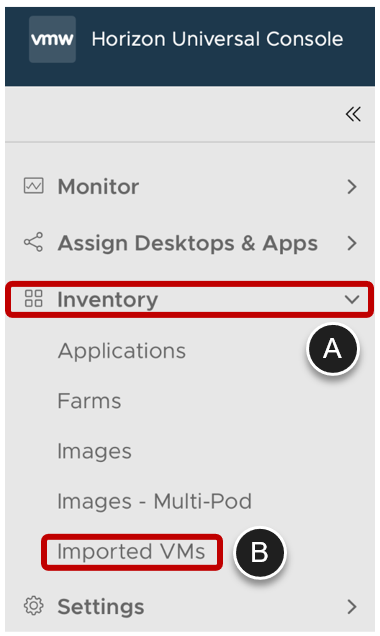
- Navigate to the Imported VMs Page
- Click Inventory.
- Click Imported VMs.
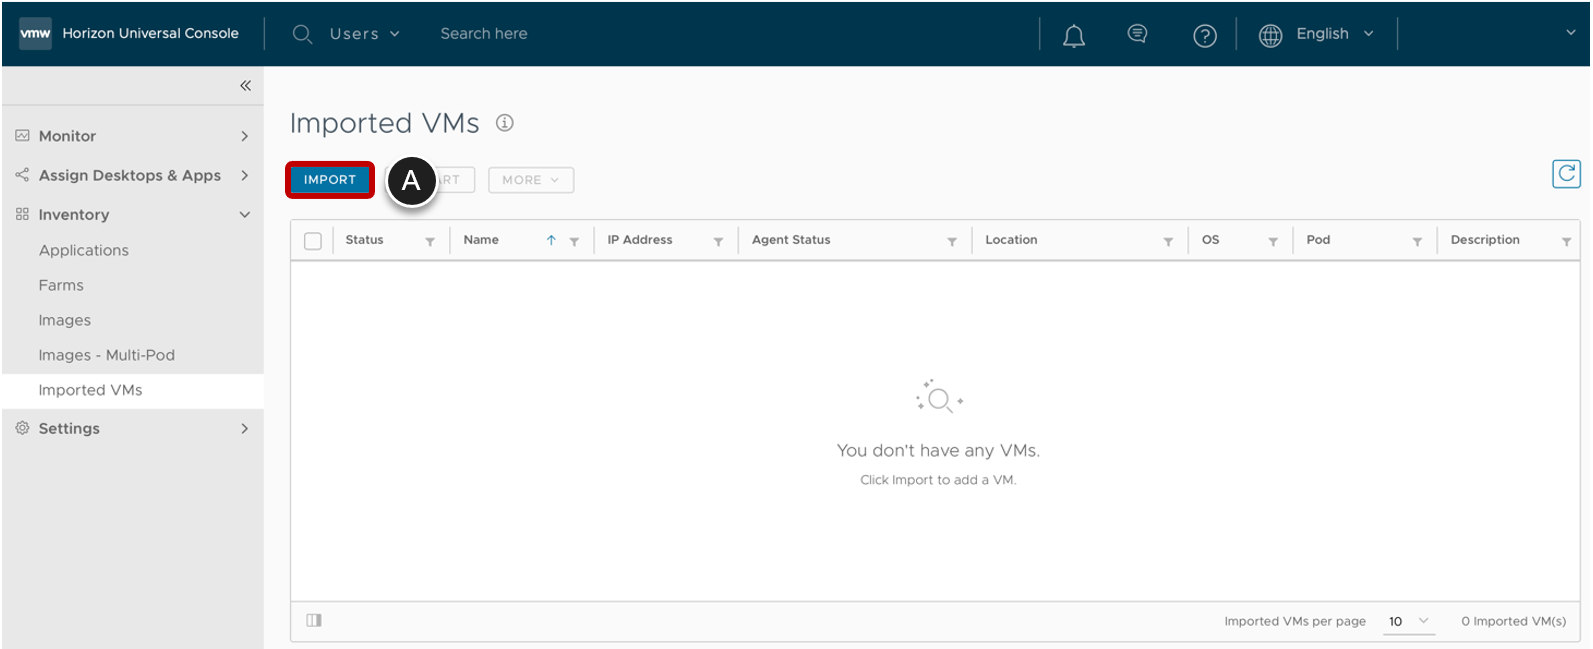
- Start the VM Import Wizard
- Click IMPORT.
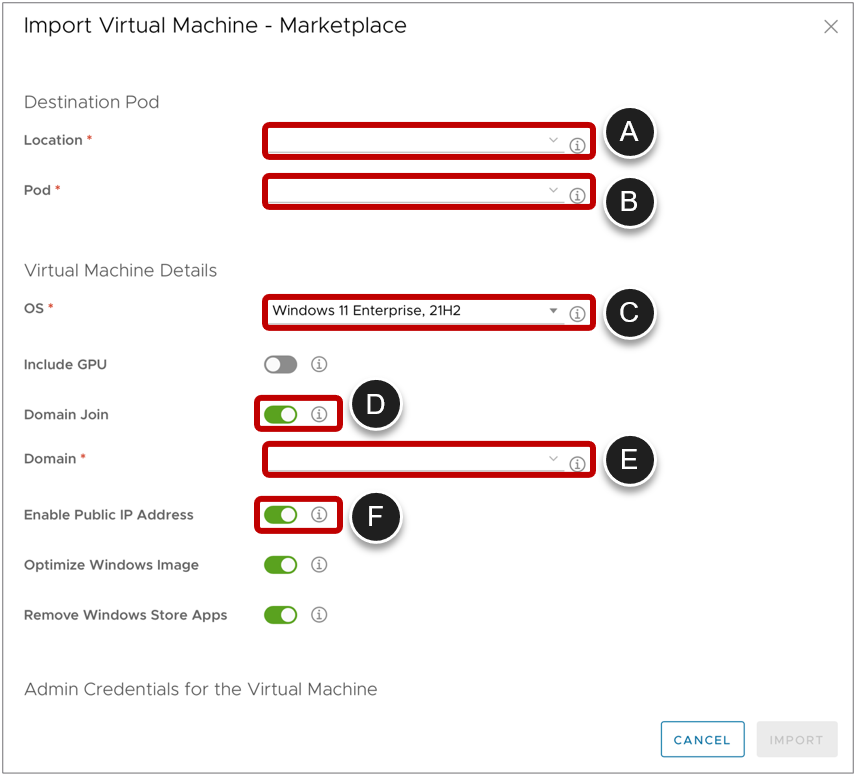
- Specify the Destination, VM Details, and Admin Credentials
- Select a Location.
- Select a Pod.
- Select an OS.
- Enable Domain Join.
- Select a Domain.
- Enable Public IP Address when you do not have direct access to the VNET.
- Scroll down.
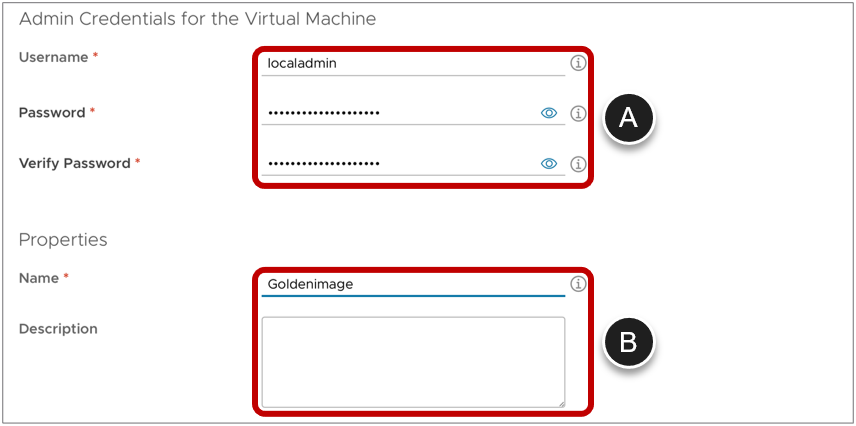
- Specify the Machine Name and Select Horizon Agent Features
- Provide a local administrator Username and Password.
- Provide a Name and optionally a Description.
- Scroll down.
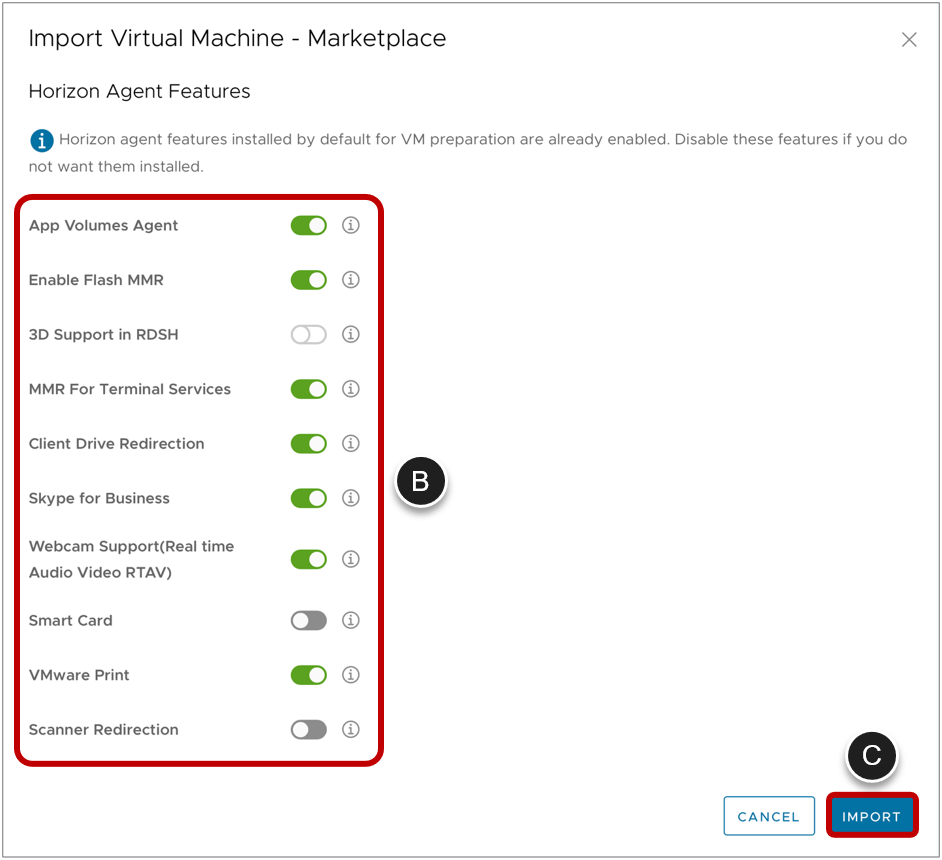
- Choose Horizon Agent Features.
- Click Advanced Options.
- Choose only the Horizon Agent Features that are required.
- Click IMPORT.
- Select Reset Agent Pairing (After the import is finished):
- Select the VM.
- Click MORE.
- Select Reset Agent Pairing.

- Install Applications
- RDP to the machine using the IP address listed and install any applications and drivers that you want to have in the base image.

Next, proceed to Running the OS Optimization Tool to Optimize, Generalize, and Finalize the OS.
Running the Windows OS Optimization Tool to Optimize, Generalize, and Finalize the OS
The Windows OS Optimization Tool for VMware Horizon (OSOT) helps optimize Windows 10/11 and Windows Server 2019/2022 systems for use as VDI or RDSH server VMs. OSOT includes customizable templates to activate or deactivate Windows system services and features, according to VMware recommendations and best practices, across multiple systems. Because most Windows system services are enabled by default, OSOT can be used to easily deactivate unnecessary services and features to improve performance. For more information on the Windows OS Optimization Tool for VMware Horizon, see Optimizing Images for Horizon.
OSOT also includes the ability to run commonly used Windows tools for image creation and optimization, including the Native Image Generator (Ngen.exe), NTFS Compression (compact.exe), and Deployment Image Servicing Management (DISM.exe). These tools can be run from the Finalize tab of the OSOT.
Note: This version of this document does not include instructions for using Windows mandatory profiles. we found that this feature does not work reliably when used with Windows 10 version 1809 and later. We decided that, for consistency’s sake, we would remove the recommendation for all versions. We found that login times are nearly equivalent if you use default user profiles instead of mandatory user profiles.
Analyze and Optimize the OS Using Customizable Templates
In this procedure, you analyze the list of recommended optimizations, and select and apply those optimizations.
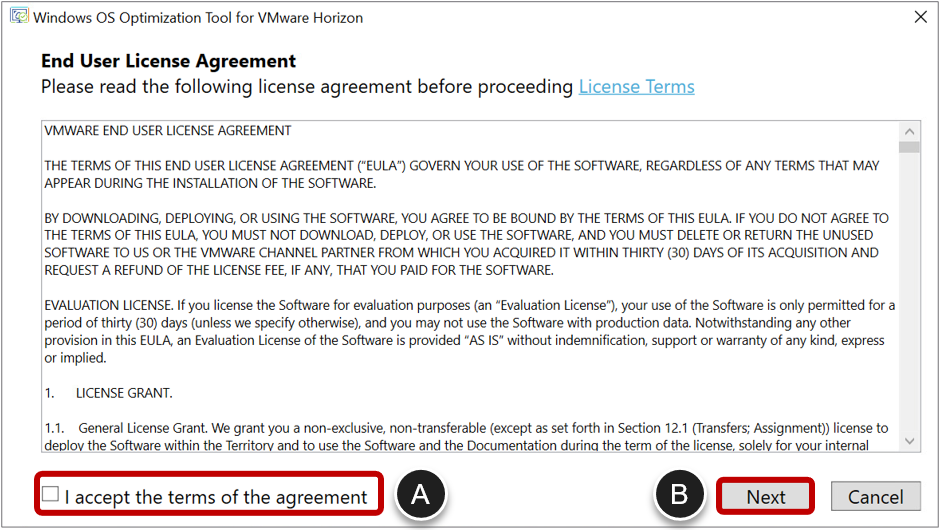
- Accept the license.
- Select I accept the terms of the agreement.
- Click on Next.
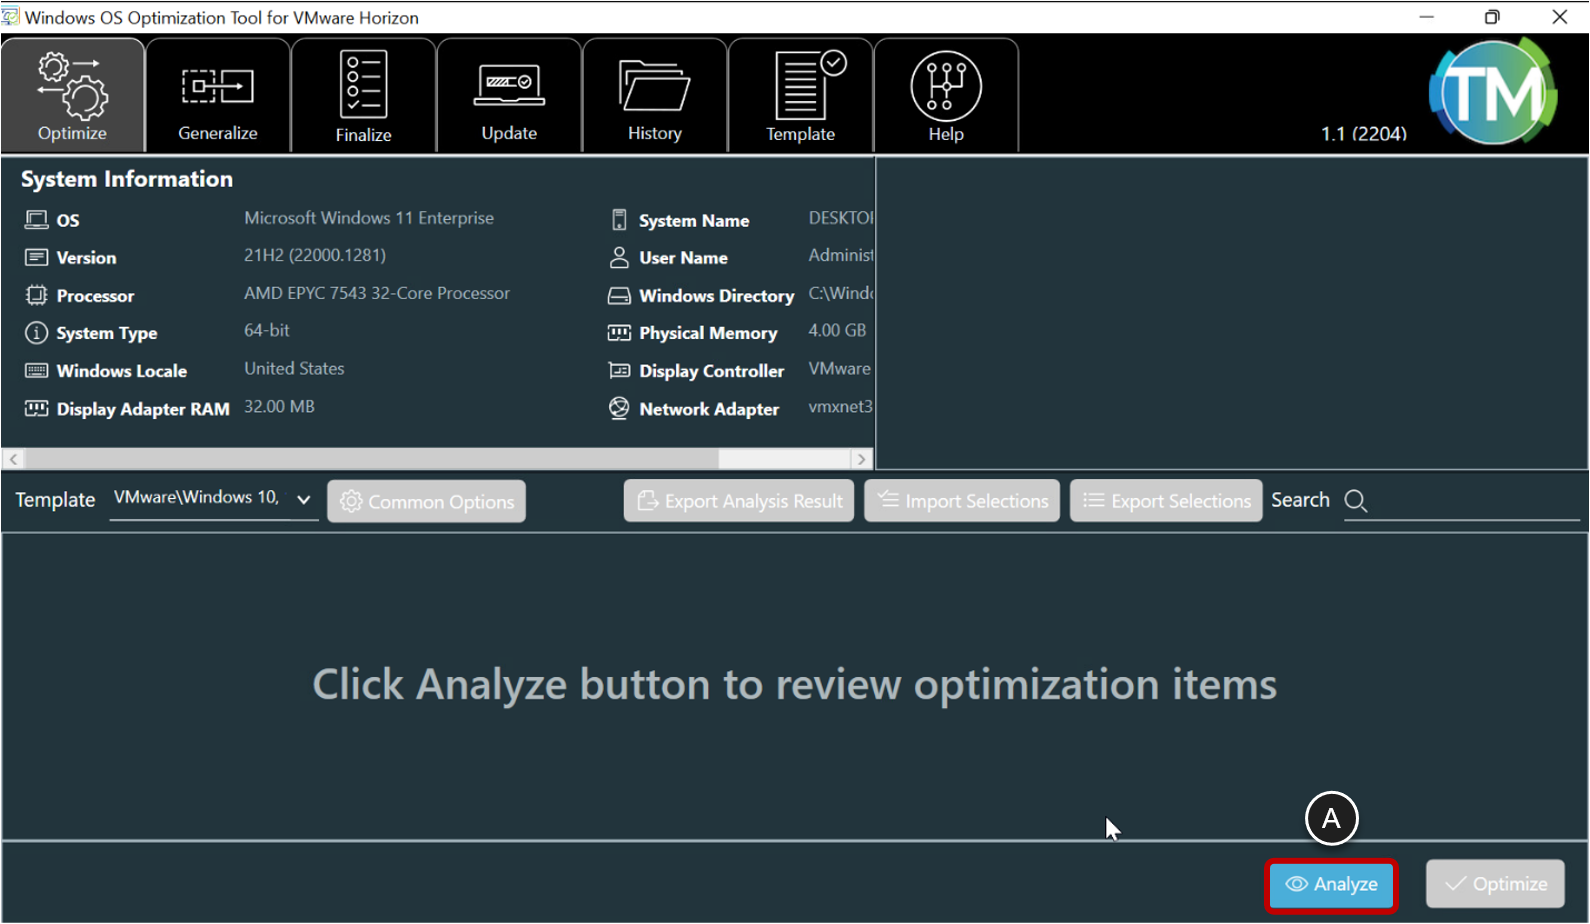
- Analyze Recommended System Optimizations to Apply
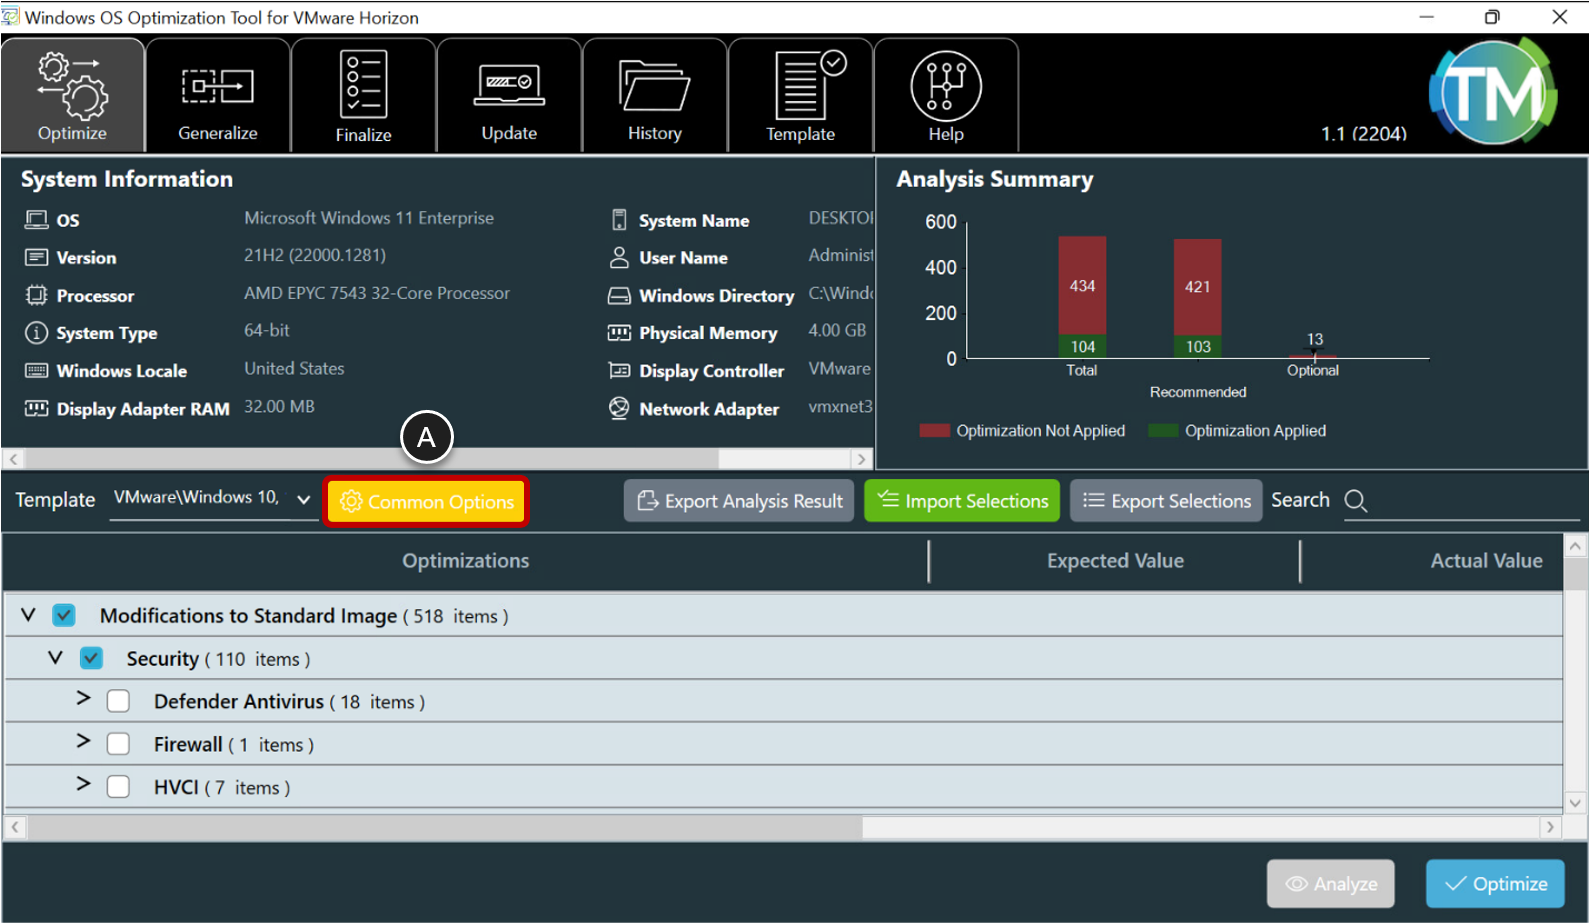
- Click Analyze.
- Select Common Options
- Click the Common Options button.
- Review the Tabs to Determine Which Options to Set
Here you can select alternate defaults that will change the selection of optimizations. As an example, for a persistent VM, you probably want to make changes to Windows Update, Search, and Security, or you might want to keep certain Store Apps.
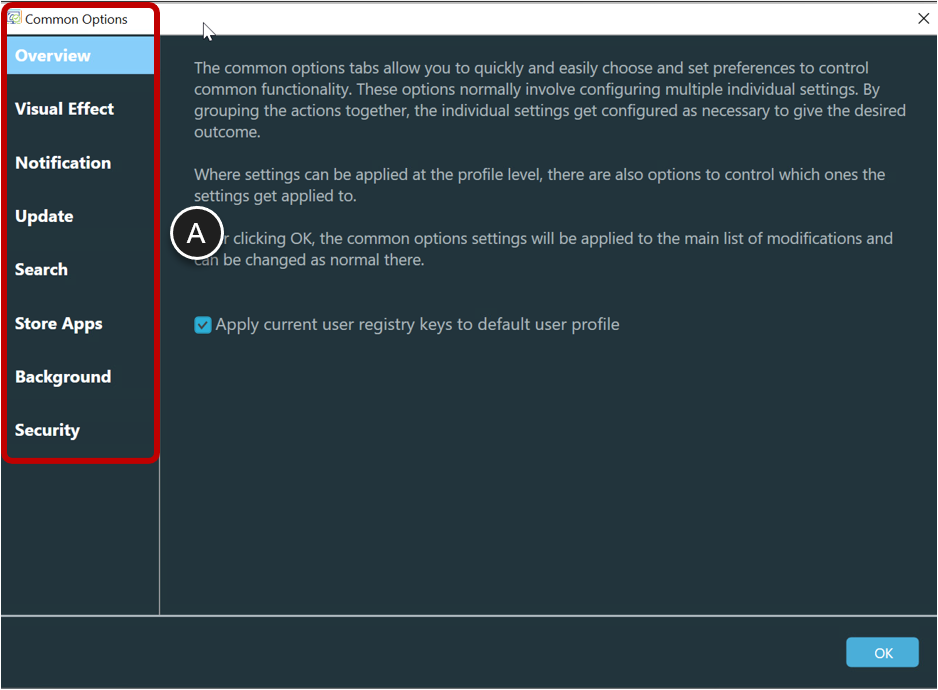
- (Optional) Revert to Security Defaults Used in Older Versions of OSOT
Note: The default behavior of Windows Security Center, Antivirus, and Firewall have changed since OSOT 2106. If you prefer, you can revert to the old behavior in the Common Options:
- Click Security.
- Select Disable Firewall, Disable Antivirus, and Disable Security Center, and click OK.

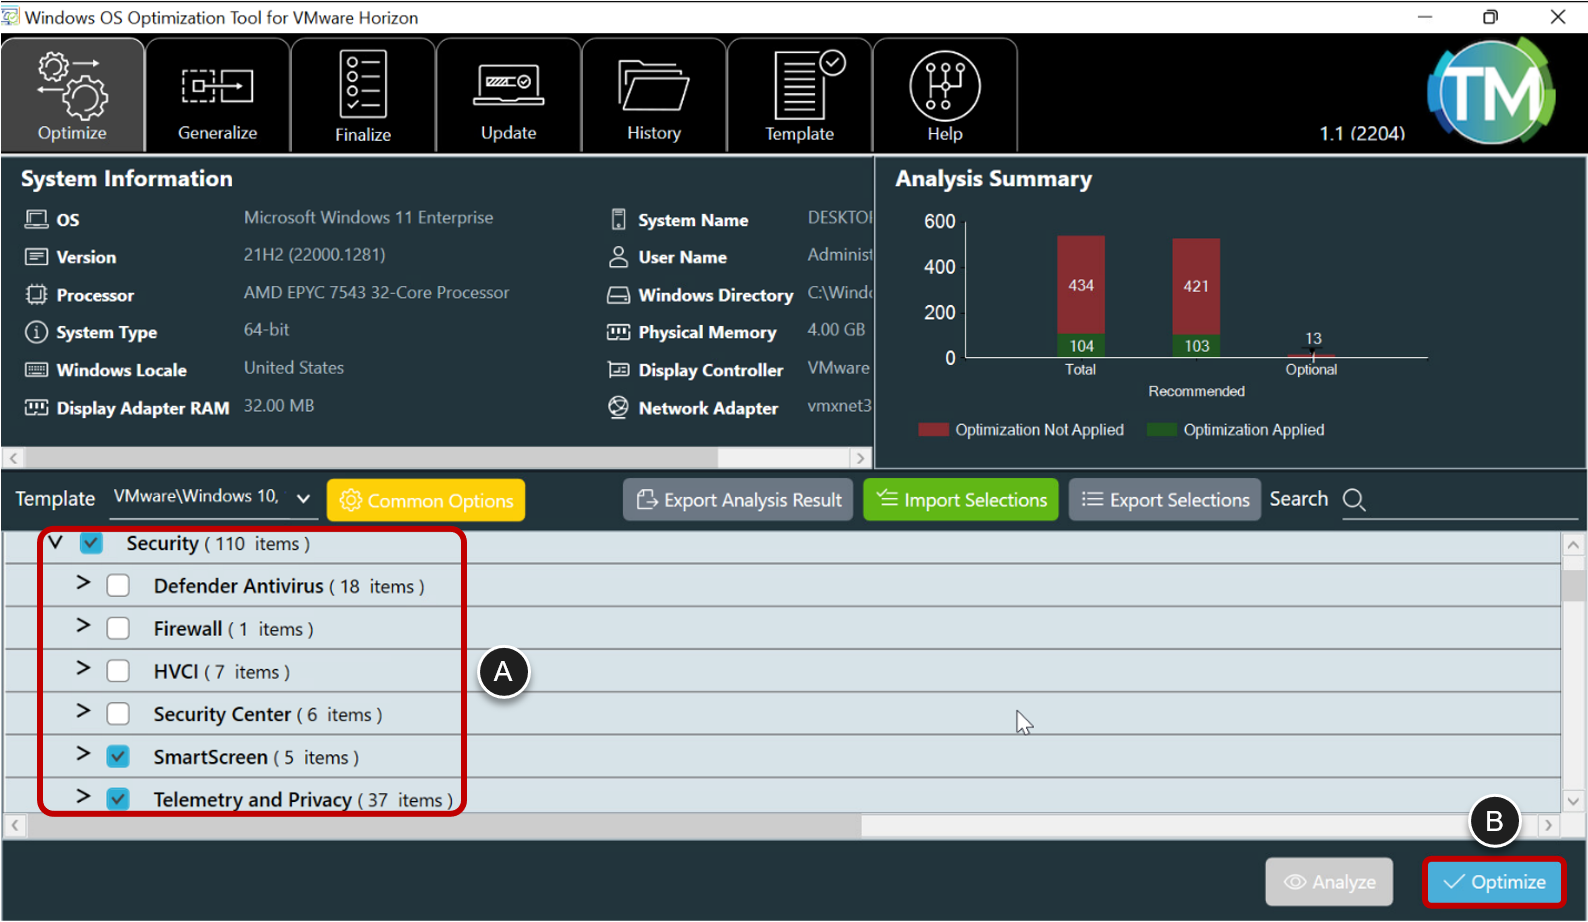
- Select the Optimizations to Apply
- Select the appropriate optimizations from the extensive list. For most VDI environments, use the default selection.
- Click Optimize.
- Monitor the optimization results, until the process is complete:
- If using Horizon Cloud on Microsoft Azure, reboot the VM, and you are ready to publish the image from within the Horizon Universal Console.
- Otherwise, continue on to the next step and generalize the image.
Use the OSOT Generalize Tab to Run Sysprep
Generalizing a Windows image means removing computer-specific information so that the image can be deployed throughout an enterprise. Use the Generalize tab of the OSOT to run the system preparation tool (Sysprep) with a supplied and editable unattend.xml answer file.
Note: This procedure pertains to vSphere based VMs. If you are using Horizon Cloud on Microsoft Azure, you will instead use the Horizon Universal Console to publish the image, which is when Sysprep is run on VMs in Horizon Cloud.
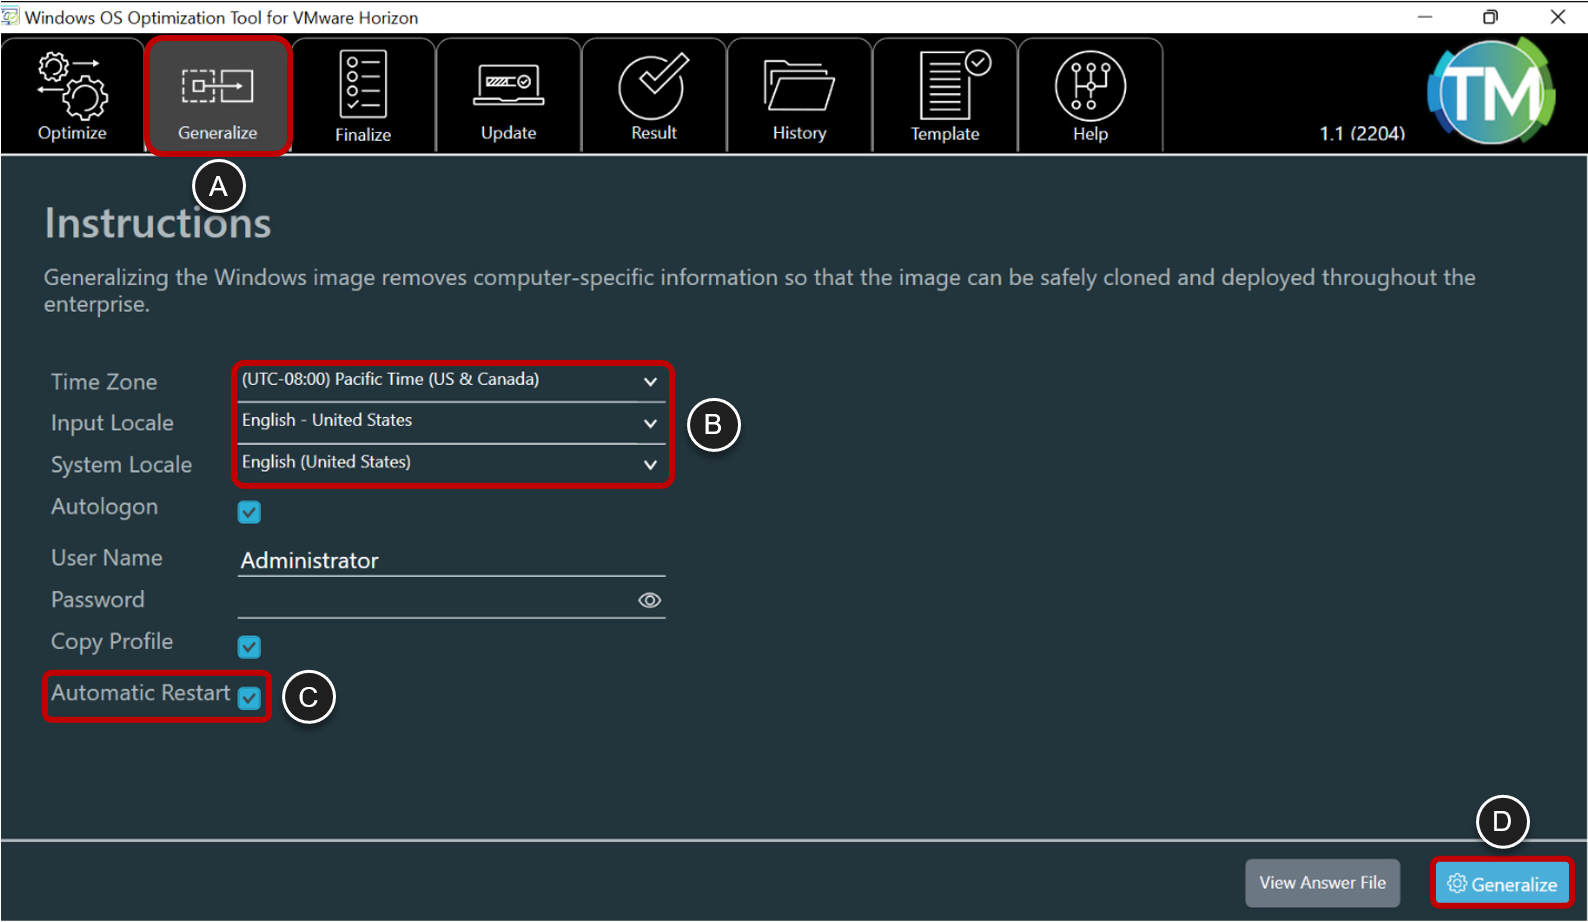
- Set Generalize Options
- Click Generalize.
- Select the correct Time Zone and Locales.
- Select Automatic Restart.
- Click Generalize.
Use the OSOT Finalize Tab to Perform Final Cleanup Tasks
The OSOT can perform the following tasks, which you were previously required to do manually for VMs that you plan to use in a vSphere infrastructure:
- Clear KMS settings
- Release the IP address
- Delete unnecessary files
- Zero empty disk space
With the OSOT, you can also use the Finalize tab to run the following tools:
- Native Image Generator (
Ngen.exe) – Improves the performance of managed applications. - NTFS Compression (
compact.exe) – Saves space on the Windows image by running the operating system and other system files from compressed files. This strategy reduces the number of IOPS required for storage with cache and has a negligible impact on the CPU. - Deployment Image Servicing Management (
DISM.exe) – Cleans unused files from the Side by Side component store. - Local Group Policy Object Utility (
LGPO.exe) – Manages local group policy. - Secure Delete (
sdelete64.exe) – Provides the ability to overwrite empty space with zeros.
Note: If you are using Horizon Cloud on Microsoft Azure, you can skip this procedure.
- Download Third-Party Tools
- Local Group Policy Object Utility can be downloaded as a zip file, as part of the Microsoft Security Compliance Toolkit, from https://www.microsoft.com/en-us/download/details.aspx?id=55319.
- Secure Delete can be downloaded by clicking https://download.sysinternals.com/files/SDelete.zip.
- Make sure Tools aren’t blocked and Copy the Tools to the OSOT Folder
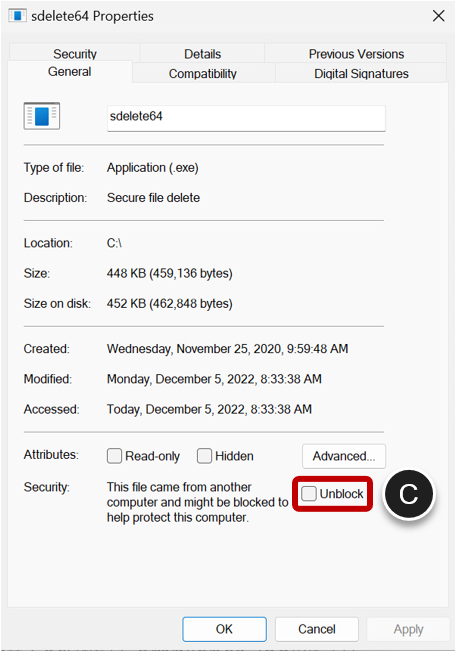
- After downloading and extracting the executables, right-click each file (
sdelete64.exeandlgpo.exe). - Select Properties, and in the Properties dialog box,
- If available, select Unblock and click OK.
- Then move the executables to the same folder as the OS Optimization Tool and launch the OS Optimization Tool.
- After downloading and extracting the executables, right-click each file (
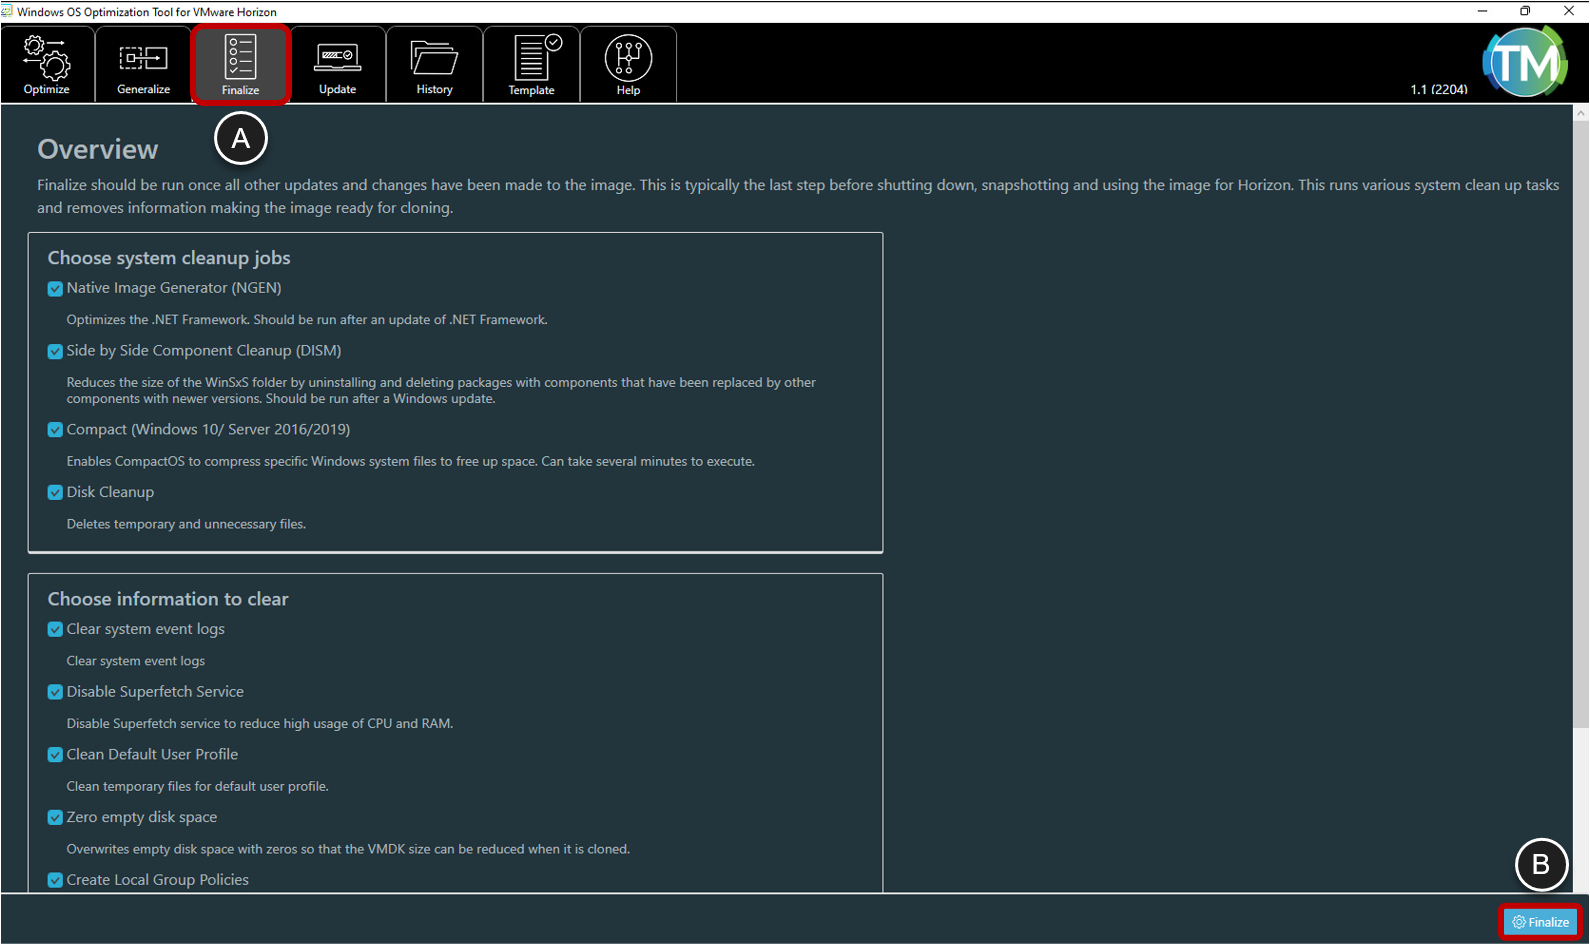
- Execute Final Cleanup Tasks
- In the OSOT, click the Finalize tab.
- Click Finalize.
- When all steps are completed, click OK.
Install NVIDIA vGPU driver and License in the Base Image
As soon as a GPU is active within the virtual machine, the vSphere console will no longer work, so before we install the driver we need to enable remote desktop and add a password.
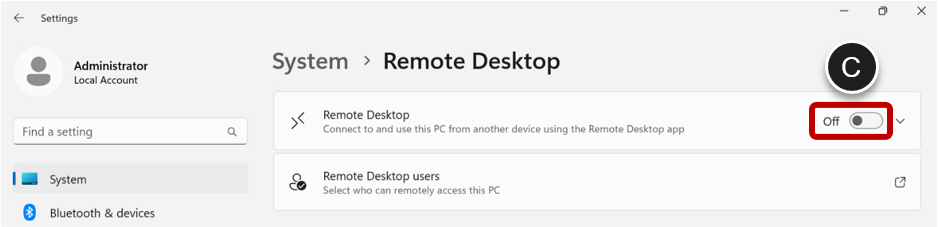
- Enabling remote desktop.
- Press Windows Key+I, to open Windows Settings.
- Go to System and then to Remote Desktop.
- Enable Remote Desktop.
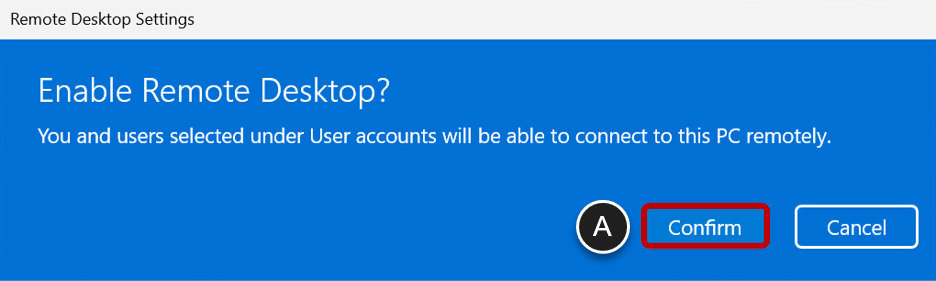
- Confirm the Remote Desktop Settings.
- Click on Confirm.
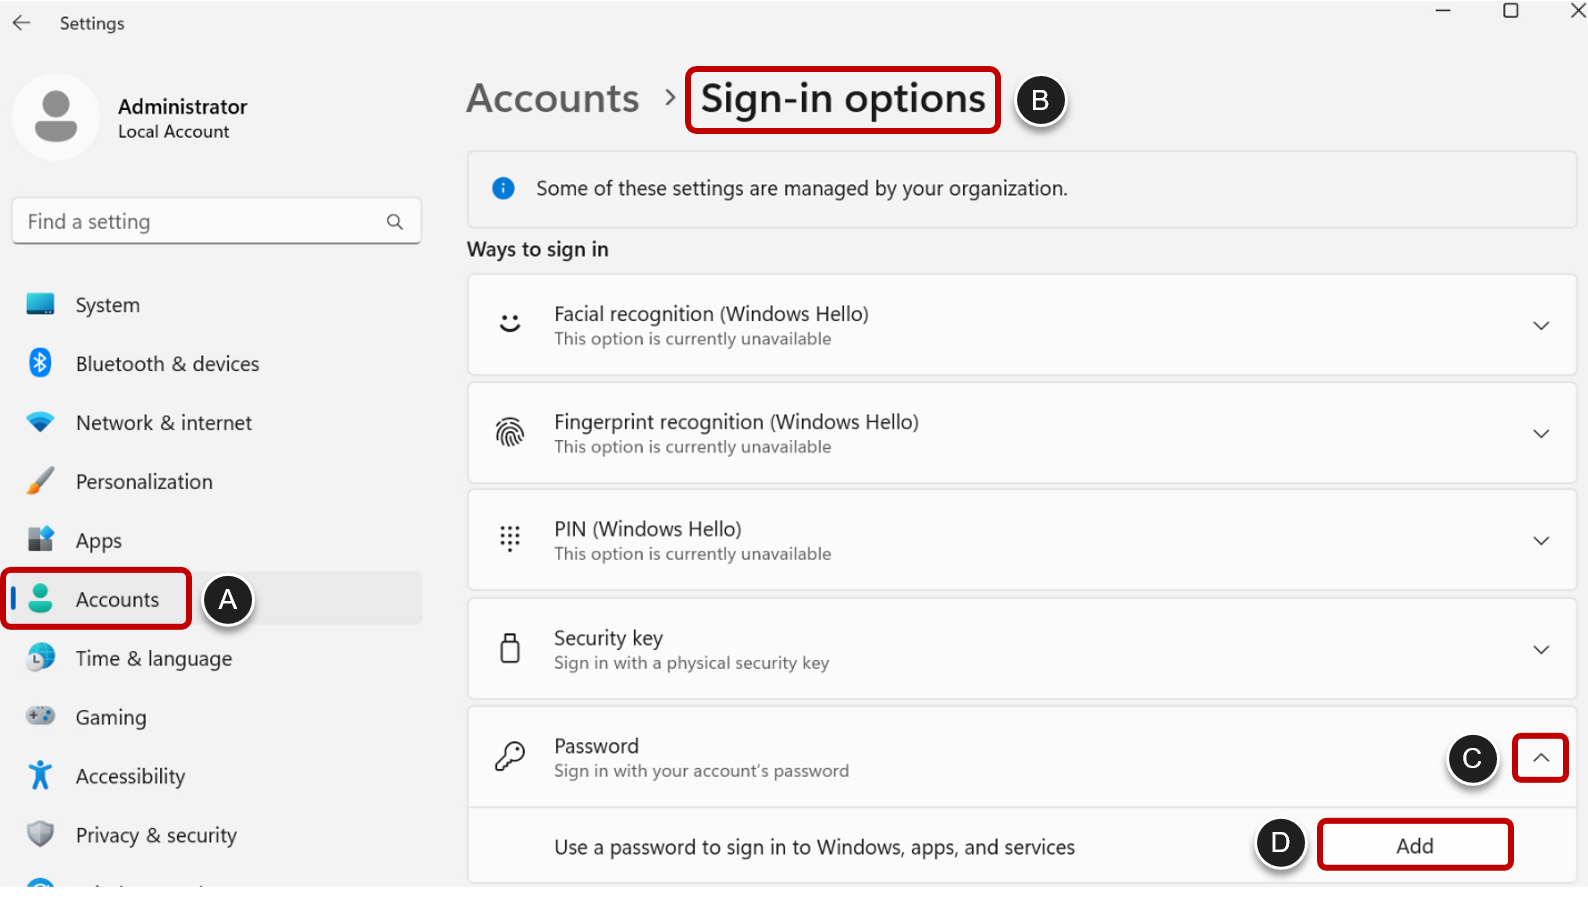
- Go to Sign-in options and add a password
- Click on Accounts.
- Click on Sign-in options.
- Expand Password.
- Click on Add.
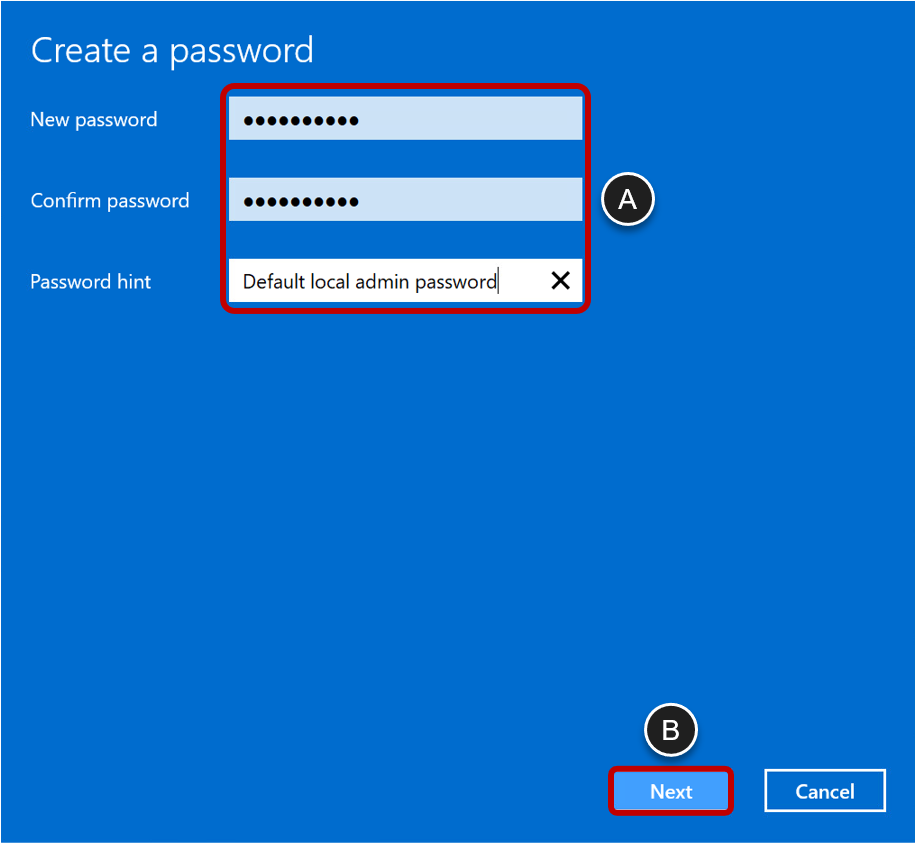
- Provide a password.
- Provide a new password, confirm it and provide a hint.
- Click Next.
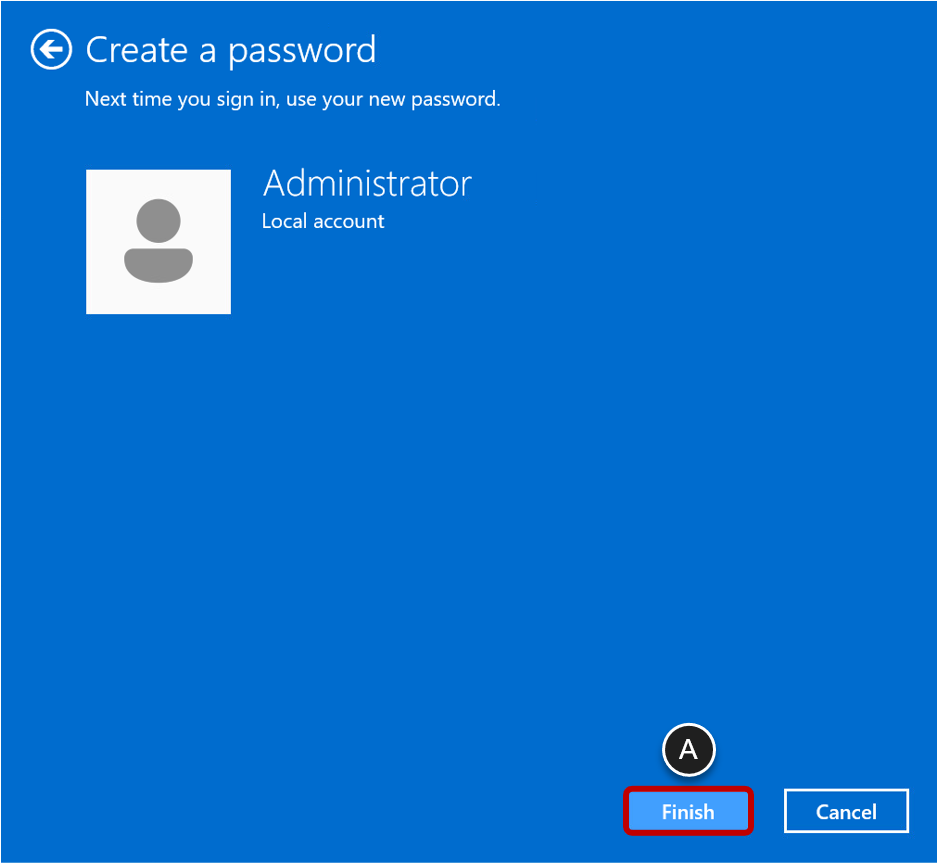
- Finish the wizard.
- Click on Finish.
- Connect to the machine with RDP.
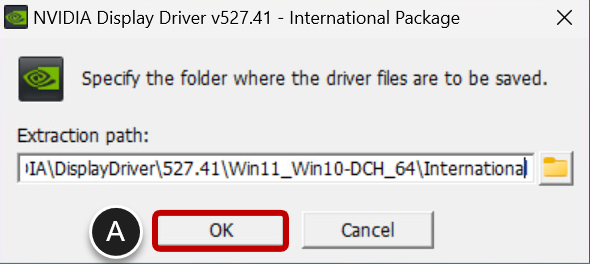
- Start the guest driver installation package that came with the ESXi driver you installed on ESXi.
- Click on OK.
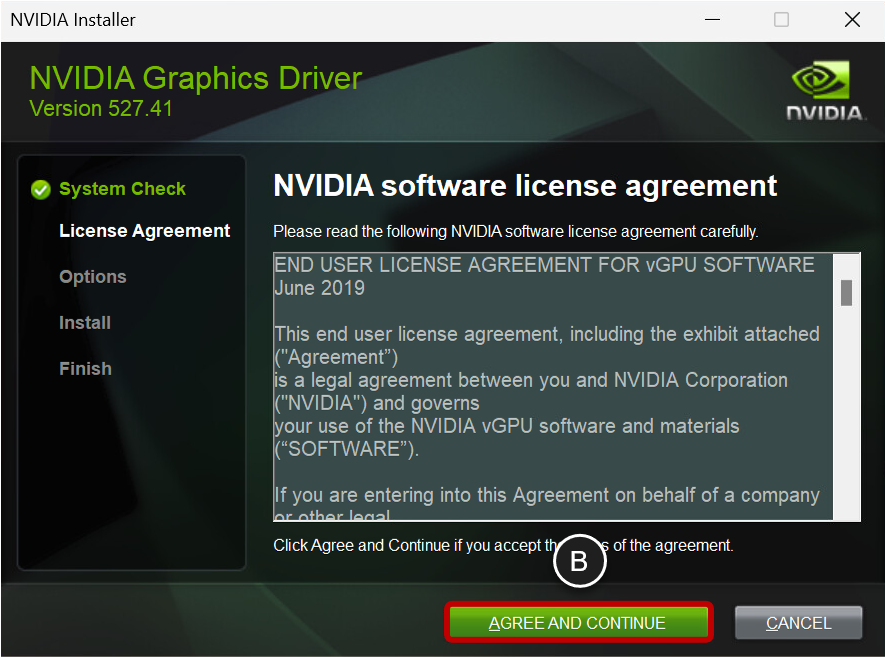
- Click on AGREE AND CONTINUE on the NVIDIA license agreement.
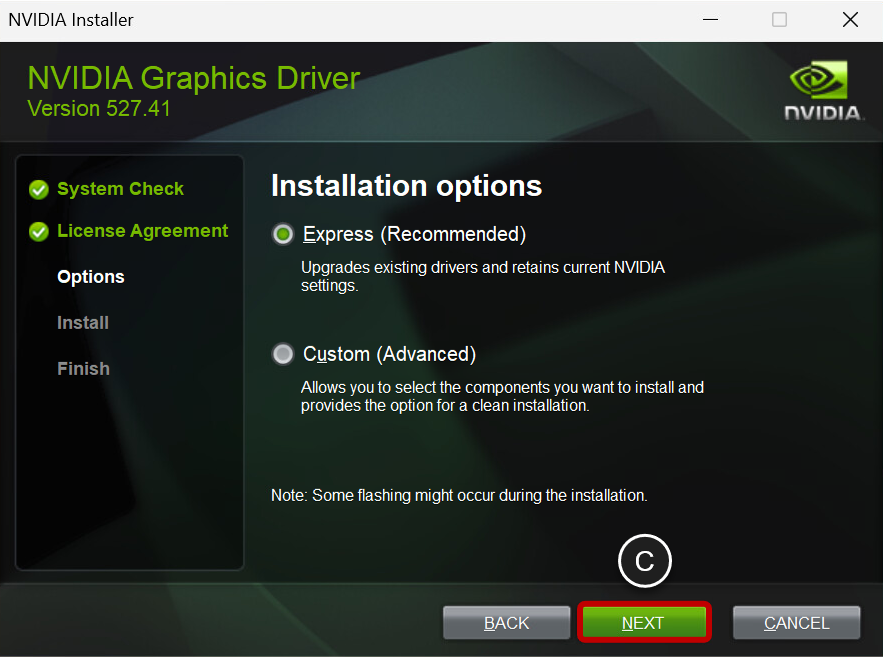
- Click on NEXT.
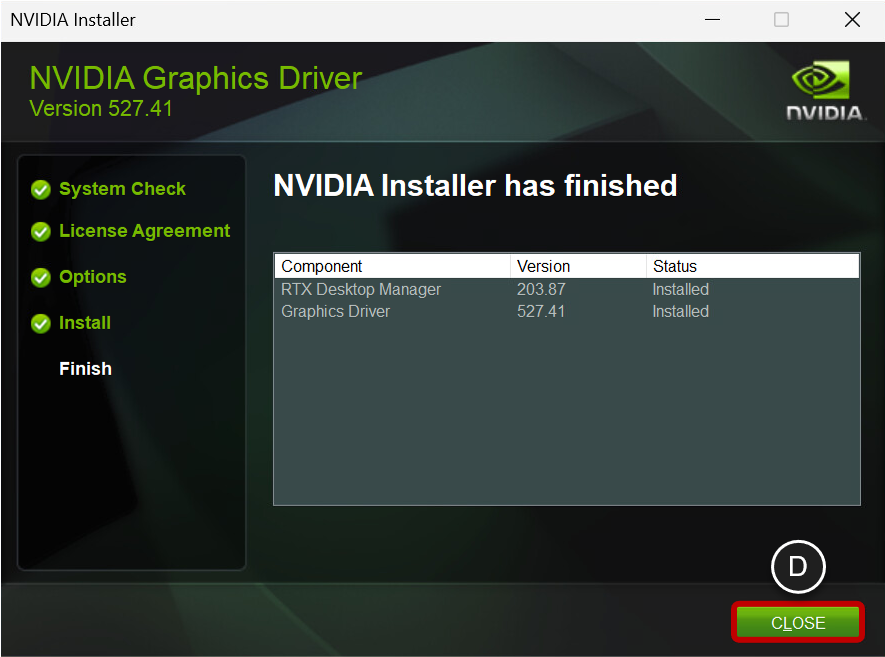
- Click on CLOSE.
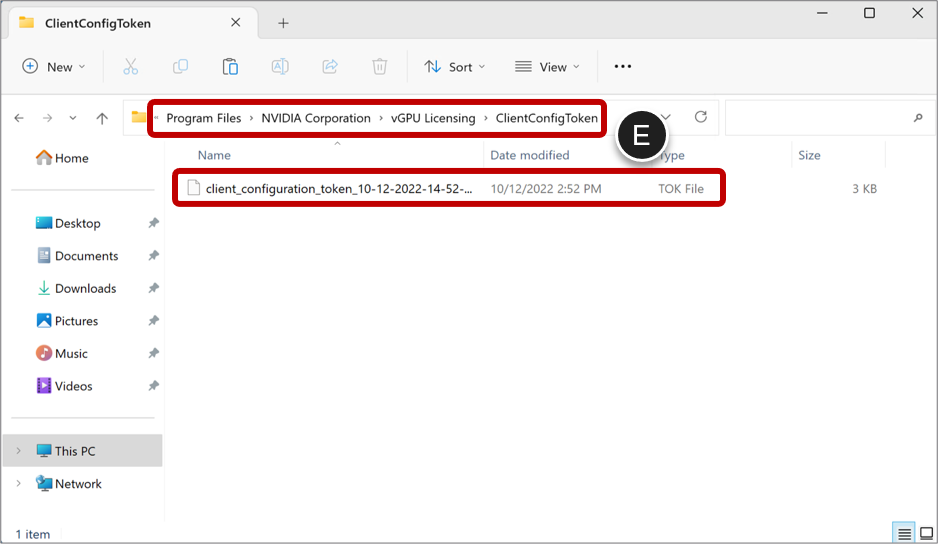
- Put the .tok file from the license portal into c:\Program Files\NVIDIA Corporation\vGPU Licensing\ClientConfigToken
Install the App Volumes Agent in vSphere-Based VMs
App Volumes delivers applications that are not in the golden VM image. Application containers, called AppStacks (in App Volumes 2.x) or application packages (in App Volumes 4), are assigned to a user, group, OU, or machine and mounted each time the user logs in to a desktop. With this strategy, user changes can persist between sessions.
App Volumes can also provide user-writable volumes, which allow users to install their own applications and have those applications follow the user as they connect to different virtual desktops.
Administrators install the App Volumes Agent on the golden VM image so that the App Volumes Manager can communicate with the cloned desktops that are deployed and attach the correct applications when a user logs in.
Notes: Installing the App Volumes Agent is an optional step for VMs that you plan to use in a vSphere infrastructure. Install this agent only if you plan to use this functionality.
This procedure describes running the App Volumes Agent installer in the guest operating system of a vSphere based VM. If instead you are using Horizon Cloud on Microsoft Azure, installing the agent is an option you can select in the process of importing a VM from the Azure Marketplace, as described in the exercise Import a VM in Horizon Cloud on Microsoft Azure.
Prerequisites for Installing the App Volumes Agent
To perform this exercise, you need the following:
- User account – When you log in to the OS of the golden image to run the installer, the account you use must have local administrative privileges.
- Installer – App Volumes is included with Horizon Enterprise Edition, available from the Download VMware Horizon page. The App Volumes installer is distributed as an ISO file. You can mount the ISO on the machine where you want to create the App Volumes component, or you can also extract the ISO contents to a shared folder. This option allows you to install each component without mounting the ISO each time.
- VM with a supported Windows OS – The machine must be running a supported Windows version. For a list of the systems we tested, see Tested Operating Systems. For a complete list of supported Windows 10 operating systems, see the VMware knowledgebase article Supported versions of Windows 10 on Horizon Agent Including All VDI Clones (Full Clones, Instant Clones, and Linked Clones on Horizon 7) (2149393).
- App Volumes Manager server information – During agent installation, you will be prompted to enter the host name or IP address and port number of the App Volumes Manager that this agent will communicate with.
Install the App Volumes Agent
- Run the Installer
- Double-click the App Volumes ISO file, start the
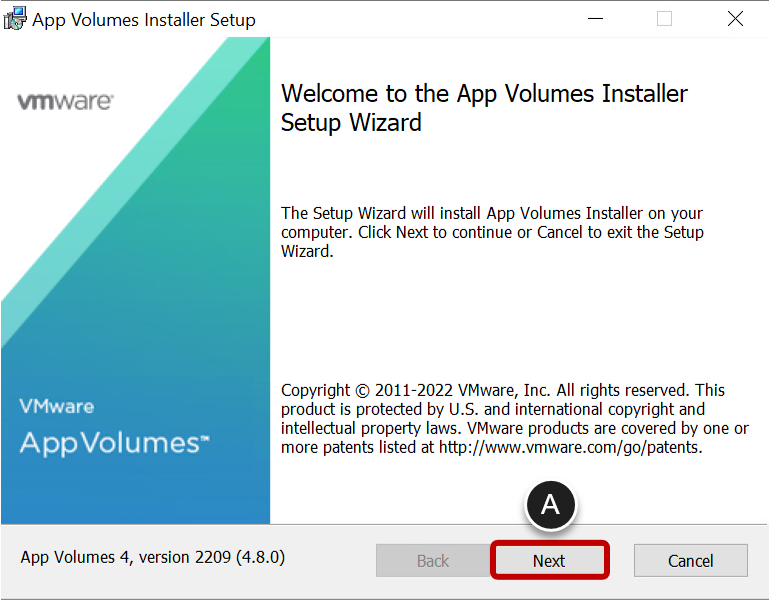
setup.msifile in the installation folder. - Click Next on the Welcome page.
- Double-click the App Volumes ISO file, start the
- Accept the License Agreement
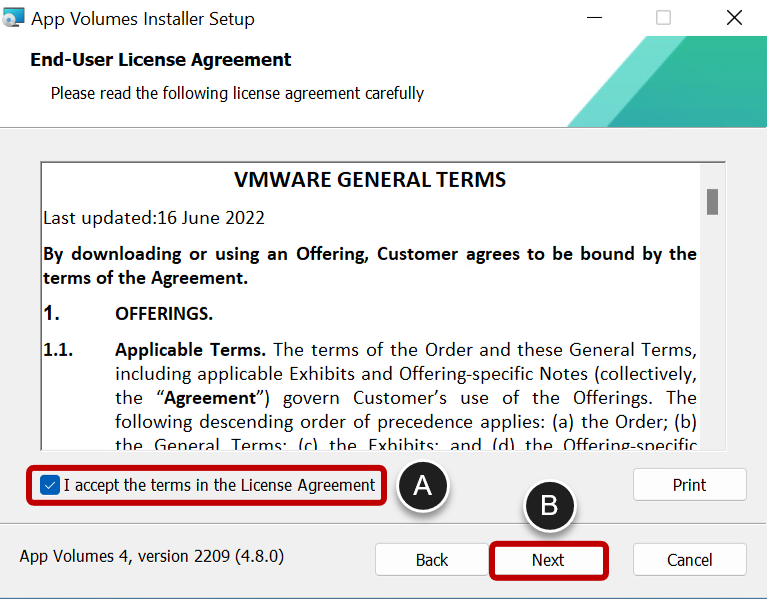
- Select the check box to accept the License Agreement.
- Click Next.
- Select the App Volumes Agent Component
- Click Install.

- Click Next on the Agent Setup Welcome Page
- Click Next.

- Supply App Volumes Manager Information
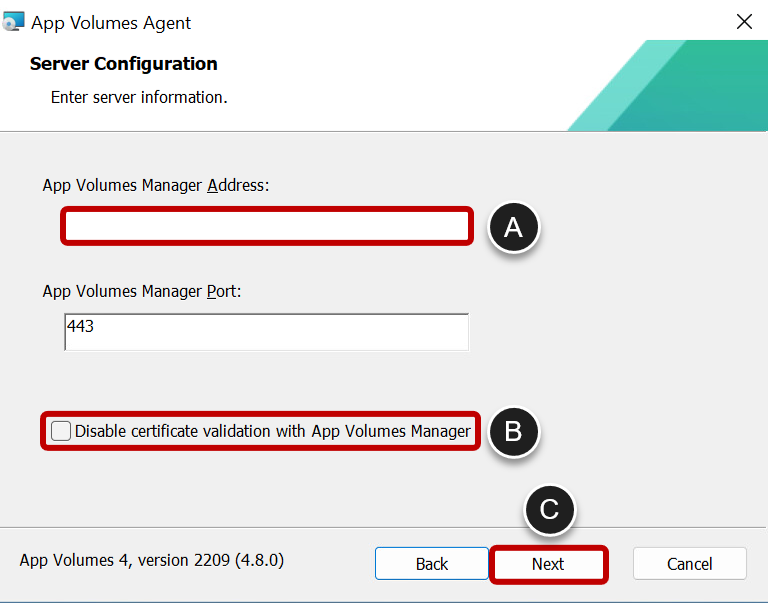
- Provide the App Volumes Manager Address.
- Ensure that Disable certificate validation with App Volumes Manager is not selected.
- Click Next.
- Begin Installation
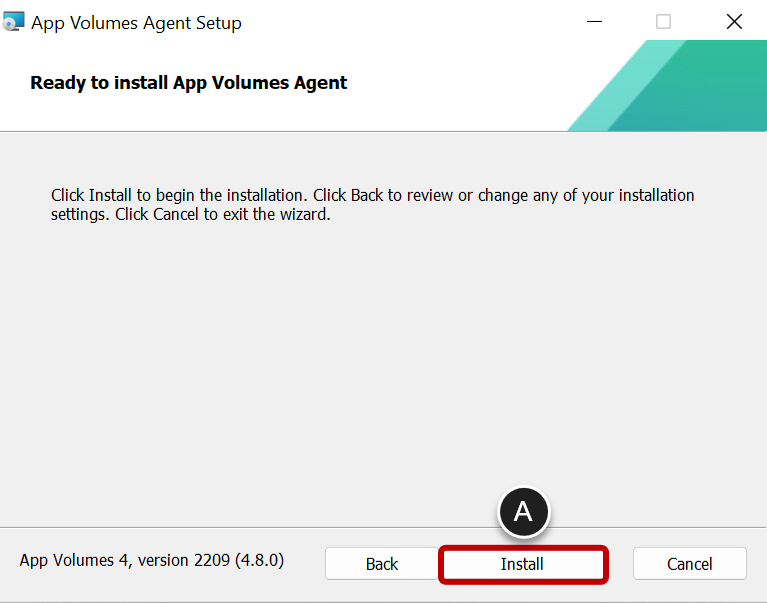
- Click Install.
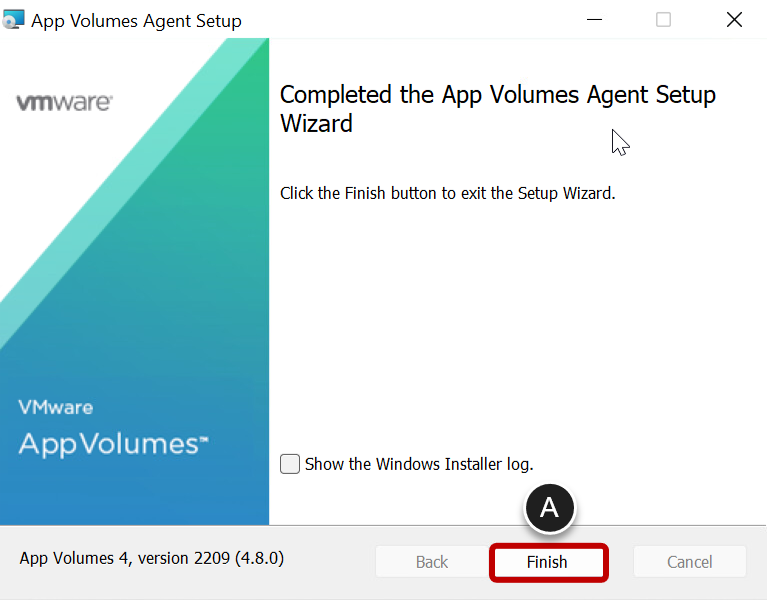
- Exit the Wizard
- Click Finish.
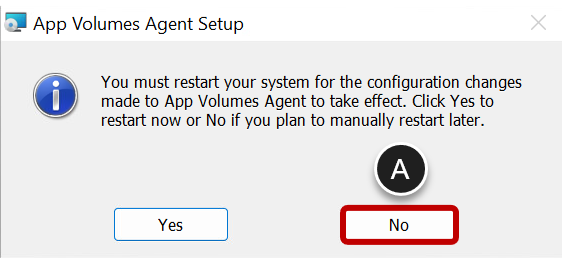
- Do Not Restart the VM
- Click No.
Use the Shutdown Command
Run the following command:
shutdown /s /t 0 /c "Image Ready"
shutdown /s /t 0 /c "Image Ready" shuts down the local computer, with 0 seconds between the time the command is given and the time the shutdown occurs, and leaves the comment "Image Ready."
Optimizing the Virtual Machine Hardware
Remove Virtual Hardware Devices That You Do Not Plan to Use
Because we no longer need the virtual CD/DVD drives, we can remove those. Likewise, we can remove the SATA controller.
Note: If you are using Horizon Cloud on Microsoft Azure, you can skip this procedure.
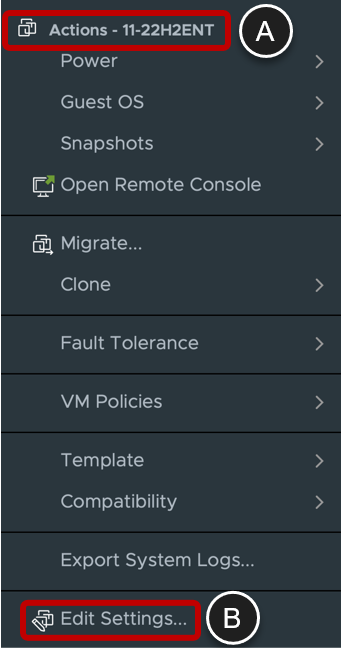
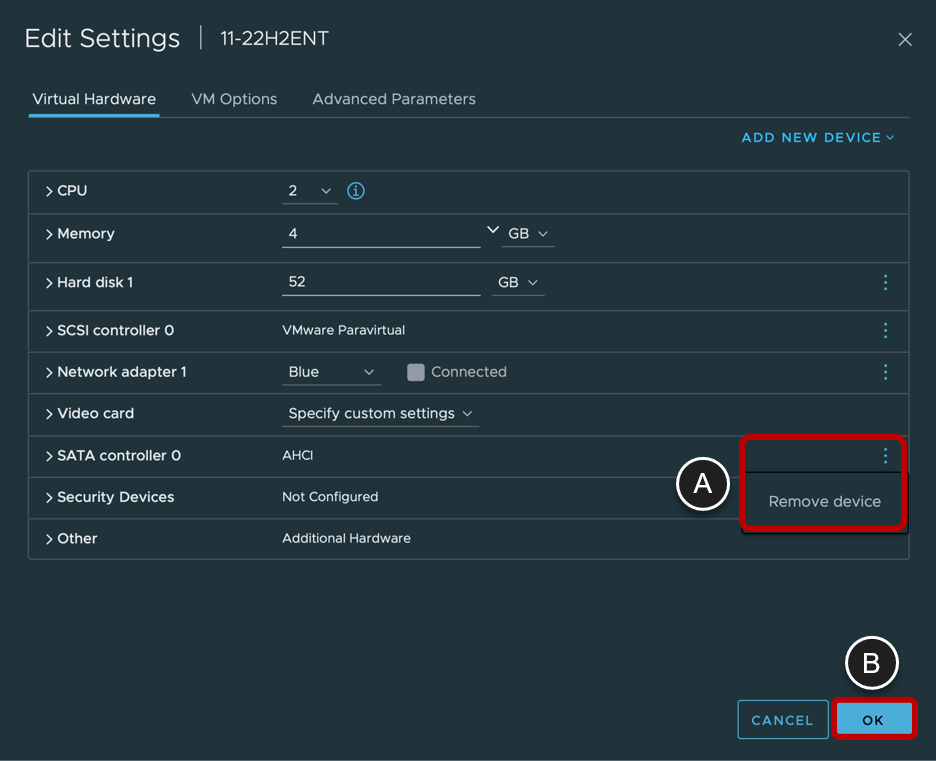
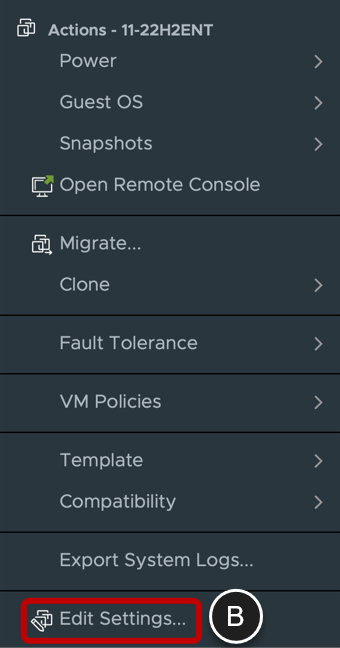
- Use vSphere Web Client to Open the Edit Settings Dialog Box
- In the vSphere Web Client, right-click the VM
- Select Edit Settings.
- Remove the CD/DVD Drives
- To remove the virtual CD/DVD drive from the VM, click the three dots or X that appears when you hover your pointer over CD/DVD drive 1 row.
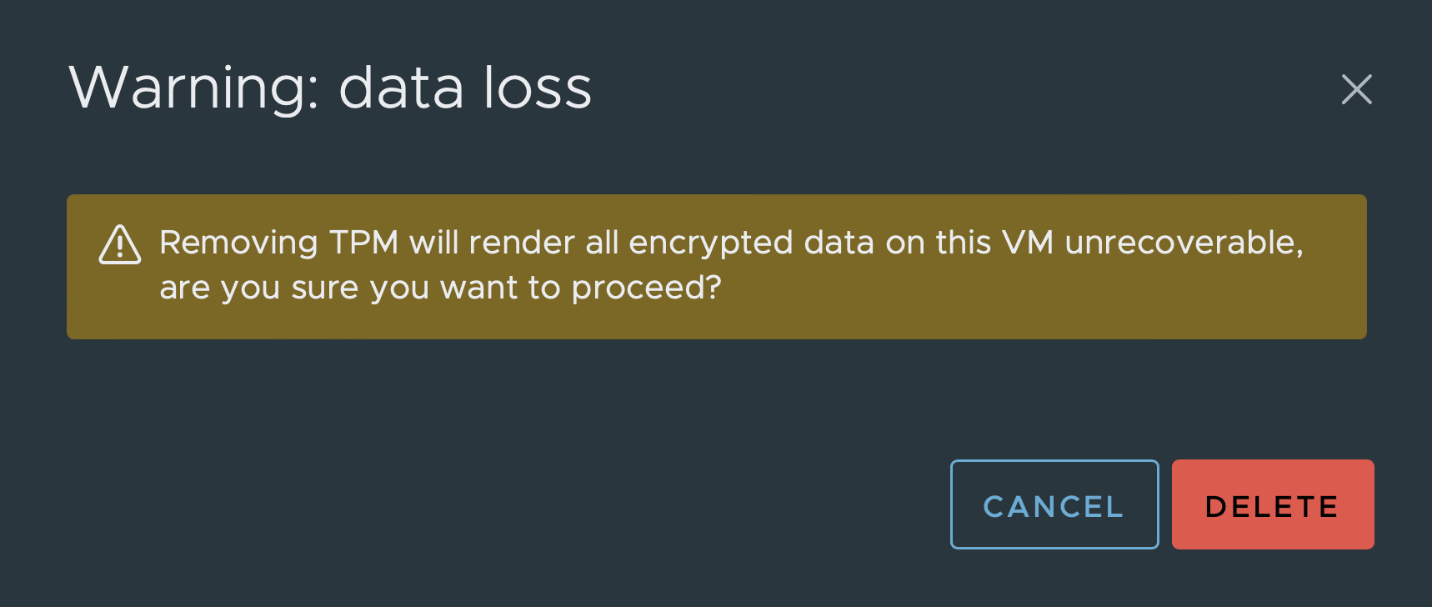
- Do the same with CD/DVD drive 2 if it exists and do the same with Virtual TPM under Security Devices if it exists.
- Click OK and edit the VM again.
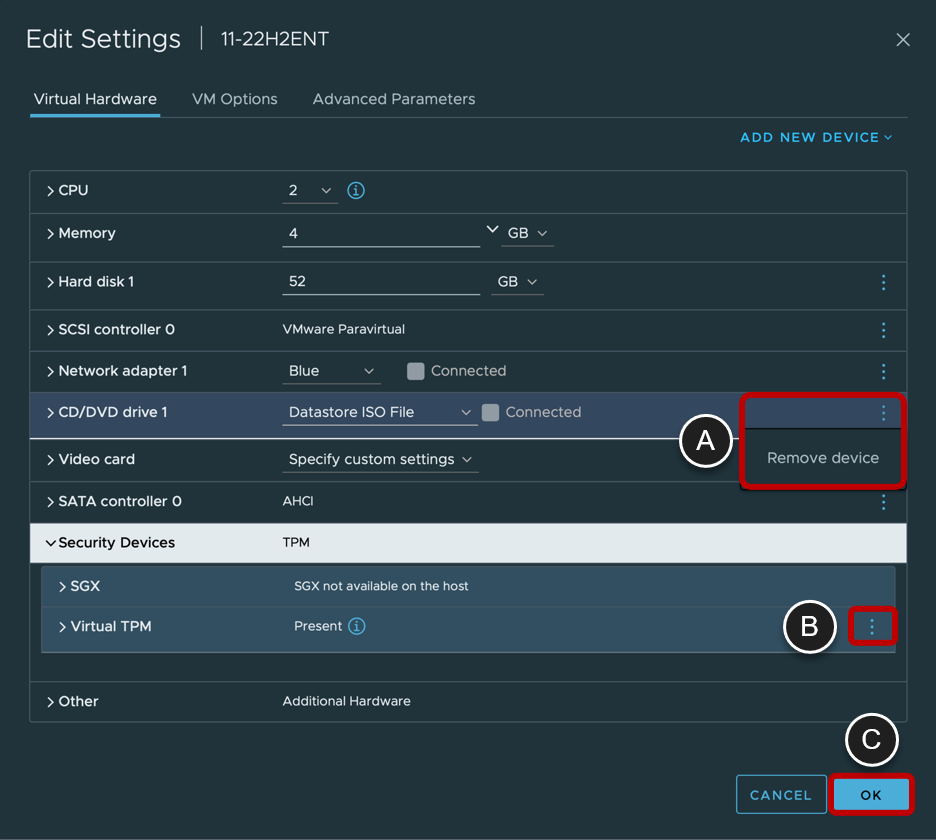
Note:
Removing a TPM device on a golden image is needed to be able to export or clone the VM. Do not remove TPM devices from production machines when software is storing keys in the TPM device. See https://kb.vmware.com/s/article/88320 for an alternative method that doesn’t remove a TPM device.
- Remove the SATA Controller
- To remove the virtual SATA controller from the VM, click the X that appears when you hover your pointer over the SATA Controller 0 row.
- Click OK.
Export the VM to Adjust Disk Size
If you used the same settings as shown in Specify Virtual Hardware Settings when you created the golden VM image, your VM has 52 GB of disk space. The storage usage of the VM can amount to the size of the disk as specified plus the amount of RAM.
Using the export/import process described in this section, we can select the thin-disk option and shrink the size of the VM according to the number of zeroes written during the finalize procedure, when the Secure Delete tool (sdelete64.exe) was run to overwrite empty space with zeros. Over time the space reclamation function of vSphere could do the same if enabled.
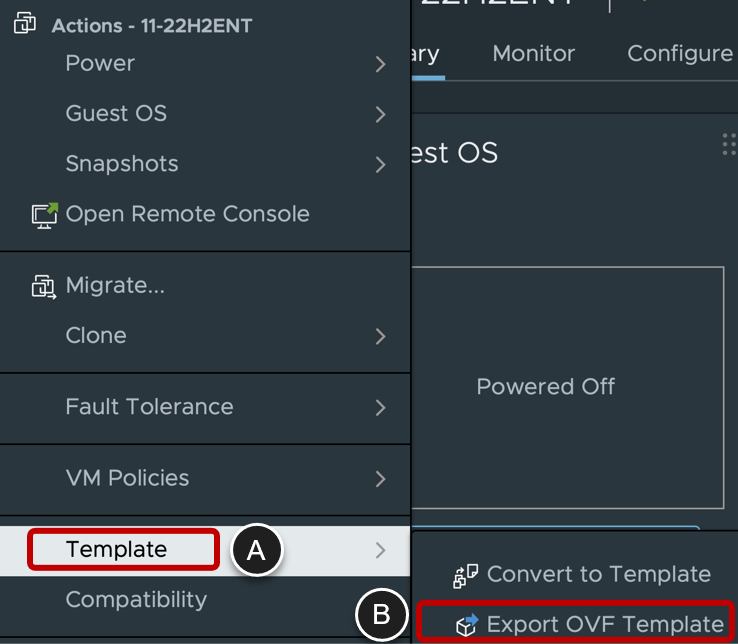
- Export to OVF (Open Virtualization Format)
- Using vSphere Web Client, right-click the VM in the inventory list, and select Template.
- Select Export OVF Template.
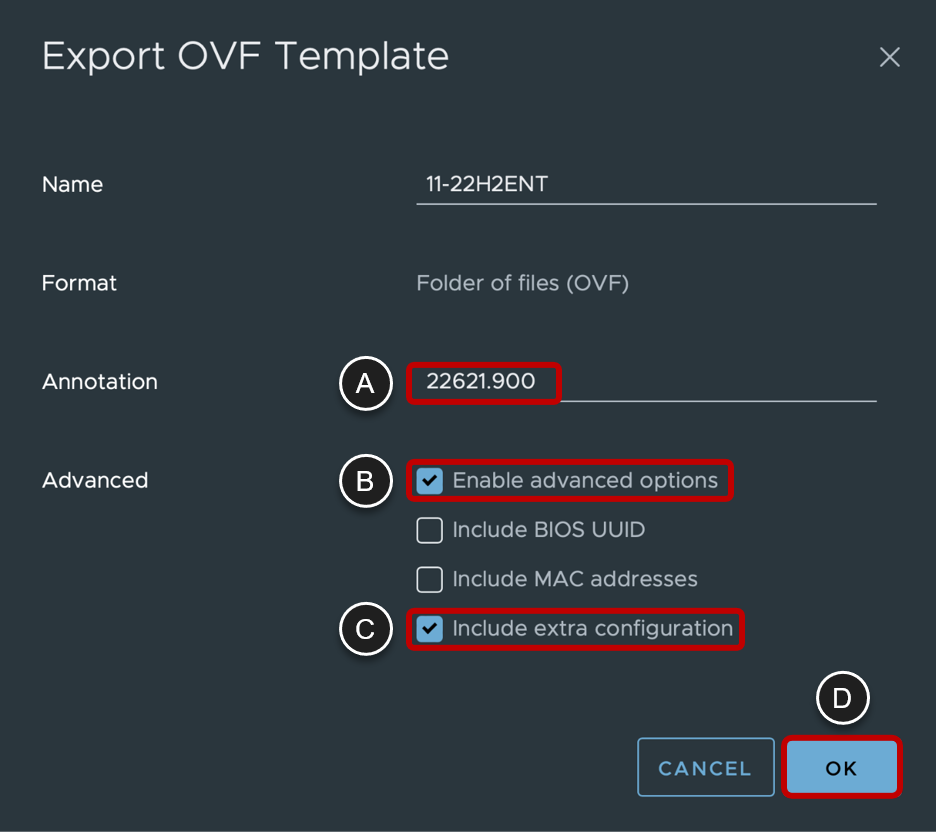
- Supply OVF Template Information
- Optionally provide an Annotation; for example, you could specify the Windows build number.
- Select Enable advanced options.
- Select Include extra configuration.
- Click OK.
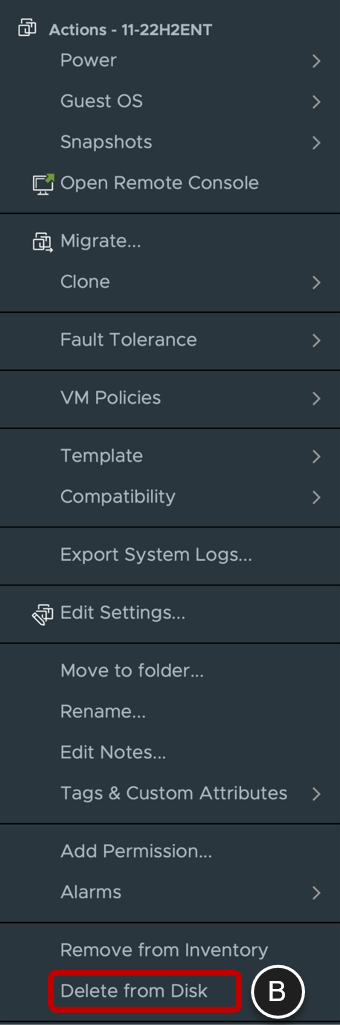
- Delete the VM
- Right-click the VM in the inventory list
- Select Delete from Disk.
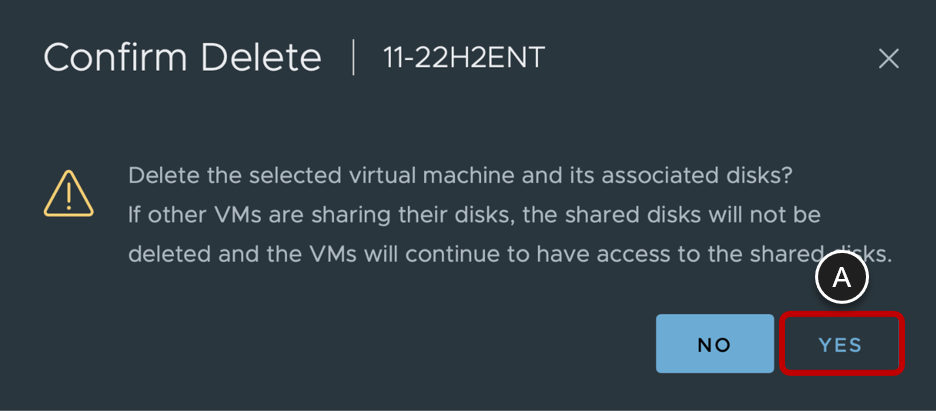
- Confirm the Deletion
- Click YES.
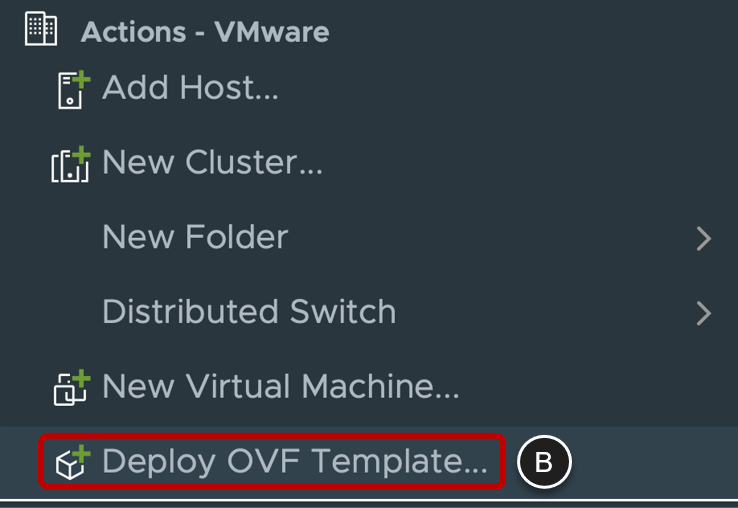
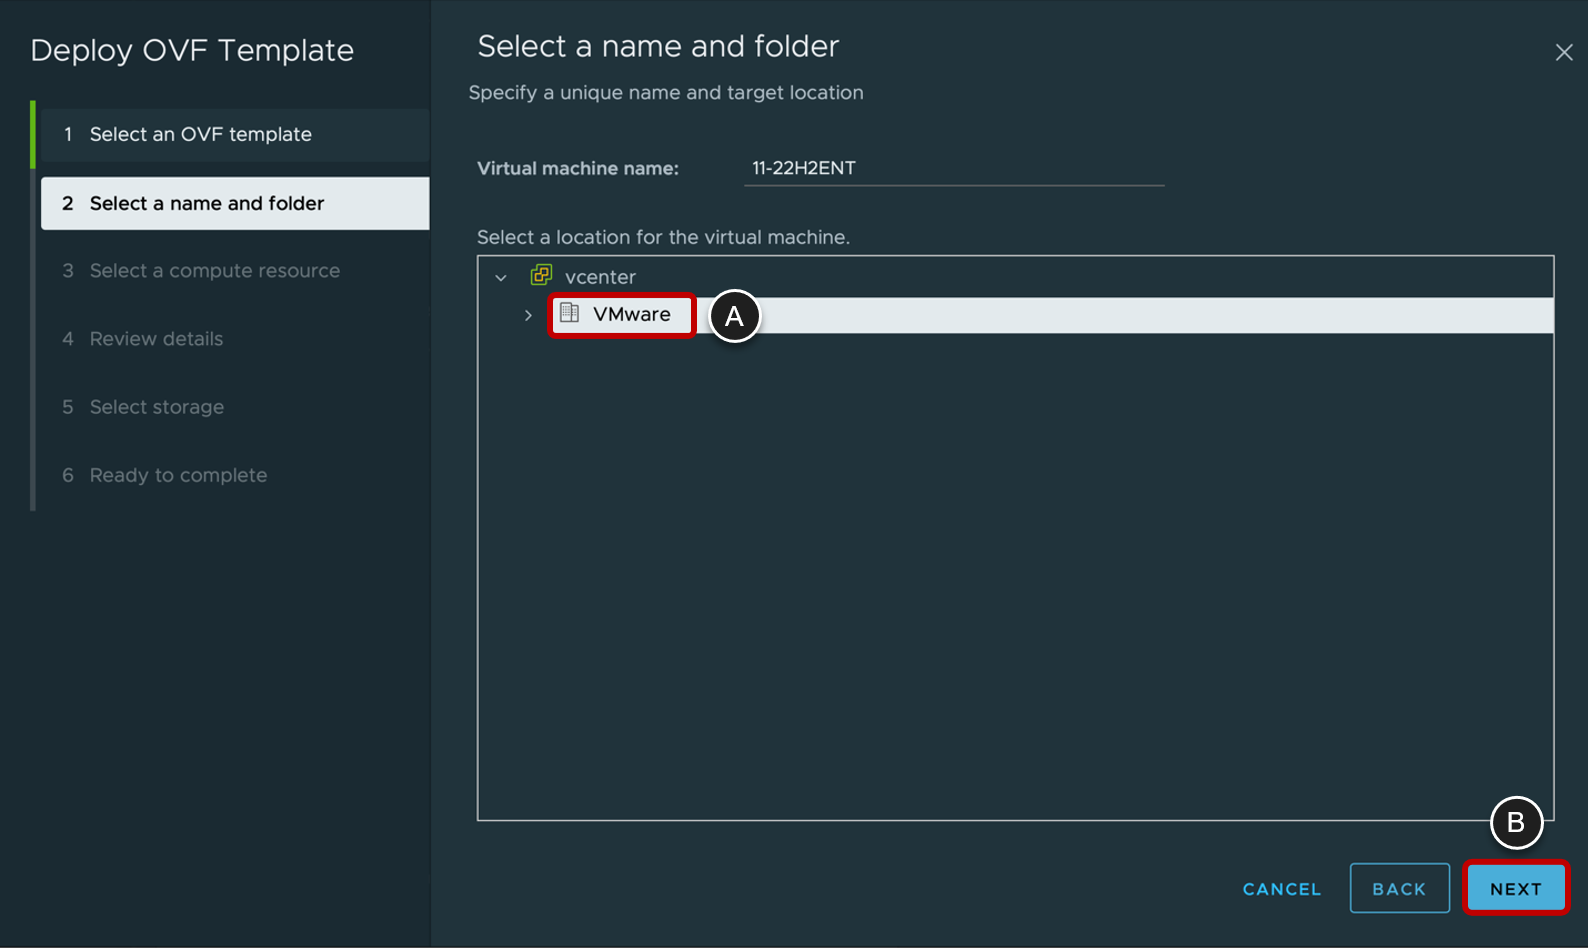
- Deploy the OVF Template
- Right-click a VM folder, host, or cluster
- Select Deploy OVF Template.
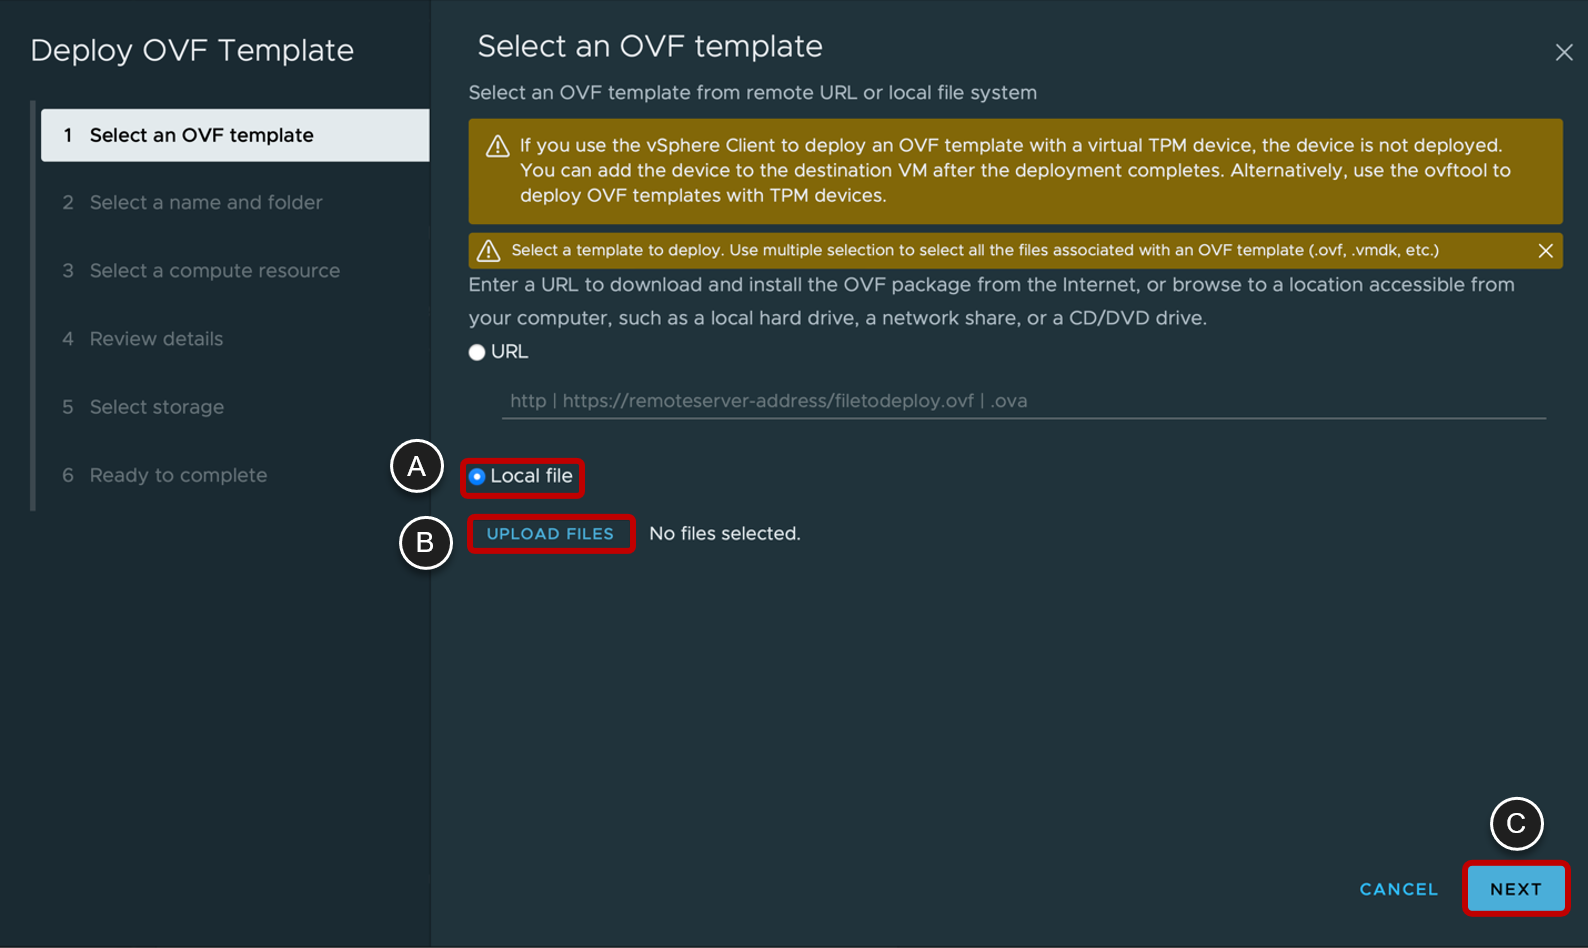
- Select the OVF Template You Just Exported
- Select Local file.
- Click UPLOAD FILES (Browse with older versions of vSphere) and select all files you have just downloaded when exporting to OVF.
- Click NEXT.
- Select a Folder
- Select a folder as a location for this VM in the vSphere inventory.
- Click NEXT.
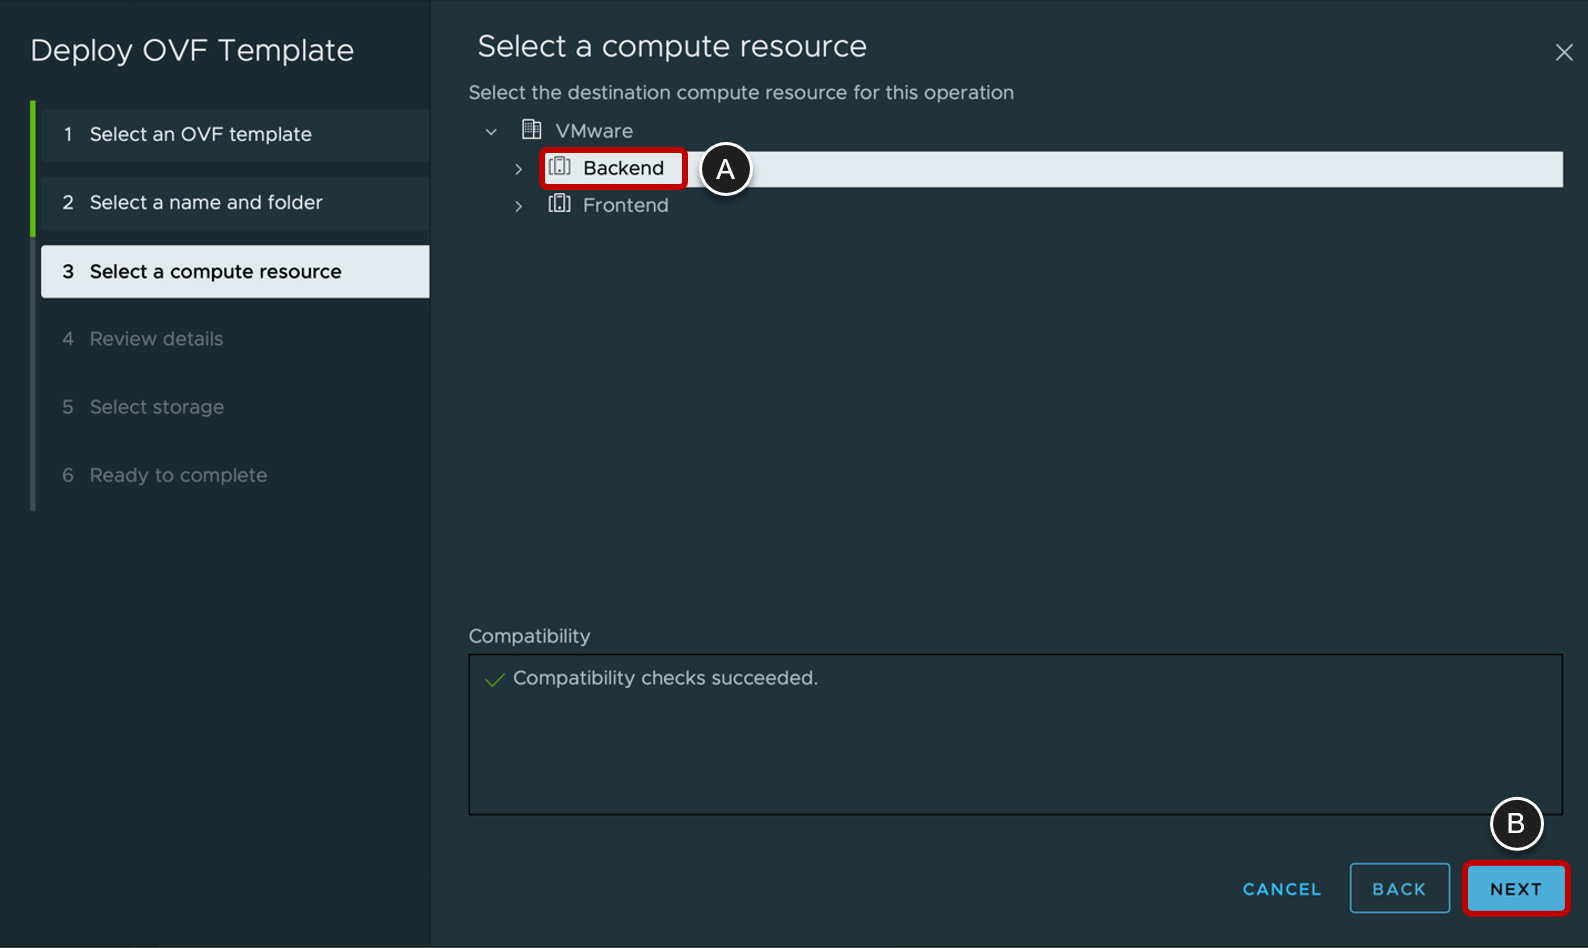
- Select a Compute Resource
- Select a compute resource to host this VM
- Click NEXT.
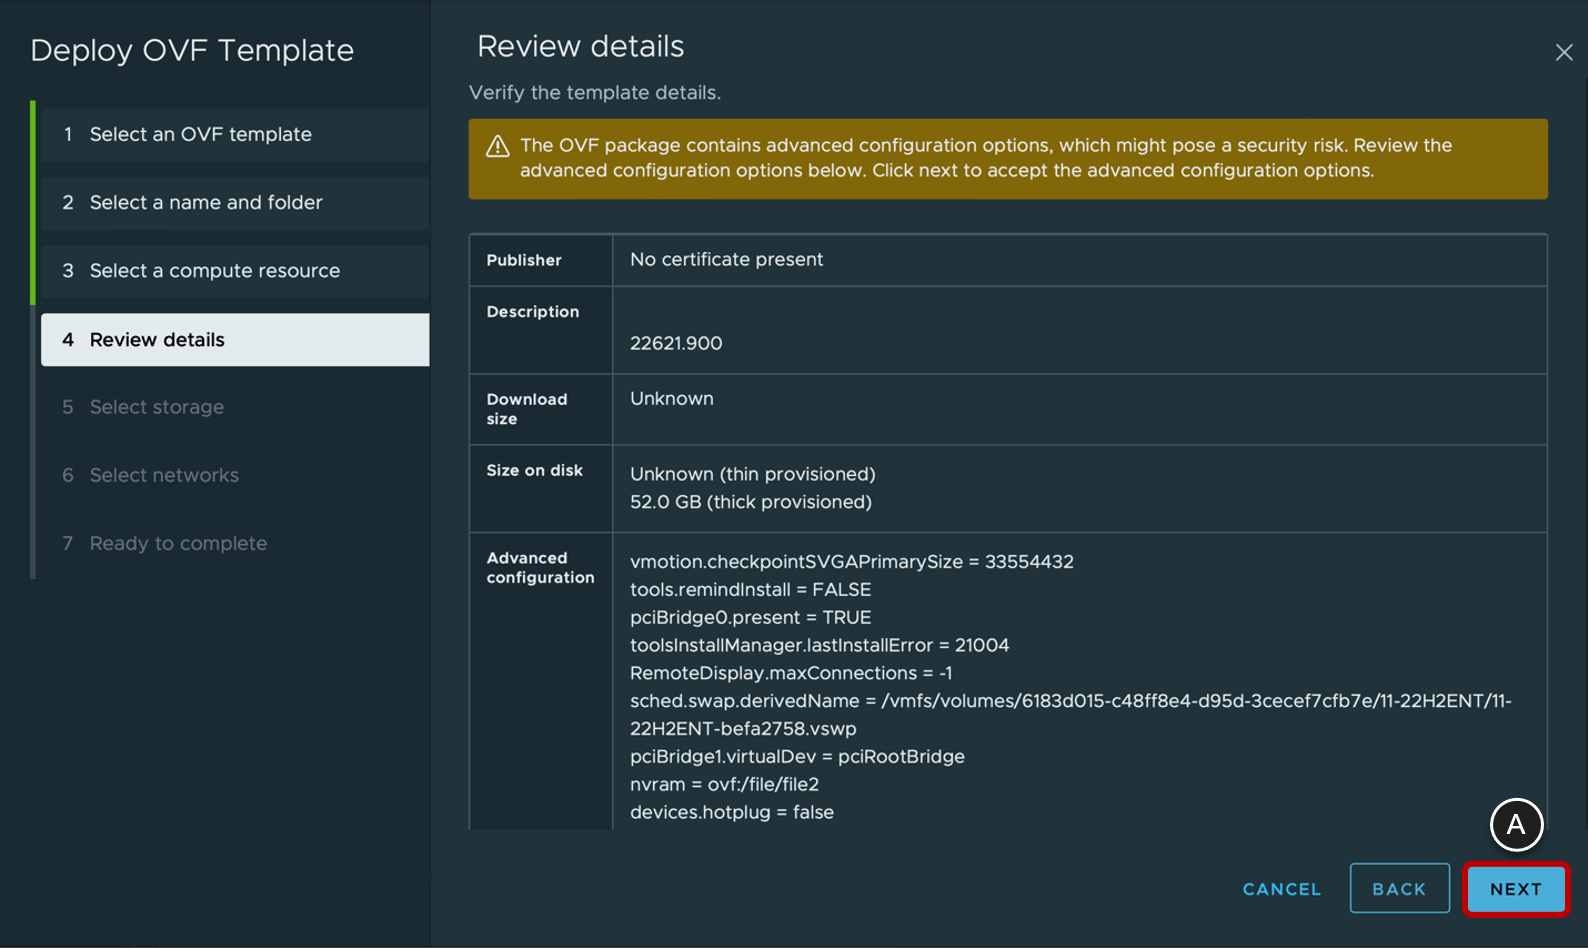
- Review Details
- Click NEXT.
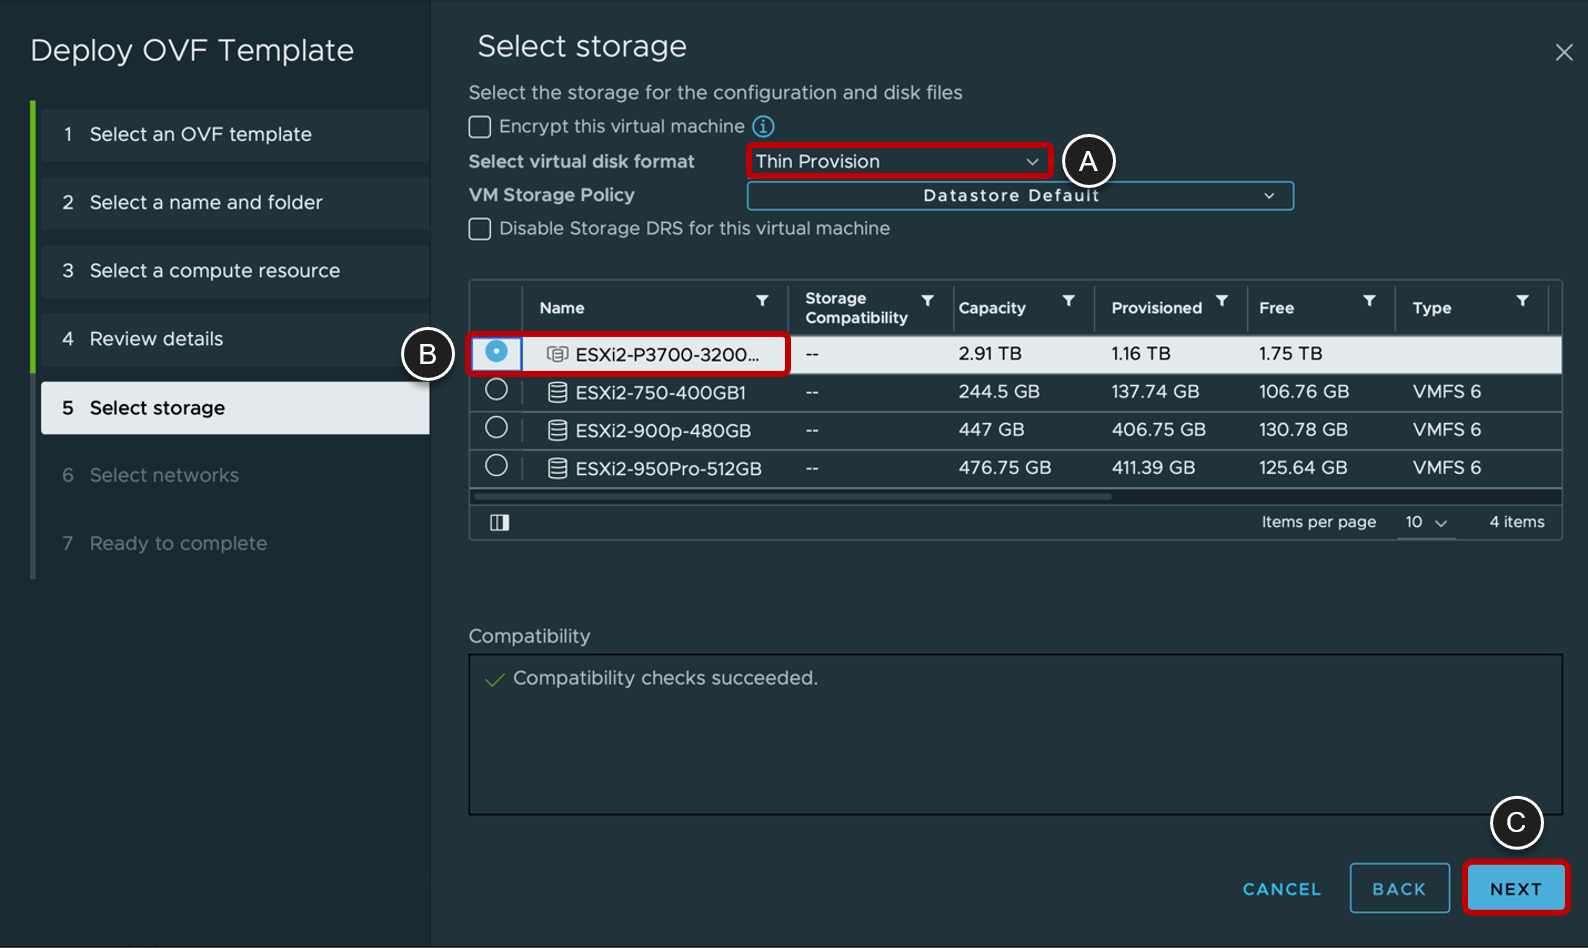
- Select Storage
- Select a datastore.
- When using storage without storage policies, select Thin Provision; otherwise, select an item from the VM Storage Policy list that has thin provisioning.
- Click NEXT.
- Select Network
- Select a VM Network.
- Click NEXT.
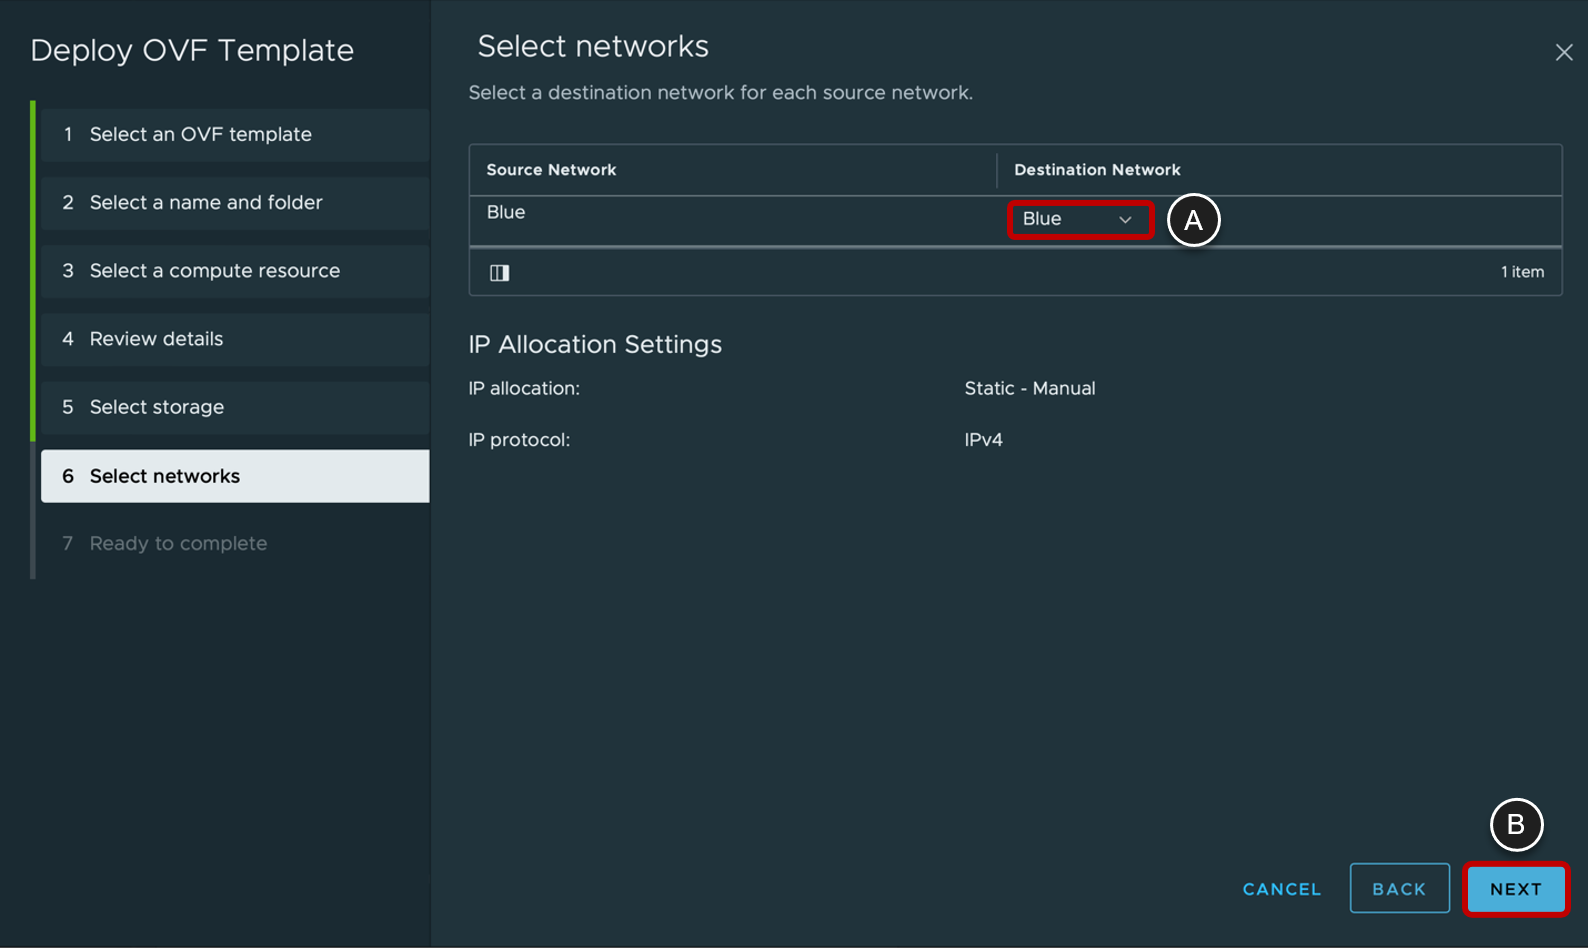
- Click Finish on the Ready to Complete Page
- Click FINISH.

Preparation for Deployment
Take a VM Snapshot
To create a desktop pool of cloned VMs, or to create a farm of cloned RDSH server VMs, you need to create a frozen state, or base image, from which the clone can be derived.
- For instant-clone pools and server farms, you achieve this state by taking a VM snapshot of the primary VM.
- For full-clone pools, you achieve this state by cloning the primary VM to a VM template.
This procedure describes taking a VM snapshot. For information about cloning a VM to a VM template, see Clone a Virtual Machine to a Template.
Note: If you are using Horizon Cloud on Microsoft Azure, you can skip this procedure.
Although it is possible to take a snapshot of a VM that is powered on, for the purposes of creating a base image for a Horizon desktop pool or server farm, the VM must be shut down and powered off.
- Open the Take Snapshot Dialog Box
- Using vSphere Web Client, select the VM in the inventory list.
- Click on Snapshots.
- Click on TAKE SNAPSHOT.

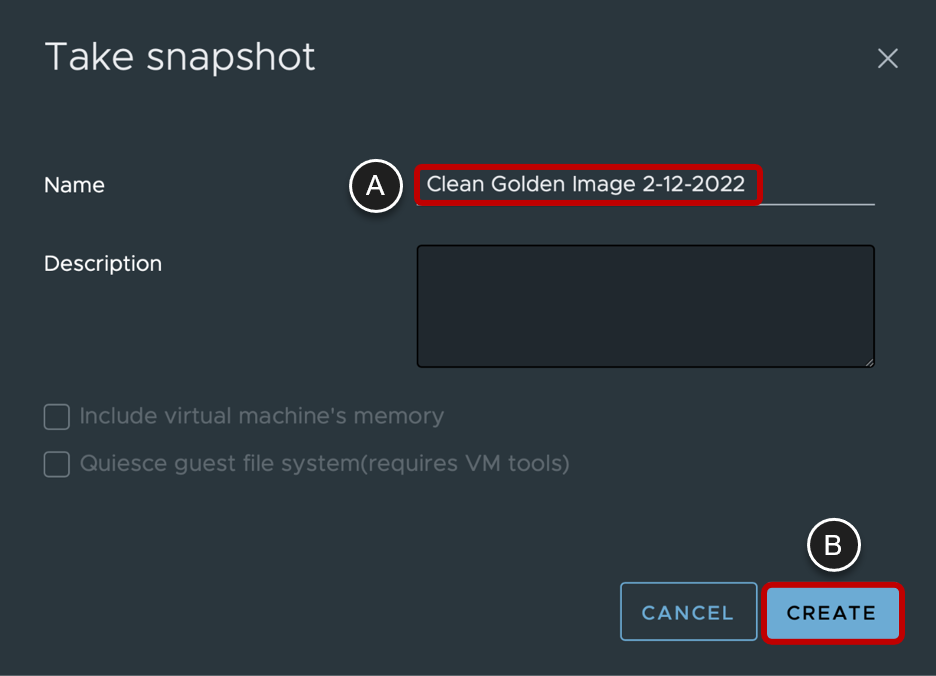
- Take the Snapshot
- Provide a descriptive name; for example, the name might include the date of the snapshot.
- Click CREATE.
Create OUs and User Groups in Active Directory
Much of the initial configuration and ongoing management of virtual desktops, RDSH server farms, feature enablement, and end user experience is performed by creating and applying group policies in Active Directory. Some standard Microsoft Group Policy Object settings are required to configure virtual desktops and applications, as described later in this guide.
If you use Horizon, you can also use VMware-provided GPO administrative templates for fine-grained control of access to features. See Using Horizon Group Policy Administrative Template Files.
OUs for VMs
You should create an organizational unit (OU) specifically for your virtual desktops and an OU for your RDSH server VMs. An OU is a subdivision in Active Directory that contains users, groups, computers, or other OUs.
To prevent group policy settings from being applied to other Windows servers or workstations in the same domain as your desktops or server farms, you can create a GPO for group policies and link it to the OU that contains your VMs.
You can also delegate control of the OU to subordinate groups, such as server operators or individual users.
User Groups
You should also create groups for different types of users in Active Directory. For example, you can create a group called End Users for your end users and another group called Horizon Administrators for users that will administer virtual desktops and applications.
Later in this guide, you will add a user group containing end users to the local Remote Desktop Users group in AD. Then members of the group will be able to connect to any VM that is joined to the domain.
Set Other Common Group Policies
For both virtual desktop VMs and RDSH server VMs, create a GPO for the OU in Active Directory, and use the Group Policy Management Editor to apply the following GPO settings.
| Setting | Value |
| Computer Configuration > Policies > Administrative Templates > Windows Components > Windows Update | |
| Configure Automatic Updates | Disabled |
| Computer Configuration > Policies > Administrative Templates > System > Group Policy | |
| Configure user Group Policy loopback processing mode | Enabled |
| Computer Configuration > Policies > Administrative Templates > System > Logon | |
| Always wait for the network at computer startup and logon | Enabled |
Deactivate the Local Administrator User Account
Next, edit the GPO to deactivate the local administrator account.
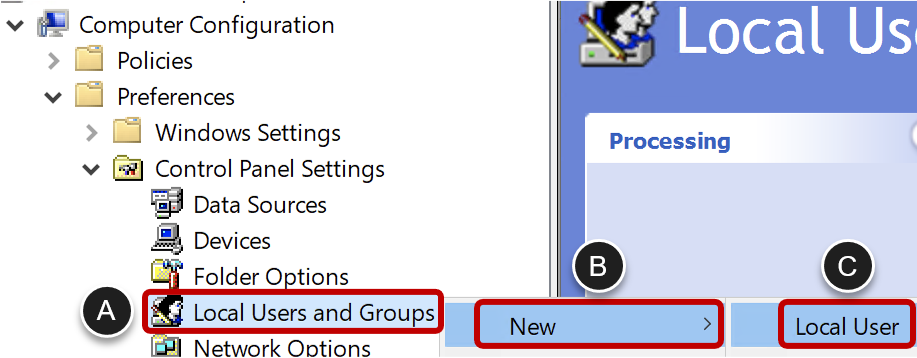
- Navigate to Local Users and Groups
- In Group Policy Management Editor, edit the GPO and navigate to Computer Configuration > Preferences > Control Panel Settings > Local Users and Groups.
- Click New.
- Click Local User.
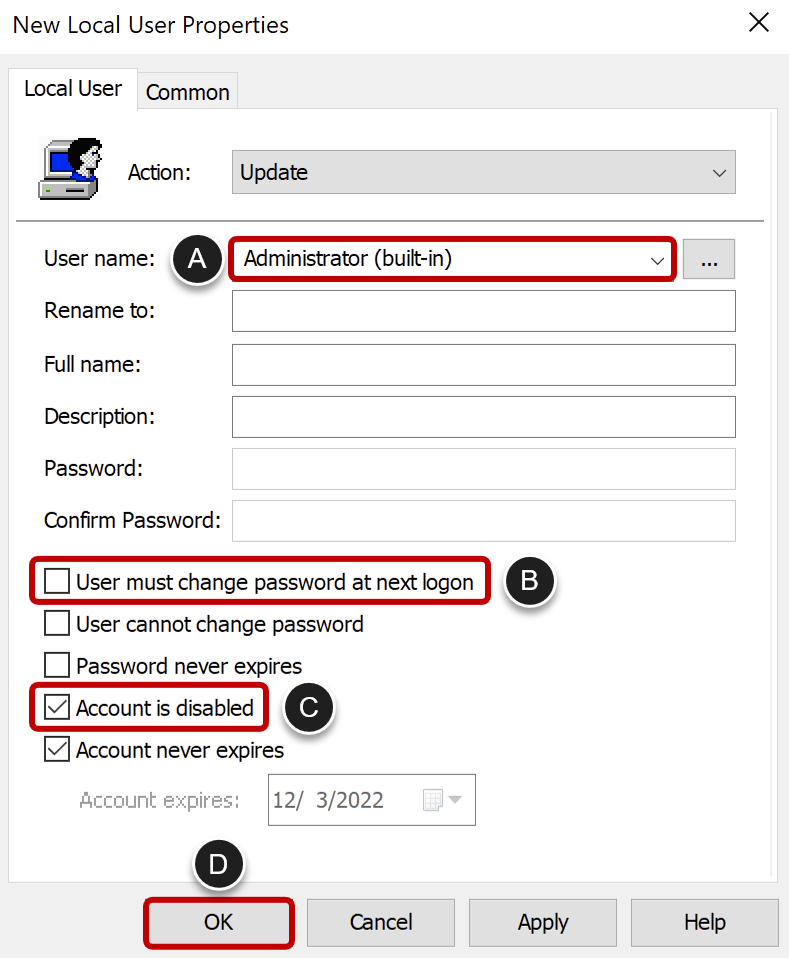
- Change Properties for the Local Administrator Account
- Select Administrator (built-in).
- De-select User must change password at next logon.
- Select Account is disabled.
- Click OK.
If you use Horizon, you can also use VMware-provided GPO administrative templates for fine-grained control of access to features. See Using Horizon Group Policy Administrative Template Files.
Set Policies for RDSH Server VMs
If you plan to use the image for creating RDSH server VMs, create a GPO for the RDSH server OU in Active Directory, and use the Group Policy Management Editor to apply the following GPO settings.
| Setting | Value |
| Computer Configuration > Policies > Administrative Templates > Windows Components > Remote Desktop Services > Remote Desktop Session Host > Licensing | |
| Use the specified Remote Desktop license server | Enabled |
| Set the Remote Desktop license mode | Enabled |
| Computer Configuration > Policies > Administrative Templates > System > User Profiles | |
| Delete cached copies of roaming profiles | Enabled |
If you use Horizon 8, review the settings listed in the RDSH Server OU-Level Settings section of the "Horizon Configuration" chapter in the VMware Workspace ONE and VMware Horizon Reference Architecture.
If you use Horizon 7, be sure to review the VMware-provided administrative templates for RDSH server management. See Using Remote Desktop Services Group Policies.
Add Users to the Local Remote Desktop Users Group
To connect to a remote desktop or RDSH server, users must belong to the local Remote Desktop Users group of the virtual desktop or RDSH server. You can use the Restricted Groups policy in Active Directory to add users or groups to the Remote Desktop Users group.
The members of the Remote Desktop Users group are always added to the local Remote Desktop Users group of every virtual desktop or RDSH server that is joined to your domain. When adding new users, you need only add them to the Remote Desktop Users group.
Note: Before you can perform the procedure in this article, you must have created one or more user groups in Active Directory that contain the end users who will connect to the virtual desktops and RDSH servers.
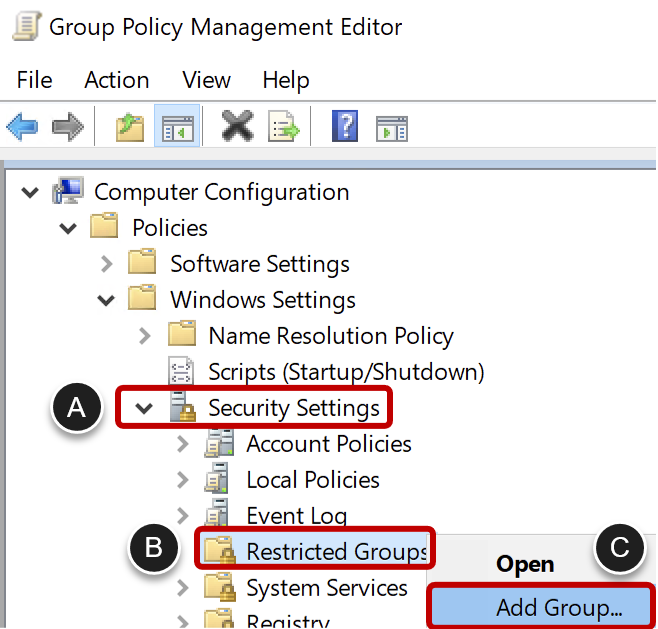
- Open the Add Group Dialog Box
- In the Group Policy Management Editor, expand Computer Configuration, Policies, Windows Settings, Security Settings.
- Right-click Restricted Groups.
- Select Add Group.
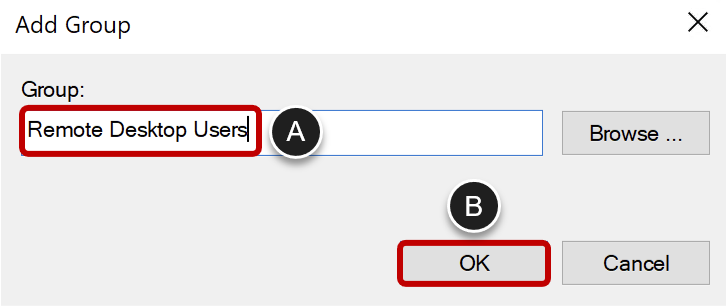
- Add the Remote Desktop Users Group
- In the Add Group dialog box, enter
Remote Desktop Users. - Click OK.
- In the Add Group dialog box, enter
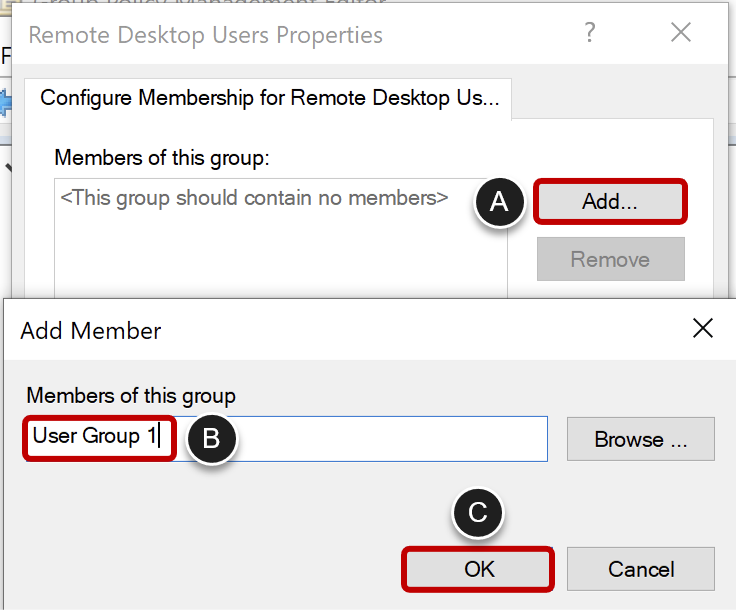
- Add User Groups to the Remote Desktop Users Group
- Click on Add... under Members of this group.
- Add a group of end users.
- Click OK in the Add Member dialog box.
- Click OK in the Remote Desktop Users Properties dialog box.
Turn Off Hardware Graphics Acceleration in Commonly Used Applications
If the VMs are not using a physical GPU in the ESXi hosts, you can reduce CPU usage by not emulating hardware graphics in applications. We recommend using Dynamic Environment Manager configuration files to control these application settings. Office, Internet Explorer and Adobe Reader are already done by OSOT, unless you deselected them.
For more information about having VMs use physical GPUs, see Deploying Hardware-Accelerated Graphics with VMware Horizon.
- Google Chrome
- To turn off hardware graphics acceleration for Chrome, navigate to
chrome://settings/system. - Turn off Use hardware acceleration when available.
- To turn off hardware graphics acceleration for Chrome, navigate to

Day-2 Updates
Update VMware Tools
When new versions of VMware Tools are released, use this procedure to update VMware Tools in the golden image.
Note: If you are using Horizon Cloud on Microsoft Azure, you can skip this procedure.
- Open the Edit VM Settings Dialog Box
Make sure the VM is powered off and then use vSphere Web Client to:
- Right-click the VM.
- Select Edit Settings.
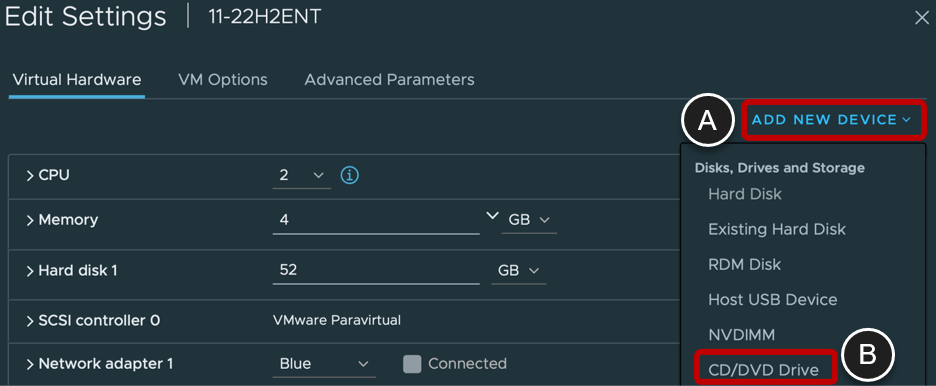
- Add a Virtual CD/DVD Drive Back to the VM
- Click ADD NEW DEVICE.
- Select CD/DVD Drive.
- Click OK.
- Power On the VM
- Select the VM.
- Click on the power icon.

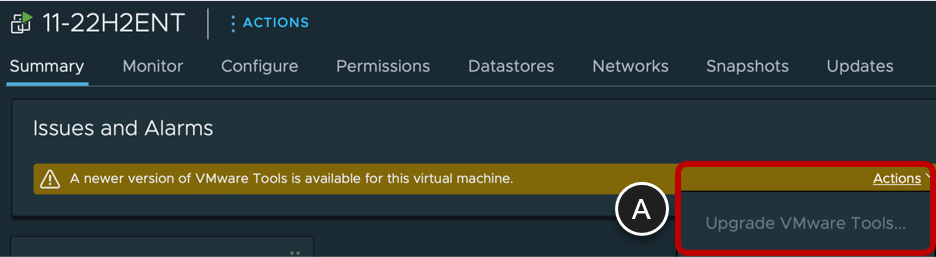
- Click Upgrade VMware Tools on the Summary Tab
- On the Summary tab for the VM, click Upgrade VMware Tools.
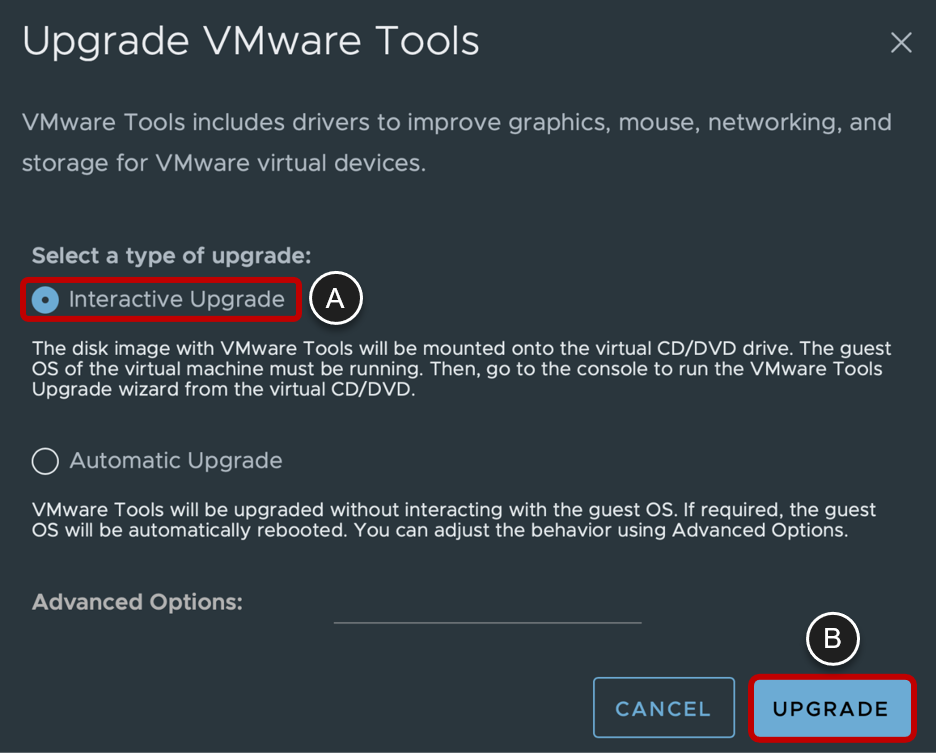
- Use the Interactive Upgrade
- Select Interactive Upgrade.
- Click UPGRADE.
- Now repeat the steps from Install VMware Tools.
Update Windows as Part of Day-2 Operations
Important: Updating Windows in the VM image is not recommended. Rather, it is better to generate a new image. An alternative to manually creating a new VM image each time you want to update Windows is to use automation. For step-by-step instructions, see the companion to this guide, Using Automation to Create Optimized Windows Images for VMware Horizon VMs.
If, however, you want to update Windows in the VM image, you can do so. If you have followed the instructions in this guide and used the OSOT as directed, some of the Windows Update facilities have been deactivated. Before you can update Windows, you must re-enable Windows Update. After you update Windows, the best practice is to run the OSOT again.
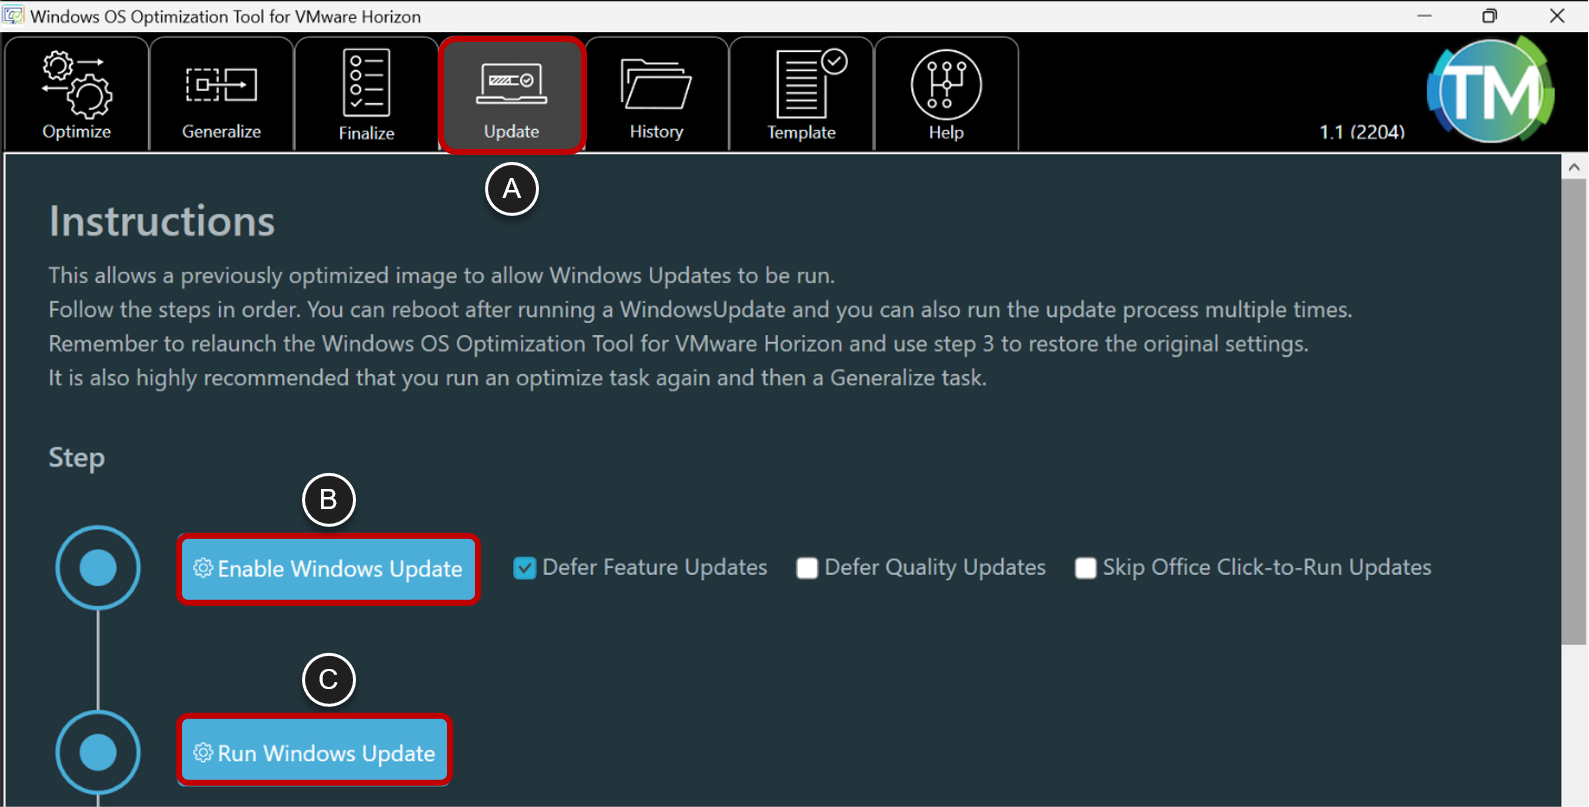
- Re-enable Windows Update
- Run OSOT again and click on the Update tab.
- If you are using a vSphere based VM, run the OSOT on the VM you used to create the golden image.
- If you are using Horizon Cloud on Microsoft Azure, use the Horizon Universal Console to duplicate the image, which creates a new VM with the same configuration, and run the OSOT on that VM.
- Click Enable Windows Update.
- Click Run Windows Update.
- Run OSOT again and click on the Update tab.
- Update Windows
- To update Windows, follow the instructions from the earlier Update Windows procedure in this guide.
- Run the Windows OS Optimization Tool for VMware Horizon Again, to Optimize and Finalize
- Follow the instructions for the following tasks from the chapter Running the Windows OS Optimization Tool to Optimize, Generalize, and Finalize the OS:
- Analyze and Optimize the OS Using Customizable Templates.
- Use the OSOT Finalize Tab to Perform Final Cleanup Tasks if you are using a vSphere based VM.
- Follow the instructions for the following tasks from the chapter Running the Windows OS Optimization Tool to Optimize, Generalize, and Finalize the OS:
Conclusion
With the image optimization procedures in this guide, you are able to achieve a significant reduction in the amount disk space, CPU, and memory used by virtual desktop and RDSH server VMs and their vSphere hosts. The result is a corresponding savings in initial deployment time, user logon times, and IOPS.
- Image optimization techniques included:
- Deleting unnecessary files and folders, such as event logs and temporary files
- Compressing OS files
- Zeroing out free disk space and shrinking the disk
Using the Windows OS Optimization Tool for VMware Horizon greatly simplifies many of these tasks.
This guide also provided step-by-step instructions for configuring the Windows image to perform optimally in a virtual environment, where CPU cores are shared among many VMs, and where users might be accessing a new VM every time they log in, though they probably will not realize it.
Seventeen discreet versions of the Windows OS were tested using the procedures in this guide, including thirteen versions of Windows 10.
The procedures in this guide help you create an optimized Windows image that you can use in a VMware Horizon implementation or in other types of deployments. End users will have a great experience, whether they access their personalized virtual desktops or remote applications from company laptops, their home PCs, thin-client devices, Macs, tablets, or smartphones.
Additional Resources
For more information about the VMware products mentioned in this guide, you can explore the following resources:
- Using Automation to Create Optimized Windows Images for VMware Horizon VMs
- Evaluate VMware Products
- Horizon Support Center
- Horizon 8 Documentation
- Horizon 7 Documentation
- Dynamic Environment Manager Documentation
- App Volumes Documentation
- VMware Product Guide
- VMware Product Interoperability Matrices
- VMware Professional Services
- VMware vSphere documentation
Changelog
The following updates were made to this guide.
| Date | Description of Changes |
| 2023-01-12 | Added table and wording to indicate which version of the PVSCSI driver to use depending on which version of Windows you are installing. |
| 2022-12-07 | Added Windows 10 21H2/22H2, Windows 11 21H2/22H2 and Server 2022. Removed Windows 10 1607 LTSB, 1909, 2004 and Server 2016 as they are out of mainstream support by Microsoft. Dropped Windows 10 1809 LTSC, 20H2, 21H1 and Server 2019 from the list of extensively tested operating system as by the time the guide is published the will have less than a year of mainstream Microsoft support remaining. Updated for vSphere 8.0. Updated for Windows OS Optimization Tool for VMware Horizon 2204. Updated for Horizon 2209. Added section for vGPU. Updated for Horizon Cloud on Azure 22.2.0. |
| 2021-07-01 | Added links to Using Automation to Create Optimized Windows Images for VMware Horizon VMs. Changed storage controller to PVSCSI for future compatibility. Removed SVGA driver deselection from VMware Tools install, as it is no longer order dependent with the Horizon Agent with latest VMware Tools. Added Windows 21H1 Education/Enterprise/Professional to the list of tested operating systems. Removed all Windows 10 1709/1803/1809 (besides LTSC)/1903 editions and 1909 Pro from the list of tested operating systems as they are no longer supported. Retested all supported operating systems with 2021-06-08 updates. Updated for vSphere 7.0 U2. Updated for OSOT 2106 and higher. Updated links to product documentation topics. |
| 2020-09-10 | Added Horizon Cloud on Azure. Added Windows 2004/20H2 Education/Enterprise/Professional to the list of tested operating systems. Retested all operating systems with 2020-09-08 updates. Updated for vSphere 7. Updated for OSOT 1170 and higher. Updated for Horizon/App Volumes/Dynamic Environment Manager 2006. |
| 2020-01-30 | Removed Windows 7/8.1, Server 2012R2, Windows 10 1709/1803 Pro from the list of tested operating systems. Added Windows Server 2019 and .NET Framework 3.5. Retested all operating systems with 2020-01-14 updates. Added a new chapter for day-2 updates for VMware Tools and Windows Update. Added new sections that correspond to the Generalize and Finalize tabs of the OS Optimization Tool (January 2020 release) and removed the procedures that told how to do these tasks manually. |
| 2019-10-10 | Removed mention of Windows mandatory profiles because this feature does not work reliably when used with Windows 10 version 1809 and later. Also, we found that login times are nearly equivalent if you use default user profiles instead of mandatory user profiles. Removed the section "Configure Local Group Policies" because this task is now done by the OS Optimization Tool (as of the September 2019 release). Renamed User Environment Manager to Dynamic Environment Manager. Updated links to product documentation topics. |
Authors and Contributors
Hilko Lantinga, Staff Engineer 2, End-User Computing (EUC) R&D, VMware
The following people contributed to the review of this paper:
- Graeme Gordon, Senior Staff EUC Architect, EUC Technical Marketing, VMware
To comment on this paper, contact VMware EUC Technical Marketing at euc_tech_content_feedback@vmware.com.